Step-by-Step Guide to Debezeling Your Monitor Without Damage
Add.: 2F, Bldg 10, Changfeng Industrial Park, Dongkeng, Fenghuang, Guangming, Shenzhen, China 518132
Mobile/WHATSAPP: 86-138 25769658
Email: marketing@topadkiosk.com topadkiosk@gmail.com
Skype: pghenry1
Wechat: adkioskhenry
English Web.: https://www.topkioskdisplay.com/
http://www.ad-kiosk.com/
https://www.toplcddisplay.com/
http://www.multitouchdigitalsignage.com/
https://www.youtube.com/channel/UCYVYNJHxLVEcQD8fuUxXNTA/videos?view_as=subscriber
https://www.facebook.com/TOPADKIOSKSHENZHEN/?ref=bookmarks
As long as we have the blueprints, Shenzhen TopAdkiosk Display Technology Co., Ltd no worse than anyone else.
please contact Shenzhen TopAdkiosk Display Technology Co.
If you want your setup to look cool and modern, you might consider a debezel monitor project. Many people choose to debezel their monitor to reduce the frame size, creating a sleek and seamless appearance—especially when using multiple monitors. You can debezel your monitor safely at home by taking your time, measuring carefully, and handling your monitor gently. Make sure to read every step before you start so you feel confident. This guide is simple and will help you debezel your monitor without causing any damage.
Key Takeaways
Get the tools you need, like a small knife, a tiny screwdriver set, and some electrical tape, before you start your debezel project.
Measure your monitor with care so your new bezel fits well. Write down your numbers so you do not make mistakes.
Always stay safe by unplugging your monitor first. Wear gloves and safety glasses while you work.
Go slow when you take off the bezel. Do not use metal tools right on the screen so you do not break it.
Try out your new bezel material before you cut it for real. This helps your monitor look neat and nice.
Tools and Materials for Debezeling
Essential Tools and Materials
You need the right tools to debezel monitor safely. Here is a helpful list to begin:
Hand-jigsaw or precision knife: You use these to cut plastic bezels.
Scissors: These are good for cutting poster board or construction paper.
Poster board or construction paper: These are great for making custom bezels or backing.
White electrical tape: This makes your project look neat and covers sharp edges.
Small screwdriver set: You need these to take out screws from the back cover and stand.
Plastic pry tool or old credit card: These help you remove the bezel without scratching the screen.
You can buy most of these tools at hardware stores, craft shops, or online. If you do not have a hand-jigsaw, you can use a precision knife or strong scissors for thin materials.
Tip: Always look at your monitor’s manual for special screws or clips before you begin.
Measuring and Preparing Materials
Before you cut anything, get a ruler or measuring tape. Measure the screen and bezel area with care. Write down the sizes so you remember them. Good measurements help you avoid mistakes and make sure your new bezel fits well.
Here is a quick chart of materials people use for new or changed bezels:
Material Type | Characteristics |
|---|---|
Aluminum Alloy | Strong, light, does not rust, helps with heat |
Stainless Steel | Tough, protects from hits, good for rough places |
Engineering Plastics | Can bend, many colors, not expensive, pretty strong |
Composite Materials | Light, strong, does not get damaged by weather |
Hybrid Constructions | Mixes metal and plastic for better looks and works well |
Pick a material that fits your needs and style. Many people like engineering plastics and poster board for DIY because they are easy to cut and shape.
Optional Items for Safety
Safety is important when you debezel monitor. You may want to use:
Safety glasses: These keep your eyes safe from flying pieces.
Gloves: These protect your hands from sharp parts.
Antistatic wrist strap: This stops static electricity from hurting your monitor’s electronics.
If you do not have these, just work slowly and carefully. Make sure your work area is clean and bright. This helps you stay safe and keeps your monitor in good shape.
Safety Precautions Before You Debezel Monitor
Protecting Yourself and the Monitor
You want to keep both yourself and your monitor safe during this project. Start by unplugging your monitor from the wall. This step keeps you safe from electric shock. Always wait a few minutes after unplugging so any leftover power can drain away.
Handle your monitor with clean, dry hands. If you wear gloves, you protect your fingers from sharp edges. You also keep fingerprints off the screen. Never touch the screen with tools. Use a plastic pry tool or an old credit card to open the bezel. Metal tools can scratch or crack the display.
Tip: Place a soft towel or foam pad under your monitor. This protects the screen from scratches while you work.
If you see any cables or wires inside, do not pull on them. Gently move them aside if needed. If you feel resistance when removing a part, stop and check for hidden screws or clips.
Setting Up a Safe Workspace
A good workspace helps you avoid accidents. Pick a flat, sturdy table with plenty of light. Clear away clutter so you have room to move. Keep all your tools within reach. If you drop a screw, you can find it easily on a clean surface.
Make sure pets and small children stay out of the area. You do not want anyone to bump the table or grab sharp tools. If you use a hand-jigsaw or knife, cut away from your body. Always keep your fingers clear of the blade.
Here is a quick checklist for your workspace:
Flat, stable table or desk
Soft towel or mat for the monitor
Good lighting
Tools and materials organized
No food or drinks nearby
No distractions
When you follow these steps, you can debezel monitor safely and avoid damage to your device or yourself.
How to Debezel Monitor Step by Step
Preparation and Workspace Setup
Before you start, make sure your workspace is ready. Place your monitor face down on a soft towel or foam pad. This protects the screen from scratches. Gather all your tools and materials so you do not have to search for anything later. Good lighting helps you see small screws and clips. Keep your tools within reach. Remove any clutter from your table. If you plan to debezel monitor for a multi-monitor setup, check that you have enough space for all your screens.
Tip: Take a photo of your monitor before you begin. This helps you remember where everything goes during reassembly.
Removing Stand and Back Cover
You need to remove the stand and back cover before you can take off the bezel. Here is how you can do it safely:
Use a screwdriver to untighten the screws holding the stand. Sometimes, you can loosen the screws with your fingers if they have wings.
Hold the stand with your other hand so it does not fall.
If your monitor does not have screws, look for a latch. Press the latch and gently wiggle the stand until it comes off.
Some stands have tabs hiding the screws. Pull these tabs off carefully.
For stands with a release button, use a pointed object to press the button while wiggling and pulling the stand out.
Once the stand is off, remove any screws from the back cover. Keep all screws in a small container so you do not lose them.
Now, gently lift the back cover away from the monitor. Do not use too much force. If you feel resistance, check for hidden screws or clips.
Detaching the Bezel
This step is the heart of the debezel monitor process. You want to remove the bezel without damaging the screen or any internal parts. Follow these steps:
Start at one corner of the monitor. Insert a thin, hard tool like a plastic pry tool or an old credit card into the gap between the front and back casing.
Twist the tool gently to separate the two parts. The first corner may feel tight, so take your time.
Once you open the first corner, move along the sides. Use your hands to help pull the bezel away as you go.
If you see screws holding the bezel, remove them with a small screwdriver.
Watch out for buttons or LEDs built into the bezel. Leave these areas for last so you do not damage any connectors.
After you remove the front bezel, set it aside in a safe place.
Note: Never use metal tools directly on the screen. Always work slowly and check for hidden clips or wires.
Testing and Fitting New Bezel Material
Now you can test and fit your new bezel material. This step helps you get a clean, professional look.
Cut your new bezel material (like poster board or engineering plastic) to the size you measured earlier.
Place the new bezel around the screen to check the fit. Make sure there are no gaps or uneven edges.
If you see any sharp edges or rough spots, trim them with scissors.
Use white electrical tape to cover the edges. This gives your project a neat finish and protects your fingers.
For multi-monitor setups, line up all your screens and check that the bezels match. You want the edges to look even and seamless.
Here is a quick table for special considerations in multi-monitor setups:
Category | Considerations |
|---|---|
Mounting System Compatibility | Make sure your mounting brackets fit and can hold the weight of all monitors. |
Environmental Integration | Keep your setup cool and dry. Avoid dust and moisture. |
System Integration | Plan your cable routes and leave space for future upgrades. |
Maintenance and Longevity | Make sure you can clean and reach all parts easily. |
Specialized Applications | For outdoor or special rooms, check for extra protection needs. |
Tip: Always test the fit before you make any final cuts or attach the new bezel. This saves you time and prevents mistakes.
Cleaning and Inspecting Components
Before you put everything back together, clean and inspect all parts. Use a soft, dry cloth to wipe dust from the screen and inside the casing. Check for any loose wires or broken clips. If you see any damage, fix it before reassembly. Make sure the new bezel sits flat and does not press on the screen.
If you used tape, press it down firmly so it does not peel off later. Double-check that all buttons and connectors work. For multi-monitor setups, look at the alignment from different angles to make sure everything looks good.
Note: If you notice anything unusual, like a loose cable or a part that does not fit, stop and check your steps. It is better to fix problems now than after you finish.
Now you are ready to move on to reassembly and mounting. You have taken the right steps to debezel monitor safely and neatly.
Common Mistakes and How to Avoid Them
When you start a debezel monitor project, you want everything to go smoothly. But sometimes, small mistakes can cause big problems. Let’s look at the most common errors and how you can avoid them.
Forcing or Rushing Steps
You might feel excited to see your new setup. Maybe you want to finish quickly. But if you rush, you can break clips, crack the screen, or lose screws. Forcing parts apart can damage the monitor forever.
Take your time with each step.
If something feels stuck, stop and check for hidden screws or clips.
Use gentle pressure and patience.
Tip: If you feel frustrated, take a short break. You will make fewer mistakes when you feel calm.
Using Incorrect Tools
The right tool makes the job easier and safer. If you use a metal screwdriver on plastic, you can scratch or snap parts. Scissors that are too dull can ruin your new bezel material.
Here’s a quick table to help you pick the right tool:
Task | Best Tool | What to Avoid |
|---|---|---|
Opening the bezel | Plastic pry tool | Metal knife or blade |
Cutting new bezel material | Sharp scissors or knife | Dull scissors |
Removing screws | Small screwdriver set | Large or wrong size |
Always check your tools before you start. If you do not have the right tool, borrow or buy one. It will save you time and trouble.
Skipping Measurements or Testing
You might think you can “eyeball” the size of your new bezel. But if you skip measuring, your new bezel may not fit. If you do not test the fit, you might have to start over.
Measure every side of your monitor before you cut anything.
Write down your numbers.
Test the fit with tape or temporary holds before you finish.
Note: Double-checking your work helps you avoid waste and keeps your project looking sharp.
If you avoid these mistakes, you will have a much better experience. You will also keep your monitor safe and get a clean, professional look.
Reassembly and Mounting Tips
Reattaching Components
Now that you have finished cleaning and fitting your new bezel, you can start putting your monitor back together. Begin by checking that all cables and connectors sit in their proper spots. If you removed any screws, use your small screwdriver to put them back in place. Snap the back cover on gently. Make sure you do not pinch any wires. If your monitor has buttons or LEDs, line them up with the new bezel openings. Take your time. You want everything to fit snugly without forcing any part.
Tip: If you took photos before starting, use them now to help you remember where each part goes.
Mounting the Debezeled Monitor
You have a few good options for mounting your debezeled monitor. The best method depends on your setup and how sturdy you want it to be. Here is a quick table to help you choose:
Mounting Technique | Description |
|---|---|
Brackets | Use screws or locking hardware for a strong hold. Great for desks or walls. |
Clips | Easy to use and tool-free. Good for testing, but not for long-term use in busy spaces. |
Double-sided adhesive | Fast and clean. Works well for light monitors, but not for heavy or flexible frames. |
When you mount your monitor, keep the screen and bezel lined up. Try to keep a small, even gap between the bezel and the screen. This helps your monitor look neat and keeps pressure off the display. If your monitor has a flex tail or ribbon cable, make sure it does not get bent or pinched. You want your monitor to last a long time.
Note: Always check that your mounting method matches your desk or wall. A strong bracket works best for heavy or multi-monitor setups.
Final Safety Checks
Before you plug in your monitor, do a quick safety check. Look for any loose screws or parts. Make sure the bezel does not press on the screen. Check that all buttons and ports work. Wipe the screen with a soft cloth to remove dust or fingerprints.
Double-check cable connections.
Make sure the monitor sits flat and does not wobble.
Test the power button and display before setting up your full workspace.
If everything looks good, you are ready to enjoy your new, sleek monitor setup! 🎉
You now know how to debezel your monitor safely. Careful measuring and the right tools make a big difference. If you follow each step, you avoid damage and get a clean look. Patience and safety matter most. Double-check your work before you finish. If you have questions or want to share your results, drop a comment below. Your experience can help others, too! 👍
What Is "Debezeling" a Monitor?
Removing the plastic outer frame (bezel) from an LCD monitor is an advanced DIY modification. It is primarily done to achieve a nearly seamless multi‑monitor setup (for gaming or productivity) or to fit a display into a custom enclosure (e.g., arcade cabinets, digital signage kiosks). This modification permanently voids your warranty and carries a real risk of damaging the screen. Proceed only if you understand and accept these risks.
⚠️ First: Risks vs. Rewards
👍 Why do people remove bezels?
Ultra‑immersive multi‑monitor setups – Minimises the visual gap between screens, especially for video walls or sim racing rigs.
Custom projects – Fitting a display into a restricted space (arcade cabinet, custom mount) where the original bezel is too large.
Aesthetic upgrades – Giving an old monitor a modern, frameless look for a DIY build.
👎 Clear risks & trade‑offs
Voids warranty – Physical disassembly immediately ends all manufacturer support.
Physical damage is common:
Cracked panel – Bare LCD glass is fragile; a small bump can shatter it.
Damaged circuits – Exposed ribbon cables and driver boards are vulnerable to static, dust, or short circuits.
Backlight bleed – The factory bezel often helps seal and diffuse light. Removing it improperly can cause uneven brightness at the edges.
Mounting becomes difficult:
No VESA holes – Many monitors have VESA mounting points moulded into the plastic back cover. Once removed, you may have no standard attachment points.
Control buttons – The power/OSD buttons are often part of the bezel. Removing them can leave you with no way to control the monitor.
Electrical hazards – Exposing the power supply board while the monitor is plugged in creates a shock risk.
Disappointing reality – Even after removing the plastic bezel, the LCD panel itself usually has a thin metal chassis and a narrow black border (the "active area" edge). The actual gain in screen‑to‑body ratio may be smaller than expected.
🛠️ Step‑by‑Step Guide (General – Model Variations Exist)
This guide is based on a typical modern monitor (e.g., Gigabyte M27Q). Your monitor may differ significantly. Always look for model‑specific teardown videos or guides before starting.
1. Preparation & Safety
Item | Purpose |
|---|---|
Screwdrivers (Phillips, Torx, etc.) | Removing screws |
Plastic spudgers / guitar picks | Prying clips without scratching |
Suction cup | Lifting the panel |
Anti‑static mat or cloth | Protecting the screen |
Electrical tape | Insulating exposed connectors |
Bright light & magnifier (optional) | Seeing small clips and screws |
Work in a clean, well‑lit area on a soft, non‑conductive surface.
Disconnect power and all cables.
Ground yourself – touch a metal radiator or use an anti‑static wrist strap.
2. Remove the Stand & Back Screws
Place the monitor face‑down on a soft cloth.
Remove the stand or base.
Remove all visible screws on the back panel. Check under rubber plugs, stickers, or labels – some are hidden.
3. Separate the Front Bezel
Insert a plastic spudger or guitar pick between the front bezel and the back cover.
Gently pry around the edges to release plastic clips. Work slowly to avoid cracking the bezel or the LCD.
Do not use metal tools – they will scratch or crack the glass.
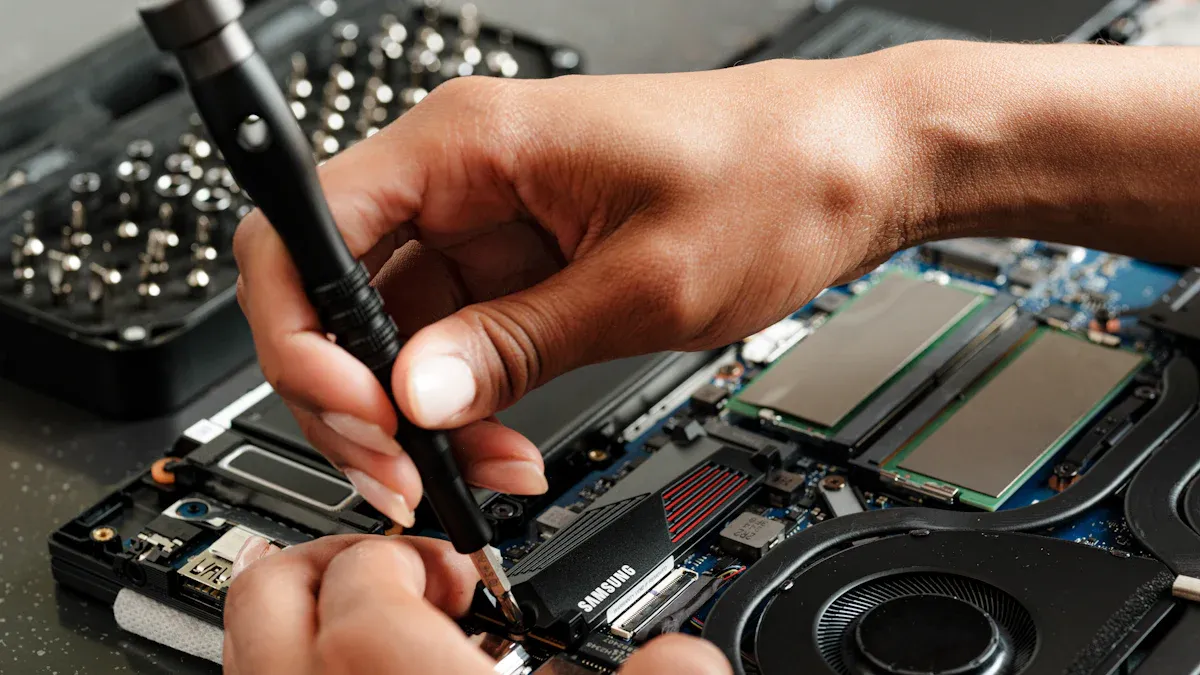
4. Disconnect Internal Components
Lift the back cover slightly and look for ribbon cables connecting to the button board, speakers, or ambient light sensor.
Carefully disconnect each cable. Use electrical tape to insulate the exposed ends (to prevent shorts if they touch the metal chassis later).
If the power supply board is exposed, also cover any high‑voltage areas with tape.
5. Remove the LCD Panel
Once all cables are free, the LCD panel (attached to its metal frame) should lift away from the plastic back cover.
You are now left with the bare panel – no plastic bezel, no back cover.
6. Prepare the Bare Panel for Mounting
Edge protection – Use black electrical tape or thin foam tape along the metal edges of the panel. This hides circuits, prevents light bleed, and insulates against accidental shorts.
Buttons – The button board can be taped to the back of the panel in a position you can still reach.
New mounting points – Most bare panels have no VESA holes. You will need to:
Drill custom holes into a metal bracket (not recommended unless you know where internal circuits run), or
Use high‑strength double‑sided thermal tape to attach the panel to a custom frame or monitor arm (less secure but common in DIY builds).
7. Final Assembly
Re‑route cables neatly, ensuring no tension on the fragile ribbon cables.
Mount the bare panel onto your custom stand, wall bracket, or arcade cabinet.
🤔 Are There Safer Alternatives?
Alternative | Pros | Cons |
|---|---|---|
Buy a true “borderless” monitor | Zero risk, retains warranty, often thinner than a debezeled old monitor | Costs money, but many affordable models exist (e.g., Dell UltraSharp, LG Nano IPS with virtually no inner border) |
Use a monitor with very thin bezels | Minimal gap without voiding warranty | Still a tiny gap; not seamless |
Hire a professional AV integrator | Done safely, with proper mounting solutions | Costs more, but includes liability |
If your only goal is a seamless multi‑screen gaming or productivity setup, consider buying monitors that are already marketed as “virtually borderless” (e.g., Dell’s InfinityEdge or similar). You will save time, avoid risk, and keep your warranty.
💎 Bottom Line
Debezeling is a high‑risk, high‑reward DIY project. It can deliver an impressive, nearly seamless multi‑monitor wall, but it will void your warranty and could easily destroy your display. If you are determined to proceed, watch model‑specific teardown videos first, work slowly, and accept that you might end up with a broken screen.
If you prefer a safer route, buy an already slim‑bezel or borderless monitor – the visual difference is often negligible for normal use, and you keep your warranty intact.
Let me know if you want a recommendation for a borderless monitor suitable for multi‑screen setups or a specific use case (racing sim, productivity, video wall).
FAQ
Can I debezel any monitor?
Most monitors can be debezeled, but some models use glue or hidden clips. You should check your monitor’s manual or search online for your model. If you see glue or lots of hidden screws, you might want to skip that monitor.
Will debezeling void my warranty?
Yes, debezeling usually voids your warranty. Manufacturers do not cover damage from opening the case. If your monitor is still under warranty, you should wait before starting this project.
What if I break a clip or part?
Don’t worry! You can use a small dab of glue or double-sided tape to hold things together. Just make sure nothing presses on the screen. If you lose a screw, check your local hardware store for a replacement.
How do I keep dust out after debezeling?
Tip: Wipe the screen and inside edges with a microfiber cloth before reassembly. You can use white electrical tape to seal small gaps. This helps keep dust away from your display.
See Also
Comprehensive Instructions for Setting Up a Touch Kiosk
Selecting the Ideal LCD Rack Monitor for Your Requirements
Creating High-Quality Touch and Non-Touch LCD Mirror Displays