Step-by-Step Guide to Setting Up a 3D Hologram Fan for Advertising
Ready to make your ads stand out? This guide shows you how to set up a 3d hologram fan. You will be able to get people’s attention in a new way. You may ask if a hologram display really works. Look at these numbers:
Comparison Metric | Traditional LED Advertising | |
|---|---|---|
Attention-Grabbing Rate | 22% of passersby stopped | |
ROI Recovery Period | 2–4 months | 6–12 months |
Social Sharing Potential | High (68% share) | Low (5% share) |
A big store changed from LED screens to hologram fans. They saw 35% more people come inside. They also got 200% more likes and shares on social media. You do not need special tech skills to start. The steps are easy, and you can set it up fast. You can also change the display quickly. Get ready to make something people will remember when they walk by.
Shenzhen TopAdkiosk Display Technology Co., Ltd.
Add.: 2F, Bldg 10, Changfeng Industrial Park, Dongkeng, Fenghuang, Guangming, Shenzhen, China 518132
Mobile/WHATSAPP: 86-138 25769658
Email: marketing@topadkiosk.com topadkiosk@gmail.com
Skype: pghenry1
Wechat: adkioskhenry
English Web.: http://www.topadkiosk.com/
https://www.topkioskdisplay.com/
http://www.ad-kiosk.com/
https://www.toplcddisplay.com/
http://www.multitouchdigitalsignage.com/
https://www.youtube.com/channel/UCYVYNJHxLVEcQD8fuUxXNTA/videos?view_as=subscriber
https://www.facebook.com/TOPADKIOSKSHENZHEN/?ref=bookmarks
Key Takeaways
Pick a spot where people can see your hologram fan. This helps more people notice and stop to look.
Make sure you can plug in the fan safely. Keep cables neat and let air move around the fan.
Pick clear pictures and moving animations for your hologram. This makes your display look cool and grabs attention.
Clean your hologram fan often. This helps it work well and show clear pictures.
Try out your setup and pictures before events. This helps you find problems and makes your display look good.
Unboxing Your 3D Hologram Fan
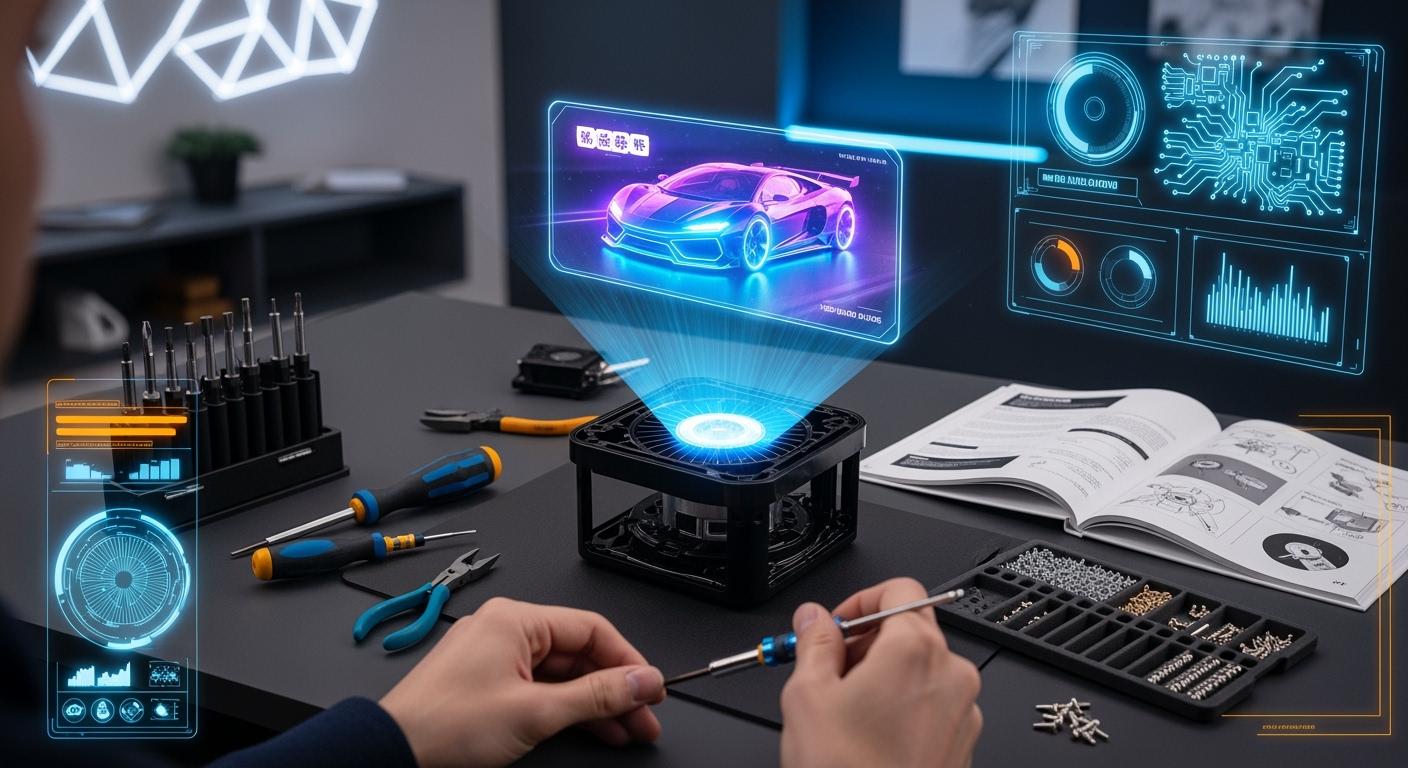
Unboxing a 3d hologram fan feels exciting. This device lets you show floating images and videos that look like they are hanging in the air. Many businesses use it to grab attention and make ads stand out. You will find that the setup is simple, and the results look amazing.
Checking Components
When you open the box, you should see several important parts. Each one helps your hologram fan work the right way. Here is what you will usually find:
Modular Mounting System
HoloWall Control Software
Content Transcoding Toolkit
Wireless Control Hub
3-Year Commercial Warranty
Take out each item and place it on a flat surface. Make sure you have everything before you start. The fan modules create the spinning effect that makes the hologram appear. The mounting system lets you put the fan on a wall or stand. The software and toolkit help you upload and change your content. The wireless hub gives you easy control. The warranty gives you peace of mind.
Tip: Keep the box and packing materials. You might need them if you move the fan or send it for service.
Inspecting for Damage
Before you get started, check each part for damage. Look for cracks, dents, or loose wires. Gently shake the fan modules to make sure nothing rattles inside. If you see any problems, contact the seller right away. Do not try to use a damaged hologram fan. This step keeps you safe and helps your fan last longer.
Now you are ready to move on to the next step in this guide. You will soon see your first hologram in action!
3D Hologram Fan Placement
Choosing a Visible Location
You want your hologram fan to grab attention. Start by picking a spot where people walk by often. Look for areas with steady foot traffic, like store entrances or checkout lines. Make sure the viewing distance is right. If people stand too close, the hologram might look blurry. If they stand too far, they might miss the details. Avoid placing the fan in direct sunlight. Bright light can wash out the display and make your hologram hard to see.
Here are some quick tips for finding the best spot:
Pick places with lots of people passing by.
Keep the fan away from windows with strong sunlight.
Make sure there’s enough space for people to view the display comfortably.
If you want your advertising to pop, think about how your content looks from different angles. Circular displays work best when the content is centered. High contrast and motion make the hologram stand out. Try to keep your ads simple and easy to understand. Short loops, around 5–15 seconds, work well. Stick to your brand colors and style so people recognize your message.
Power Access and Safety
You need safe and reliable power for your 3d hologram fan. Check that there’s an outlet nearby. Don’t use extension cords that stretch across walkways. That can cause tripping hazards. Route cables neatly and keep them out of sight. Make sure the fan has enough airflow so it doesn’t overheat.
Here’s a table with safety guidelines:
Safety Guideline | Description |
|---|---|
Proper Cable Management | Route cables neatly to prevent tangling and tripping. |
Heat Management | Ensure airflow for fans to avoid overheating. |
Periodic Inspection | Check for dust and mechanical issues regularly. |
Certified Technicians | Use qualified professionals for setup and maintenance. |
Set up safety zones with barriers so people don’t get too close. Put up clear signs to warn about moving parts. Control the fan remotely when possible. You can also automate the display to run at certain times. These steps help keep everyone safe and make your hologram fan work smoothly.
Hologram Fan Installation
Getting your 3d hologram fan up and running starts with a good plan. You want your display to look amazing and stay safe. This step-by-step installation guide will help you avoid common mistakes and get the best results.
Mounting Options
You have two main ways to set up your hologram fan: wall mounting or using a stand. Each method has its own benefits.
Wall Mounting: This is the most popular choice for stores and public spaces. You save floor space and keep the fan out of reach. Pick a sturdy wall with enough room around it. Experts recommend mounting the fan at a height between 2.2 and 2.5 meters. This keeps the hologram visible and prevents people from touching the spinning blades. Use the template that comes with your fan to mark where you need to drill. Make sure the wall can hold the weight of the fan and bracket.
Stand Mounting: If you want to move your display or use it at events, a heavy-duty stand works well. Look for a stand with a wide base so it does not tip over. Place the stand on a flat surface. Check that the area has enough space for people to walk by safely. You can adjust the height of the stand to match your audience’s eye level.
Tip: Before you start, go through a pre-installation checklist. Make sure you have all the parts, tools, and a stable surface. Check for power outlets nearby and look at the lighting in the area. Good planning makes the installation much easier.
Securing the Fan
Now you are ready for the secure mounting process. Take your time with this part. A strong setup keeps your hologram fan safe and your display looking sharp.
Use the template to mark drill points on the wall or stand.
Drill holes and insert wall anchors if you are using a wall. This step gives extra grip and stops the fan from coming loose.
Attach the bracket with screws. Tighten them so the bracket does not move.
Place the fan on the bracket or stand. Lock it in place with the safety clips or bolts.
Double-check that everything feels solid. Give the fan a gentle shake to test the stability.
You want to avoid these common mistakes during holographic fan installation:
Picking a weak or uneven surface.
Skipping the template for drill points.
Forgetting to use wall anchors or the right screws.
A stable power source is also important. Plug your fan into a certified adapter and use a surge protector. This keeps the electrical flow steady and protects your device.
If you are setting up more than one fan, secure each one by itself. This helps keep the images in sync and stops one loose fan from affecting the others.
Here is a quick table to help you remember the key points:
Step | What to Do |
|---|---|
Choose Mounting Method | Wall or stand |
Check Mounting Height | 2.2–2.5 meters for best results |
Use Secure Brackets | Heavy-duty for large fans |
Follow Secure Mounting Process | Mark, drill, anchor, screw, lock |
Test Stability | Shake gently to check |
Power Safely | Certified adapter and surge protector |
You have now finished the most important part of the installation. Your fan is secure, safe, and ready for the next steps. With careful setup, your hologram will look bright and clear every time.
Powering and Testing the Hologram Fan
Connecting Power
You have finished the installation. Now, you need to power up your 3d hologram fan. This step is simple, but you should follow it carefully for safety and best results.
Find the power adapter that came with your fan. Check that it matches the outlet in your space.
Plug the adapter into the back of the fan. Make sure it fits snugly.
Locate a nearby power outlet. Try to pick one that is not overloaded with other devices.
Plug the adapter into the outlet. You should see a small light or hear a soft click.
Keep the area around the fan clear. Do not let anything block the blades or vents.
Tip: Always keep the fan out of reach of children and pets. Unplug the fan before you clean it or move it. Never use the fan in wet places. This keeps you and your equipment safe.
Initial Function Test
Now, you get to see your hologram in action. Turn on the fan using the power button or remote control. The blades will start spinning, and you should see the default hologram appear in the air. Watch the display for a few moments.
Check these things:
The image looks clear and bright.
The fan runs smoothly without strange noises.
The blades spin without hitting anything.
If you notice any problems, turn off the fan right away. Look for loose parts or blocked blades. Fix these issues before you try again.
A quick test like this helps you catch small problems early. You want your hologram fan to work perfectly every time. When everything looks good, you are ready to move on to uploading your own content and making your advertising shine.
Holographic Fan Software Setup
Setting up the right software is a big step in making your 3d hologram fan work for advertising. You want your display to look sharp and run smoothly. This part of the guide will walk you through the process, from picking the best program to connecting your device. You do not need to be a tech expert. Just follow these steps, and you will have your hologram up and running in no time.
Installing Compatible Software
You need the right tools to create and manage your hologram content. Many people use special programs to design, edit, and upload their visuals. Some software is free and easy to use, while others offer more advanced features for those who want to get creative.
Here is a quick look at one of the most popular options for managing 3d hologram fan content:
Software Name | Cost | Learning Curve | Compatibility Rating | Key Benefits |
|---|---|---|---|---|
Blender | Free | Medium | 5 out of 5 stars | Supports polygonal modeling, sculpting, keyframe animation, and particle effects. Exports directly to MP4, OBJ, and FBX. |
Blender stands out because it lets you build 3D models, add cool effects, and animate your ads. You can export your finished work in formats that most holographic fans accept. If you want something simple, you can use the content toolkit that comes with your fan. This toolkit often includes basic editing tools and step-by-step guides for software installation.
Tip: Always check your fan’s manual for a list of supported software. Some brands work best with their own apps, while others let you use third-party programs like Blender.
After you pick your software, download it from the official website or app store. Follow the on-screen instructions to install it on your computer or mobile device. If you get stuck, most programs have help sections or video tutorials. Take your time to explore the menus and try out a few sample projects. You will get better with practice, and soon you will create eye-catching ads that make people stop and look.
Device Connection Steps
Once you finish installing your software, you need to connect your device to the 3d hologram fan. This step lets you upload your content and control the display. The process is simple, and you can do it with just a few taps or clicks.
Follow these steps to connect your device:
Unbox your holographic fan and make sure you have all the parts.
Mount the fan in the spot you picked earlier.
Plug in the power adapter and connect it to the fan.
Turn on the fan and check that the default hologram appears.
Connect your computer or phone to the fan using Wi-Fi. Most fans create their own network, so look for it in your device’s Wi-Fi settings.
Open the control app, like Lumina, on your device. This app lets you upload your ads and manage the display.
You might recall that earlier in this guide, you checked your fan’s stability and power. Now, you see how those steps help make the software setup go smoothly. If you have trouble connecting, restart your fan and device, then try again. Some fans also let you use a USB drive or memory card to transfer files if Wi-Fi does not work.
If you want your ads to look their best, always test your connection before a big event or campaign. A quick check can save you time and stress later.
With your software installed and your device connected, you are ready to start creating and uploading your own hologram ads. The next steps will show you how to make your content stand out and get noticed.
Creating and Formatting Content
You want your 3d hologram fan content to look amazing and grab attention. The right file format, resolution, and style make a big difference. Let’s walk through what works best for holographic fan displays.
Supported 3D Formats
Most fans work best with MP4 video files. Some premium models also let you use AVI or MOV. The fan I use most often runs MP4 with H.264 encoding. When you set up your scene, always check your fan’s manual for the exact formats it supports. Using the right format helps your hologram content play smoothly and look sharp.
Here’s a quick look at the industry standards for holographic display:
Specification | Value |
|---|---|
Resolution | 1024x1024 |
Aspect Ratio | 1:1 |
Frame Rate | 30fps (60fps for fast motion) |
You get the best results when you follow these specs. High-contrast visuals and bright colors stand out from a distance. Try dynamic animations, 3D product models, and short narrative videos. These types of content boost engagement and make your display pop.
Customizing with Logos and Branding
You want your brand to shine. Good holographic fan content starts with a strong logo. Use a 3D extrusion of your logo for extra depth. Add a reveal animation that uses your brand colors. Keep the background pure black. This trick makes your logo float in the air and avoids weird visual effects.
Here are some tips for loading custom content and making your hologram stand out:
Use custom animations that match your campaign.
Show product visuals that your audience likes.
Tell a short story with your hologram content.
Make sure your graphics are bold and easy to see.
Tip: Always preview your content before you upload it. This step helps you catch mistakes and keeps your display looking professional.
With these steps, you can create good holographic fan content that gets noticed and remembered.
Uploading Content to the Hologram Fan
You have finished your setup and created some eye-catching 3d hologram fan content. Now, you need to get your files onto the fan. This step is easy, and you have a few ways to do it.
File Transfer Methods
You can use different methods to upload your hologram content. Most people choose the one that matches their fan model and how often they want to update the display.
USB or SD Card: Save your MP4 video or animation on a USB drive or SD card. Plug it into the slot on your holographic fan. Use the fan’s controls to pick and play your file. This method works well if you want a simple and quick upload.
Wi-Fi or App Control: Many new fans let you connect your phone or computer to the fan using Wi-Fi. Open the app that comes with your fan. You can send your files straight to the device and manage your playlists from anywhere in the store.
LAN or CMS Control: If you have more than one fan, you might use a content management system. Open a browser on your computer, log in, and upload your files. This method helps you control many holographic fan displays at once.
Tip: Always check your file before uploading. Make sure the video plays smoothly and looks good on your holographic display.
Setting Playlists
You want your display to keep people interested. Setting up playlists helps you show different hologram content in a loop. Most apps let you drag and drop files to set up your scene. You can pick the order, set how long each video plays, and even schedule special ads for busy times.
A good playlist boosts engagement and keeps your message fresh. Try mixing short product clips, your logo, and fun animations. This approach creates good holographic fan content that stands out and gets people talking.
When you set up and test your playlist, watch how people react. Change your lineup if you see something works better. With the right playlist, your holographic display will turn heads and make your advertising unforgettable.
Optimizing Holographic Display
Adjusting Image Quality
You want your holographic display to look clear and get attention. The right settings help your hologram stand out, even in busy places. Here are some easy steps to make your holographic fan displays look better:
Pick high-resolution images. Clear pictures help people see details.
Use a dark or black background. This makes the hologram look brighter and easier to see.
Choose images that your audience will like. Fun and interesting pictures make people pay attention.
Tip: Always check your display before you start your ad campaign. This helps you find any problems with how clear or colorful your images are.
If your holographic content looks blurry or faded, check the file resolution and background color. Small changes can really help.
Adapting to Environment
Every place is different. You need to change your setup to fit the space. Bright lights or sunlight can make your holographic display hard to see. Move your fan away from windows or bright lights if you can. Try to dim the lights near your display area.
You can also change the angle of your holographic fan displays. Tilt the fan a little so people get the best view. Make sure nothing is blocking the display. Keep the space around your display clean and open.
A good setup helps your ads look great. When you match your holographic display to the space, more people will stop and watch.
Maintenance and Troubleshooting
Taking care of your 3d hologram fan is important. It helps your ads look good and keeps your holographic fan displays working well. If you check and clean your fan often, you can stop problems before they happen.
Regular Cleaning
Clean your fan every three months if you use it for business. Dust can build up on the fan blades, LED arms, and bearings. This dust can make your display look blurry. It can also make the fan shake. Here is an easy cleaning routine:
Wipe the blades and LED arms with a soft, dry cloth.
Look for loose screws and tighten them if you find any.
Check the bearings for dust or damage.
Add oil to moving parts if you hear squeaks or if they feel stiff.
If your fan is in a busy store, clean and oil it every three months. Let trained workers do the maintenance, especially for electrical parts.
If you follow these steps, your fan can last about 30,000 hours. That means you can use it for advertising for a long time!
Common Issues and Fixes
Sometimes, your fan might have problems. Don’t worry. Most problems are easy to fix. Here is a table to help you solve common issues:
Issue | Causes | Solutions |
|---|---|---|
Device Fails to Start | Power supply issues, damaged adapter | Check outlet, inspect adapter, check fuse |
Distorted or Unstable Images | Incompatible content, dust, misaligned | Use correct format, clean blades, inspect |
Abnormal Noises/Vibrations | Loose parts, worn bearings, uneven base | Tighten screws, lubricate, stabilize base |
Content Fails to Load/Play | Unsupported formats, faulty USB, signal | Check file, test USB, improve signal |
Overheating/Shutdown | Blocked airflow, long use, cooling fail | Clear vents, limit use, check cooling fan |
Splicing Sync Issues | Bad connections, settings, weak power | Check cables, match settings, steady power |
Tip: Always check your fan before a big event. A quick look can help you find problems early and keep your display looking good.
If you take care of your 3d hologram fan, it will work better. Your ads will look great and you will get better results.
Here are the main steps for setting up your 3d hologram fan. First, get your software ready. Next, learn what file formats you need. Then, make or find a 3D asset. Set up your scene so it fits the round display. Move your content onto the fan. Check how it looks and make changes if needed.
Try out different types of content to see what people like. Here are some good strategies:
Strategy | Benefit |
|---|---|
Visual Appeal | Gets people’s attention and makes them curious. |
Detail and Clarity | Shows small details very clearly. |
Flexibility | Works well in stores, trade shows, and other places. |
Most people notice holographic displays. About 65% of people walking by will look at them. Keep your fan clean and check it often to make sure it works well. If you need help, look at the fan installation guide. You can also watch videos from the company that made your fan. Your 3d hologram fan can make people stop and help your ads do better!
FAQ
How do I know which 3d hologram fan is right for my business?
You should think about your space, budget, and what you want to show. When you choose your hologram fan, look for one that fits your needs and is easy to use.
Can I use my phone to control the 3d hologram fan?
Yes, you can! Most fans come with an app. You just connect your phone to the fan’s Wi-Fi and use the app to upload videos or change settings.
What file types work best for hologram displays?
MP4 files work best for most fans. Check your fan’s manual to see if it supports other types like AVI or MOV. Always use high-quality videos for the clearest display.
Is it safe to run the 3d hologram fan all day?
You can run your fan for many hours. Just make sure it has good airflow and stays clean. If you hear strange noises or see dust, turn it off and check for problems.
How do I clean the fan without breaking it?
Turn off and unplug the fan first. Use a soft, dry cloth to wipe the blades and arms. Never spray water or use harsh cleaners. If you are not sure, ask a technician for help.
See Also
Transforming Dull Advertisements With 3D LED Hologram Fans
The Art of Creating Eye-Catching Holograms With 3D Fans
Maximizing Advertising Impact With 3D LED Fans in 2025