How to Turn Your Raspberry Pi into a Digital Signage Player with Open Source Tools
Shenzhen TopAdkiosk Display Technology Co., Ltd.
Add.: 2F, Bldg 10, Changfeng Industrial Park, Dongkeng, Fenghuang, Guangming, Shenzhen, China 518132
Mobile/WHATSAPP: 86-138 25769658
Email: marketing@topadkiosk.com topadkiosk@gmail.com
Skype: pghenry1
Wechat: adkioskhenry
English Web.: https://www.topkioskdisplay.com/
http://www.ad-kiosk.com/
https://www.toplcddisplay.com/
http://www.multitouchdigitalsignage.com/
https://www.youtube.com/channel/UCYVYNJHxLVEcQD8fuUxXNTA/videos?view_as=subscriber
https://www.facebook.com/TOPADKIOSKSHENZHEN/?ref=bookmarks

You can change a simple Raspberry Pi into a strong digital signage player by using open source digital signage software. This way gives you more choices and helps you save money. Look at these ways to save cash:
Raspberry Pi hardware costs about $35, but commercial media boxes usually cost $300–$800.
You can stop spending money when your screens are off for a long time.
Many people see their total costs go down by 24–31% when they use Raspberry Pi setups.
Starting is simple, even if you are new to technology. You will like the freedom and control that open source tools give you.
Key Takeaways
You can turn a Raspberry Pi into a cheap digital signage player with open source software. This can help you save up to 31% compared to buying commercial products.
First, collect the hardware you need. You will need a Raspberry Pi, a power supply, a microSD card, an HDMI cable, and a display. This makes it easy to start.
Pick open source digital signage software that fits your needs. Some options are Screenly OSE and Yodeck. Choose one based on what you like and how much you know about technology.
Make your screen content interesting. Use clear pictures, large fonts, and the same style everywhere. This helps get people’s attention.
Use remote management tools to control many screens from anywhere. This makes sure your digital signage works well and stays up to date.
Raspberry Pi Digital Signage Requirements
Hardware Checklist
You do not need expensive gear to start with raspberry pi digital signage. Most people only need a few simple parts to make a player. Here is a fast list of what you need:
Component | Specification |
|---|---|
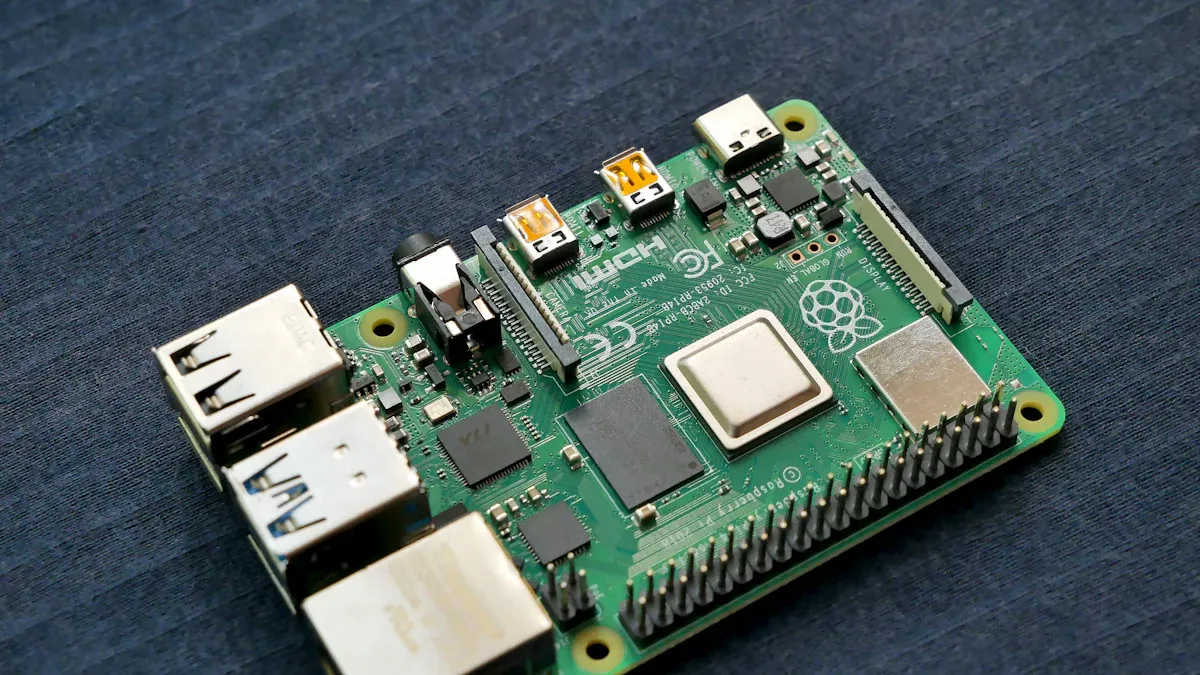
Raspberry Pi model | Model 3 recommended (others supported) |
Power supply | USB with micro USB cable (2A capacity) |
microSD card | Class 10, 8GB+ from a good brand |
HDMI cable | Good quality for connecting to your screen |
Network connectivity | LAN cable or USB Wi-Fi adapter if needed |
A keyboard and mouse can help you set things up at first. Later, you may not need them anymore. You also need a display. This can be a TV or a monitor with an HDMI port.
If you want to know which Raspberry Pi models are best, look at this table:
Model | Features |
|---|---|
Raspberry Pi 3 Model B+ | 1.4GHz quad-core processor, 1GB RAM, wired and wireless connections, energy efficient |
Raspberry Pi 4 Model B | 2GB–8GB RAM, faster processor, supports 4K video |
Raspberry Pi 5 | Even better performance, great for advanced signage setups |
Tip: Raspberry Pi does not use much power. This saves you money and helps the planet.
Software Essentials
You need open source digital signage software to show things on your screens. Some well-known choices are:
Yodeck
Screenly OSE
PiSignage
Info-Beamer
Flutter Pi
Anthias (Screenly OSE)
Pi Presents
Most digital signage software works right away. Some ask you to make a free account. This lets you control your screens from anywhere. Pick the software that matches what you want and what you know how to use.
You also need a good internet connection. This lets you change your content and control your screens from your laptop or phone.
Note: Using hardware and software that saves energy means your setup will last longer and cost less.
Choosing Open Source Digital Signage Software
Top Software Options
There are many open source digital signage software choices for Raspberry Pi. Here are some top picks for 2026:
Screenly OSE (Anthias): Good for offline use and local control. You can run it on your own device.
Yodeck: Simple to use with a cloud dashboard. You can control many screens from anywhere.
info-beamer: It is flexible and powerful. It works well for custom projects and advanced users.
PiSignage: Easy to set up and great for small businesses or schools.
PlaySignage: Has both open source and paid features. You can start free and pay later if you want more.
You might want to know how these tools are different. Check this table to compare Screenly OSE and Yodeck:
Feature | Screenly OSE | Yodeck |
|---|---|---|
Deployment | Self-hosted on Raspberry Pi | Cloud-based with remote management |
Offline Playback | Yes | No |
Content Management | Local control with playlist | Centralized control with remote device |
Ideal for | Small teams, offline signage | Teams with many locations |
Technical Comfort Needed | Moderate | Low (very user-friendly) |
Other tools like info-beamer and PiSignage have strong features too. Pick the one that matches what you need and what you know.
Tip: If you want to keep your data private, use self-hosted digital signage software. If you want to control screens from anywhere, cloud-based digital signage software is better.
Pros and Cons for Raspberry Pi
Each tool has good and bad points for raspberry pi digital signage. Here are some things to think about:
Screenly OSE: Works offline. You need some tech skills to set it up.
Yodeck: Easy for beginners. Needs internet for updates.
info-beamer: Very flexible. Best for people who like to tinker.
PiSignage: Simple and reliable. Not as many advanced features.
PlaySignage: Good for trying out digital signage software. Some features cost money.
You should also look at the license for each tool. For example, Anthias uses GPLv2, and Xibo uses AGPLv3. Some licenses let you use the software for free, but you may need to share changes if you give services to others.
Software | License Type | Key Points |
|---|---|---|
Anthias | GPLv2 | Commercial license option available |
Xibo | AGPLv3 | Must share changes if you offer as a service |
Pick the software that fits your comfort level and project size. You can always change later if you need something else.
Setting Up Raspberry Pi for Digital Signage
Ready to get your screens up and running? This step-by-step guide will walk you through setting up raspberry pi for digital signage. You do not need to be a tech expert. Just follow each step, and you will have your display showing content in no time.
Flashing the Software Image
First, you need to put your chosen digital signage software onto the microSD card. This process is called "flashing" the image. Here’s how you can do it:
Download the software image from the official website of your chosen digital signage solutions.
Use a tool like Raspberry Pi Imager, balenaEtcher, or Win32 Disk Imager to flash the image onto your microSD card.
Insert the microSD card into your Raspberry Pi.
Tip: Always use a high-quality microSD card with a Class 10 rating or higher. This helps your setup run smoothly and last longer.
Sometimes, things do not go as planned. Here are some common issues you might face during flashing:
The power supply may not give enough power, causing under-voltage problems.
The SD card could be worn out or corrupted.
Errors might pop up during the flashing process, or the disk image could be bad.
Some Raspberry Pi models may not work with certain operating systems.
A slow SD card can make your player lag or freeze.
If you run into trouble, try a different SD card or re-download the image. Make sure your power supply is strong enough for your Raspberry Pi.
Initial Setup and Connections
Now, let’s get your hardware connected. This part of the setup is simple:
Plug your Raspberry Pi into your display using an HDMI cable.
Connect the power supply to your Raspberry Pi.
Attach a keyboard and mouse for the first boot.
Connect to the internet using a LAN cable or Wi-Fi adapter.
When you power up your Raspberry Pi for the first time, you will see the digital signage software start. Some software will ask you to pick your language or set up a password. Follow the on-screen instructions.
Note: A stable network connection helps you manage your screens and update content from anywhere.
After the first boot, you can remove the keyboard and mouse if you want. Your Raspberry Pi will keep running the signage software on its own.
Linking and Configuring Screens
You are almost done! Now, you need to link your screen to the management interface. This step lets you control what shows up on your display.
Most open source digital signage software gives you a web dashboard. You can access it from your laptop or phone. Here’s a quick step-by-step guide:
Find the IP address of your Raspberry Pi. The software may show it on the screen at startup.
Open a web browser on your computer or phone.
Type the IP address into the browser to reach the management dashboard.
Log in with the default username and password, or create a new account if needed.
From the dashboard, you can:
Upload images, videos, or even design HTML assets.
Create playlists and set the order and duration for each item.
Group players together to manage several screens at once.
Schedule content with start and end dates.
Monitor all your players from one place.
You can also play or pause playlists, operate your screens in kiosk mode, and use autoconfiguration for bulk management. If you want to get fancy, some software lets you use a REST API for programmatic control.
Pro Tip: Grouping players makes it easy to push the same playlist to many screens. This saves you time and keeps your messaging consistent.
With this configuration, your raspberry pi digital signage setup is ready to go. You can now manage content, schedule playlists, and control multiple screens with ease.
Content Management and Playlists

Designing and Uploading Content
You want your screens to look sharp and grab attention. Start by creating content that pops. Think about what people see when they walk by. Use big fonts, bright colors, and clear images. Here are some tips to help you design great digital signage content:
Make your message easy to see at a glance. People only look for a second or two.
Stick to one main idea per screen. Too much information can confuse viewers.
Adjust font size and images based on how far people stand from the display.
Use the same colors, fonts, and templates for every slide. This keeps your screens looking professional.
Avoid clutter, low contrast, and old content. Fresh and simple works best.
When you finish your designs, you can upload them to your digital signage setup. Most digital signage solutions support many file types. Here’s a quick look at what you can use:
File Format | Description |
|---|---|
.jpg, .jpeg, .png | |
.pdf, .doc, .docx, .rtf | Documents and slides |
Video (H.265) | Smooth video playback, even in 4K |
HTML5 | Dashboards, live data, and web pages |
TTF Fonts | Custom fonts for unique branding |
CAP feeds | Emergency alerts |
Tip: PNG works well for logos. H.265 is great for looping videos. HTML5 lets you show live dashboards.
Creating and Scheduling Playlists
Now, let’s get your content playing in the right order at the right time. Playlists help you organize what shows up on your screens. You can group images, videos, and web pages together. Here’s how you can set up and schedule playlists:
Create different playlists for different times or events. For example, you might have a breakfast playlist, a lunch playlist, and a regular playlist.
Assign your Raspberry Pi players to a group, like "Store 1."
Pick a default playlist that runs when nothing else is scheduled.
Add special playlists for certain times. For example, show the breakfast playlist from 8:00 AM to 10:00 AM and the lunch playlist from 12:30 PM to 3:30 PM.
Set the order of your playlists. Put the most important ones at the top.
Deploy your group so all screens update at once.
You can change playlists anytime from your dashboard. This makes it easy to keep your screens fresh and on schedule. With these tools, you control what your audience sees and when they see it. Your digital signage setup will always stay up to date.
Tips for Reliable Operation
Auto-Start and Remote Management
You want your digital signage system to work well every day. Setting up your Raspberry Pi to start the signage software by itself is a smart idea. There are ways to make sure your player turns on and starts working without you doing anything:
Install software like EasySignage. It adds a script so the app starts when you turn on the device.
Use the EasySignage Custom Android Image. This gives better speed and makes your system more stable.
On Raspberry Pi OS (64-bit), type this command in the terminal:
/bin/bash -c "$(curl -fsSL https://appds.io/rpi64.sh)"For Raspberry Pi OS (32-bit), use this command:
/bin/bash -c "$(curl -fsSL https://appds.io/rpi32.sh)"
Remote management helps you a lot, especially if your screens are in different places. With centralized management, you can watch and control all your displays from one spot. You can:
Turn screens on or off using your dashboard.
Check HDMI connections and see live screenshots.
Schedule reboots and send updates without going to each device.
Get alerts if a player stops or goes offline.
Use telemetry data to keep your devices healthy.
Many cloud-based digital signage tools let you group screens, send new content, and check playback status. Some systems, like PiSignage, keep playing content even after a power cut. You do not have to worry about downtime.
Tip: Use web dashboards or mobile apps to manage your screens from anywhere. This saves time and helps you fix problems quickly.
Troubleshooting Common Issues
Sometimes things do not work right, but you can fix most problems with a few easy steps. Here are some common issues and how to solve them:
Prevent black screens: Turn off screen blanking in your Raspberry Pi settings or change the autostart file.
Check system logs: Look in
/var/log/syslogfor errors or~/.config/chromium/Crash Reports/for browser problems.Back up your content and settings: Use tools like
rsyncto copy files to the cloud or an external drive. Keep a spare SD card ready for quick recovery.
Backup Type | Strategy |
|---|---|
Content Backup | Copy content folders to cloud storage or USB drives. Use rsync or set up cron jobs. |
System Backup | Clone your microSD card with tools like dd or rpi-clone. Keep a backup card handy. |
Configuration Files | Save custom scripts and settings. Store passwords in a safe, encrypted place. |
Busy places like airports and malls need over 99% uptime. Many people use remote monitoring and even cellular backups to keep their screens running. If you group your screens and use alerts, you can find problems before they get worse.
Note: Regular backups and remote monitoring help you avoid trouble and keep your digital signage system working well.
You now know how to use your Raspberry Pi as a digital signage player with open source tools. Try out different software and content styles to find what looks best on your screens. If you want to do more, look at these advanced features:
Feature | What It Does |
|---|---|
Shows the same content on many screens at once | |
Interactive content | Connects with IoT for real-time displays |
HEVC video support | Plays smooth 4K videos on Raspberry Pi 4 and 5 |
You can add more devices by copying your setup. Raspberry Pi signage lets you update screens from far away and keep them matching. If you have questions or ideas, share them below! 🚀
Top Open Source Digital Signage Software Compared in 2026
In 2026, the core value of open source digital signage remains zero license fees and complete architectural freedom. You control your data, choose your hardware freely, and scale to unlimited screens without being locked into a commercial SaaS model.
However, this freedom comes with responsibility – you need to manage it like a private cloud. Setup can take days, players and CMS are not always easy to decouple, and you will need dedicated ops or IT support for servers, updates, and security.
Below is a comparison based on architectural independence (can it truly run without vendor lock‑in?) and maintenance complexity:
🟢 GarlicSignage – Fully independent, long‑term viable (based on open SMIL standard)
🟡 Xibo (Self‑Hosted) – Strong control, heavy maintenance (commercial‑grade CMS, complex deployment)
🟡 Anthias (formerly Screenly OSE) – Simple, but single‑screen per instance
🟡 PiSignage – Hardware‑agnostic, but paid for multi‑screen
🔴 info‑beamer – Developer‑only, high performance, steep learning curve
🔴 Concerto – Legacy system, not recommended for new projects
🟡 Wallify – Minimalist web‑based system, actively updated but still young
📊 Detailed Platform Comparison
Feature | Xibo | Anthias (ex Screenly OSE) | PiSignage (free tier) | GarlicSignage | info‑beamer |
|---|---|---|---|---|---|
Core focus | Most feature‑rich open source CMS | Most popular Raspberry Pi‑based project | Hardware‑free, commercial‑open hybrid | Open standard (SMIL) based, fully independent | Code‑driven, pro Raspberry Pi platform |
Recommended hardware | Server + Linux/Win/Android players | Raspberry Pi / x86 PC | Raspberry Pi / Android / Windows | Standard server running Docker | Raspberry Pi |
Deployment mode | Self‑hosted or cloud | Local single‑machine self‑hosted | Self‑hosted or cloud | Self‑hosted | Self‑hosted |
Pros | Flexible layouts, multi‑screen management, powerful features | Simple, fast, flash‑and‑go | Hardware flexibility, low deployment cost | No vendor lock‑in, fully independent | Very high performance, complex compositions |
Cons | Complex setup; player focus on Windows, not RPi | No cloud dashboard; single‑screen management | Free tier only supports one screen | Small community, design challenges | Steep learning curve, code‑only |
Best for | Mid‑large teams with IT support (campuses, large offices) | Individuals or small teams, single location (cafés, small offices) | Mid‑size projects exploring hardware freedom (chains, venues) | Organisations demanding maximum control and stability | Developer‑led projects (art installations, digital exhibits) |
2026 note: Xibo can run on Raspberry Pi 5 via the experimental Axeribo project (making Linux players stable), but this is not official. For heavy RPi users, Anthias remains the safer, mature choice.
Emerging / niche open source projects
Open Signage – Updated in early 2026, built on Laravel + Vue.js. Modern tech stack for developers.
Next Signage – An academic project focused on reducing e‑waste and operational costs by using Raspberry Pi and refurbished hardware.
💎 How to Choose – Match Your Situation
The key is to honestly assess your team’s capabilities and project scale.
1. Individual developer / small single location (café, small showroom, 1–3 screens)
✅ Recommend: Anthias or PiSignage (free tier)
📌 Lowest startup cost, simplest. A Raspberry Pi and a screen – you can be running in minutes with minimal maintenance.
2. Organisation with IT support (school, corporate HQ, 4–10 screens)
✅ Recommend: Xibo (self‑hosted)
📌 When you need unified multi‑screen management, fine‑grained scheduling and powerful layout design, Xibo delivers operational efficiency.
3. Large‑scale deployment / teams that demand true independence (chain stores, government, 10–50+ screens)
✅ Recommend: GarlicSignage or Xibo + professional support
📌 At this scale, long‑term architectural control and total cost of ownership (TCO) matter more than short setup time. GarlicSignage avoids vendor lock‑in by design; Xibo may need paid support to offset its complexity.
FAQ
What is the best operating system for Raspberry Pi digital signage?
Most people should pick raspberry pi os for digital signage. It works with many open source tools. Lots of digital signage software supports raspberry pi os. You get updates, a big group for help, and it is stable.
Can I use raspberry pi os for remote management?
Yes, you can control your screens from far away with raspberry pi os. Many digital signage platforms let you change content from anywhere. You only need a good internet connection and raspberry pi os on your device.
How do I set up auto-start for my signage software?
You can make your signage app start by itself on raspberry pi os. Just add your app to the startup list. Your content will play every time you turn on your Raspberry Pi. Most guides for raspberry pi os show these steps.
What should I do if my screen goes blank on raspberry pi os?
If your screen turns black, check your raspberry pi os settings. Turn off screen blanking in the display menu. You can also change the autostart file. This keeps your digital signage content on all day.
Can I update my digital signage software easily on raspberry pi os?
Yes, it is easy to update. Most open source signage tools let you update on raspberry pi os. You can use the update manager or type commands in the terminal. Always save your content before you update raspberry pi os.