Add an OLED Display to Your Raspberry Pi OS System for Real-Time Monitoring
Shenzhen TopAdkiosk Display Technology Co., Ltd.
Add.: 2F, Bldg 10, Changfeng Industrial Park, Dongkeng, Fenghuang, Guangming, Shenzhen, China 518132
Mobile/WHATSAPP: 86-138 25769658
Email: marketing@topadkiosk.com topadkiosk@gmail.com
Skype: pghenry1
Wechat: adkioskhenry
English Web.: https://www.topkioskdisplay.com/
http://www.ad-kiosk.com/
https://www.toplcddisplay.com/
http://www.multitouchdigitalsignage.com/
https://www.youtube.com/channel/UCYVYNJHxLVEcQD8fuUxXNTA/videos?view_as=subscriber
https://www.facebook.com/TOPADKIOSKSHENZHEN/?ref=bookmarks
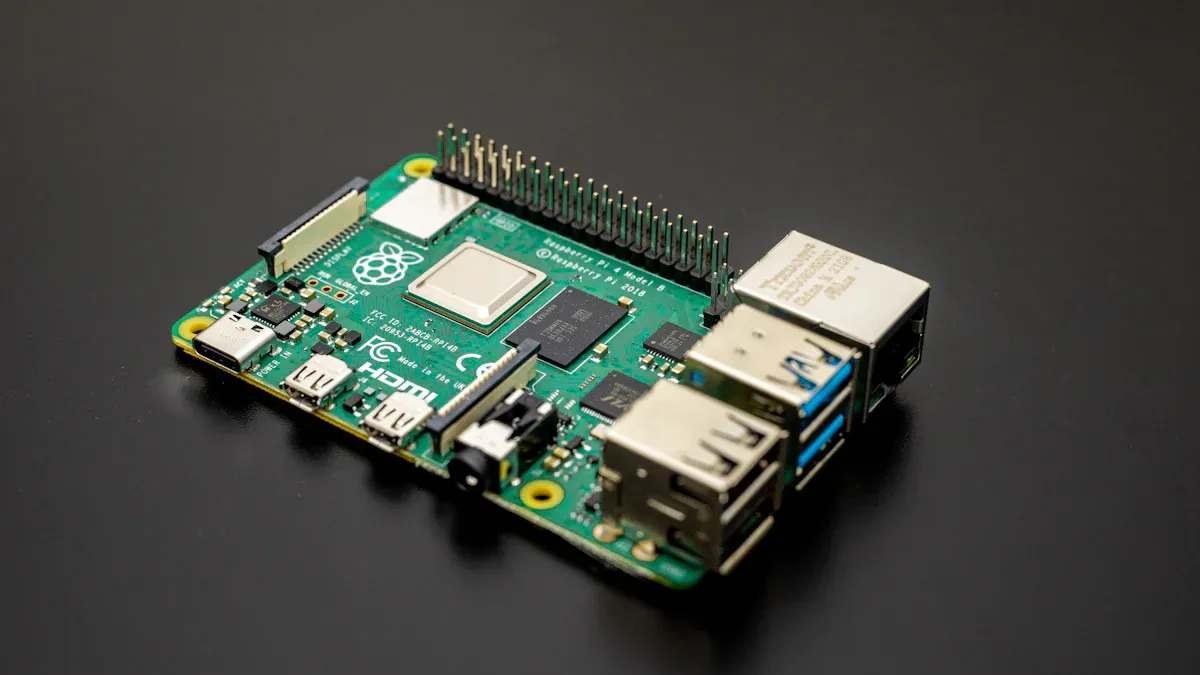
You can add an SSD1306 oled display to your Raspberry Pi OS. This lets you see real-time updates. You only need a Raspberry Pi, an SSD1306 oled display, and some jumper wires. You also need software like Python, the Adafruit library, and the crismc/rpi_i2c_oled package. This setup shows you important stats right away. It can also show alerts or learning content.
Benefit Type | Description |
|---|---|
Real-time Monitoring | The display gives you quick updates on system health and status. |
Visual Alerts | Icons and messages help you find problems fast. |
Educational Content | The oled stats display can show tips or quizzes for learning. |
Be sure to turn on I2C before you start. Check if your power is right for your oled display Raspberry Pi project.
Key Takeaways
Hook up an SSD1306 OLED display to your Raspberry Pi with I2C. This lets you watch your system in real time.
Turn on I2C in the Raspberry Pi settings. This helps the OLED display talk to your Pi.
Add libraries like Adafruit and crismc/rpi_i2c_oled. These make the display work right.
Write a Python script to show things like CPU temperature and memory use. The OLED display will show these stats.
Set up the script to start by itself with systemd or cron. This way, you can always see your system stats.
OLED Display Raspberry Pi Setup
SSD1306 OLED and I2C Connection
You can connect an SSD1306 OLED display to your Raspberry Pi using the I2C interface. This setup is simple and reliable. Start by gathering your components: the Raspberry Pi, the SSD1306 OLED, and jumper wires.
Attach the display to your Raspberry Pi with these connections:
GND on the display to Pin 9 (Ground) on the Pi
VCC on the display to Pin 1 (3.3V) on the Pi
SCL on the display to Pin 5 (GPIO 3)
SDA on the display to Pin 3 (GPIO 2)
Enable I2C on your Raspberry Pi:
Open a terminal and run:
sudo raspi-configGo to "Interface Options" and select "I2C". Choose "Yes" to enable it.
Reboot your Raspberry Pi to apply the changes:
sudo rebootCheck if your display is detected by running:
sudo i2cdetect -y 1
The default I2C address for the SSD1306 OLED is 0x3C. If you see "3c" in the table, your connection works.
If you do not see the address, check your wiring and make sure the I2C interface is enabled.
Power Compatibility Tips
The SSD1306 OLED display works with both 3.3V and 5V power. Most Raspberry Pi models provide a 3.3V pin at physical pin 1. Always connect VCC to this pin and GND to pin 9. Some displays may have VCC and GND pins reversed, so double-check the labels before connecting.
Specification | Value |
|---|---|
3.3V to 5V | |
Continuous Current | 12.25uA |
Maximum Current | 100uA |
Consumption Range | 2mA - 24mA |
If your display does not turn on, check the power connections first. Make sure the Raspberry Pi can supply enough current for the oled display raspberry pi setup.
A stable connection ensures your oled stats display works without flicker or errors. If you see random lines or the screen stays blank, try swapping the jumper wires or using a different set of pins. This helps rule out faulty cables or pin issues. With careful setup, your i2c oled display will show system stats reliably.
Install the OLED Stats Display Script
Update Raspberry Pi OS Bookworm
You should update your Raspberry Pi OS before you add the oled stats display script. This step helps stop problems when you add new packages. Follow these steps to update your system:
Open the terminal or use SSH to connect to your Raspberry Pi.
Type these commands to update your system:
sudo apt-get update
sudo apt-get -y upgrade
Restart your Raspberry Pi:
sudo rebootWhen it turns back on, open the terminal again. Then install the tools you need:
sudo apt-get install python3-pip
sudo apt install --upgrade python3-setuptools
Updating your system helps you avoid problems with the oled. It also lets you get the newest libraries.
Install Adafruit and rpi_i2c_oled Libraries
You must add some libraries to make your oled stats display work. These steps are good for both Raspberry Pi OS Bookworm and Raspberry Pi OS Bullseye. First, install the tools and check your i2c connection:
Add the tools:
sudo apt-get install i2c-tools git vimSee if your display is found:
i2cdetect -y 1Add Python3 tools:
sudo apt-get install python3-dev python3-smbus python3-pilTo add the crismc/rpi_i2c_oled library, type:
curl -sSL https://raw.githubusercontent.com/crismc/rpi_i2c_oled/v1.0.4/basic-install.sh | sudo bash
If you want to add the circuitpython library, use pip3 to add Adafruit libraries. Sometimes, you might see errors when you add the Adafruit SSD1306 library on Raspberry Pi OS Bookworm or Raspberry Pi OS Bullseye. Here are some common problems and what to do:
Issue Description | Error Message | Suggested Action |
|---|---|---|
Compatibility issues with Adafruit SSD1306 library on Raspberry Pi OS Bookworm | ImportError: libgpiod Python bindings not found | Add libgpiod Python bindings as the error says |
Related to installation of adafruit-shell | ModuleNotFoundError: No module named 'adafruit_shell' | Add adafruit-python-shell using pip3 |
If your display looks messy, you may have the wrong driver. Use the SSD1306 driver, not SH1106. Always turn on i2c in your Raspberry Pi settings before you add libraries.
After you add everything, check your setup:
Type:
sudo apt-get install python-smbus
sudo apt-get install i2c-tools
sudo pip3 install Adafruit_BBIO
Use
i2cdetect -y 1to see if your display is found. If you see the address, your oled stats display is ready.
Keeping your python libraries new helps your oled stats display work well. Watch your system for any problems after you add libraries.
Programming the OLED Stats Display
Tutorial: System Monitor Script
You can make a script to watch your system stats on the oled display raspberry pi. This guide shows you how to see things like CPU temperature, memory use, and uptime on your oled stats display. You need Python and the crismc/rpi_i2c_oled library.
Here are the steps to start:
Open the terminal on your Raspberry Pi.
Make a new Python file. Call it
oled_stats.py.Copy and paste this code into your file:
import time
from rpi_i2c_oled import OLEDStatsDisplay

oled = OLEDStatsDisplay()

while True:
    oled.fill(0)  # Clear the display to prevent flicker
    cpu_temp = oled.get_cpu_temp()
    mem_usage = oled.get_mem_usage()
    uptime = oled.get_uptime()
    oled.text(f"CPU: {cpu_temp}C", 0, 0)
    oled.text(f"Mem: {mem_usage}%", 0, 16)
    oled.text(f"Up: {uptime}", 0, 32)
    oled.show()  # Refresh the display only once per cycle
    time.sleep(5)  # Wait before updating again
You clear the screen before you draw new info. This stops flickering and keeps updates smooth. The display only refreshes once each time. This way, your oled stats display shows the right info without mistakes.
If you see weird lines or shapes, check your wires and make sure i2c is working. You can find helpful guides online. Woolsey Workshop and Peppe8o have step-by-step help for connecting and fixing the oled display raspberry pi.
Here are some common problems and how to fix them:
Error Type | Description | Resolution |
|---|---|---|
Speckled Screen | Shows random values. | Check data transfer between Raspberry Pi and SSD1306. |
Solid Screen | Screen appears solid white. | Use correct command for display resume. |
Screen Flipped in Y Direction | Display is upside down. | Adjust initialization settings. |
Screen Flipped in X Direction | Display is mirrored horizontally. | Adjust initialization settings. |
Screen Flipped in Both Directions | Display is upside down and mirrored. | Adjust initialization settings. |
Screen is Inverted | Colors are reversed. | Check configuration settings. |
Image is Partially off the Screen | Image does not fit. | Match image size to display resolution. |
Image is Wrapped on the Screen | Image wraps around. | Check rendering logic and boundaries. |
Black Screen | No output. | Verify power and connections. |
Screen Has Gone Crazy | Random patterns or artifacts. | Reset display and check communication. |
If your screen stays blank, check your power and wires first. There are many guides online with easy steps to follow.
Customizing Display Output
You can change what your oled stats display shows or how it looks. The crismc/rpi_i2c_oled library lets you pick fonts, layouts, and stats. You can also change the temperature unit, turn the screen, or add icons.
Here are some settings you can use:
Name | Type | Requirement | Description | Default |
|---|---|---|---|---|
i2c_bus | int | Required | I2C bus number. /dev/i2c-[bus number] | 1 |
Temperature_Unit | string | Required | Show CPU temperature in C or F | C |
Rotate | int | Optional | Rotate screen counter clockwise (e.g. 180 = upside down) | 0 |
Show_Icons | boolean | Optional | Show icons for each screen | true |
Show_Hint | boolean | Optional | Show hint instead of icon | false |
Compact | boolean | Optional | Show data in compact form | false |
Default_Duration | int | Required | Seconds to display each screen | 10 |
DateTime_Format | string | Optional | Format for datetime text | %d/%m/%Y %H:%M:%S |
Graceful_Exit_Text | string | Optional | Text when service exits | Exited at {datetime} |
You can change these in your script. For example, turn the screen if your oled is upside down. Show hints instead of icons for a simple look. You can also set how long each screen shows.
Try different fonts and layouts to make your oled display raspberry pi project special. You can show more stats or use compact mode for small screens.
If you want to learn more about programming the oled stats display, you can find guides that show how to connect the display, turn on i2c, and use the library. These guides help you write code and fix problems.
Peppe8o gives real examples and explains why oled displays are good.
Many guides show how to connect the oled display raspberry pi with i2c and simple electronics.
You can use these guides to make your oled stats display better and help your raspberry pi os project do more.
Automate OLED Stats Display at Startup
You can make your oled stats display start up automatically every time you power on your Raspberry Pi. This step saves you time and keeps your system monitor running without extra work. You have two main ways to do this: using systemd or using the cron service.
Enable Script with systemd
Systemd is a tool that helps you manage services on Raspberry Pi OS. You can use it to launch your Python script for the oled display at boot. Follow these steps:
Create a folder for your files:
sudo mkdir -p /opt/stats/Copy your
stats.pyscript and any needed font files, likePixelOperator.ttf, into/opt/stats/.Write a systemd unit file called
stats.service. Here is a simple example:[Unit] Description=OLED Stats Display Service After=network.target [Service] ExecStart=/usr/bin/python3 /opt/stats/stats.py WorkingDirectory=/opt/stats/ Restart=always User=pi [Install] WantedBy=multi-user.targetCopy the unit file to the systemd folder:
sudo cp stats.service /etc/systemd/system/Reload systemd to find your new service:
sudo systemctl daemon-reloadEnable and start the service:
sudo systemctl enable --now stats
Systemd makes automating the script to run on start-up easy. You do not need to log in or run commands each time.
Test and Manage Startup Automation
You should test your setup to make sure the oled display works after a reboot. Here are some ways to check and fix problems:
Reboot your Raspberry Pi. Watch the oled to see if it shows your stats.
If nothing appears, check your wiring and i2c settings.
Use this command to see if your service is running:
sudo systemctl status statsIf you see errors, check your script path and working directory.
You can also use the cron service as another way to start your script. Open your crontab with:
crontab -e
@reboot cd /opt/stats && python3 /opt/stats/stats.py &
This method works well if your script needs to find files in a certain folder.
If your oled does not show anything, make sure your script is executable and in the right place. You can use
sudo chmod +x /opt/stats/stats.pyto set permissions.
With these steps, your oled stats display will always show system info after every boot. This setup helps you keep track of your Raspberry Pi health with no extra steps.
You can connect an SSD1306 oled display to Raspberry Pi OS easily. The display lets you see stats as they happen. This makes it simple to watch your system. You can change how your display looks and add new things. Many people use this display for checking their systems.
Feature | Description |
|---|---|
Modular Screen System | Switch between different screens with info |
GPIO/Sensor Support | Add sensors to watch more things |
Try using new sensors and different screens.
Find more ways to use your display.
How to Connect and Set Up an OLED Display with Raspberry Pi
It looks like you’re having trouble getting your test code to run. Don’t worry – we can go step by step. To successfully drive an OLED display, you need to ensure everything from hardware wiring to software configuration is correct.
🔌 Step 1: Check the Hardware Connections
Start with the physical connections – this is the most basic and often overlooked part.
Stable power – The OLED needs a stable voltage. Check that the VCC wire is firmly connected to 3.3V (physical pin 1) or 5V on the Raspberry Pi. Some modules have onboard voltage regulators and can accept 5V, but check your screen’s documentation first. If power seems fine, try the simple “power cycle” – unplug the screen and plug it back in.
I2C mode selection – If your screen supports both
I2CandSPI, you may need to solder or set a jumper on the back to selectI2Cmode.Correct wiring order – Use a multimeter to confirm each wire is connected to the correct pins. Reference the standard wiring table below:
OLED Pin | Function | Raspberry Pi (Physical Pin) |
|---|---|---|
VCC | Power (3.3V or 5V) | 1 (3.3V) or 2/4 (5V) |
GND | Ground | Any GND (e.g., 6, 9, 14, 20, 25) |
SCL | I2C clock | 5 (GPIO 3 / SCL) |
SDA | I2C data | 3 (GPIO 2 / SDA) |
Once you’ve confirmed the wiring, move on to software configuration.
⚙️ Step 2: Check Software Configuration
Enable I2C and install tools – Run
sudo raspi-config, go toInterface Optionsand ensureI2Cis Enabled. Then update and installi2c-tools:bash
sudo apt update && sudo apt upgrade -y
sudo apt install i2c-tools
Scan for the device address – Run
sudo i2cdetect -y 1. Normally you should see an address like0x3cor0x3d. If nothing appears, the communication path between your Pi and the OLED is not working.text
     0  1  2  3  4  5  6  7  8  9  a  b  c  d  e  f
00:                         -- -- -- -- -- -- -- --
10: -- -- -- -- -- -- -- -- -- -- -- -- -- -- -- --
20: -- -- -- -- -- -- -- -- -- -- -- -- -- -- -- --
30: -- -- -- -- -- -- -- -- -- -- -- -- -- 3c -- --
...
Check Python libraries – Before running your test code, make sure you have installed the correct libraries:
bash
sudo pip3 install adafruit-circuitpython-ssd1306 pillow
🐛 Step 3: Troubleshoot Common Errors
If everything is configured correctly but the screen still doesn’t work, here are some common issues and fixes:
i2cdetect -y 1shows nothingVerify that
I2Cis enabled inraspi-config.Power off, then reseat all jumper wires.
Screen shows random noise or garbled content
This is often a power issue. OLEDs can draw a spike during initialization. Make sure your Pi’s power supply is adequate (>2.5A). You can also try adding a 10–100µF capacitor across the VCC and GND pins near the display to stabilize power.Screen is completely dark, but
i2cdetect -y 1shows an addressConfirm that the I2C address in your code matches the detected address (usually
0x3C).Try running an example script from the Adafruit library directly to rule out code errors.
If nothing works, the display may be damaged – try a different unit.
Follow these steps step by step, and you should be able to find the problem. If you get stuck at a specific step, feel free to describe the symptom and I’ll help you further.
FAQ
How do you connect the SSD1306 OLED display to your Raspberry Pi?
You connect the display using jumper wires. Attach GND to pin 9, VCC to pin 1, SCL to pin 5, and SDA to pin 3. Make sure you enable I2C in Raspberry Pi settings.
What should you do if the OLED display stays blank?
Check your power and wiring first. Make sure I2C is enabled. Run i2cdetect -y 1 to see if the display appears. If not, try swapping cables or using different pins.
Which libraries do you need for the OLED stats display?
You need Python, the Adafruit SSD1306 library, and the crismc/rpi_i2c_oled package. Install them using pip or the provided install script. Keep your libraries updated for best results.
Can you customize what the OLED display shows?
Yes, you can change fonts, layouts, and stats. Use the crismc/rpi_i2c_oled library settings to show icons, hints, or compact data. Adjust screen rotation and display duration as you like.
How do you make the OLED stats display run at startup?
Create a systemd service or add a cron job. Place your script in /opt/stats/. Enable the service with sudo systemctl enable --now stats. Test by rebooting and checking the display.
See Also
Step-By-Step Guide to Creating a Raspberry Pi Smart Mirror
Essential Tips for Enhancing Your OLED Display Projects
Guide to Installing and Configuring Digital Signage Displays
Understanding Transparent OLED Technology for Modern Displays
Introductory Guide to Using Transparent OLEDs in DIY Projects