Miniature OLED display picks for easy DIY projects
Shenzhen TopAdkiosk Display Technology Co., Ltd.
Add.: 2F, Bldg 10, Changfeng Industrial Park, Dongkeng, Fenghuang, Guangming, Shenzhen, China 518132
Mobile/WHATSAPP: 86-138 25769658
Email: marketing@topadkiosk.com topadkiosk@gmail.com
Skype: pghenry1
Wechat: adkioskhenry
English Web.: https://www.topkioskdisplay.com/
http://www.ad-kiosk.com/
https://www.toplcddisplay.com/
http://www.multitouchdigitalsignage.com/
https://www.youtube.com/channel/UCYVYNJHxLVEcQD8fuUxXNTA/videos?view_as=subscriber
https://www.facebook.com/TOPADKIOSKSHENZHEN/?ref=bookmarks
If you want a clear and bright screen for your next DIY project, you have some great choices in 2026. Here are the best miniature OLED display picks:
0.96-inch I2C monochrome OLED
Micro OLED with OLEDoS technology
High-res 0.39-inch micro OLED (1920x1080)
These miniature OLED displays are special because they are very small, look sharp, and are easy to use with popular boards. OLEDs smaller than 2 inches now make up over 30% of the market. This shows that many makers really like these tiny screens. You get lots of pixels, save power, and see true black colors. This makes them great for wearables, gaming gear, and touch panels.
Advantage | Description |
|---|---|
Bright and clear images in small screens | |
Power efficiency | Good for gadgets that use batteries |
True black levels | Great contrast for cool visuals |
Compact form factors | Fits in any small gadget |
Optical compatibility | Works well in AR/VR and special optics |
Are you ready to choose the best miniature OLED display for your project? The quick guide and reviews below will help you pick.
Key Takeaways
Pick the best miniature OLED display for your project. Think about the size, how clear the screen is, and how much power it uses.
If you are new, try the 0.96-inch I2C monochrome OLED. It is simple to use and does not use much power. It also works with many popular microcontrollers.
High-resolution micro OLEDs are good for advanced projects like AR or VR. They show clear pictures and dark blacks but cost more money.
Cheap OLED modules like SSD1306 and SSD1331 are great for DIY projects. They work well and fit with many microcontrollers.
Always buy from trusted sellers so you do not get fake displays. Read reviews and check the details to make sure they are good quality.
Miniature OLED display comparison
Specs and features table
It helps to see these screens side by side. The specs and features are important for a miniature OLED display. You will see that pixel density, contrast, and power efficiency are different. These things help you choose the best OLED for your DIY project.
Specification | Miniature OLED Display A | Miniature OLED Display B | Miniature OLED Display C |
|---|---|---|---|
Pixel Density | >4000 PPI | Up to ~800 PPI | Typically < 500 PPI |
Contrast Ratio | Infinite (true blacks) | High (~100,000:1) | Lower, backlight dependent |
Power Efficiency | Very high | Moderate | Lower due to backlight |
Response Time | Very fast (<1ms) | Fast (~10-100ms) | Slower (~10-20ms) |
Size & Thickness | Ultra-compact, thin | Thin, glass based | Thicker, backlight layer |
Display A has the sharpest image and saves the most power. Display B still looks good and works for most projects. Display C is thicker and uses more power, so people do not use it as much for small gadgets.
Size, resolution, interface, price
Let’s look at the main specs you should check. Size and resolution are important for clear pictures. The interface type shows how easy it is to connect your screen. Price changes a lot based on the features.
Product Name | Company Name | Unit Price (Lowest Tier) |
|---|---|---|
0.91 Inch 128X32 Oled Display 4 Pin I2C | MICROTECH TECHNOLOGY COMPANY LIMITED | $1.20 |
0.69 inch Micro Display 96X16 White Blue Light OLED Screen | Shenzhen Hengjia Technology Co., Ltd. | $0.75 |
0.91 Inch Monochrome PMOLED Panel Mini OLED Display | Shenzhen Qintang Shengshi Technology Co., Ltd. | $0.90 |
Original New ECX337 0.5 Inch 1280*960P OLED screen | Shenzhen Solskin Technology Co., Ltd. | $140.00 |
ECX337AF 0.5 Inch 1280x960 OLED Screen Micro OLED Display | Shenzhen Youritech Technology Co., Limited | $80.00 |
DXQ High-definition 0.7inch 1920x1080 LVDS Interface | Shenzhen Dongxingqiang Technology Co., Ltd. | $54.50 |
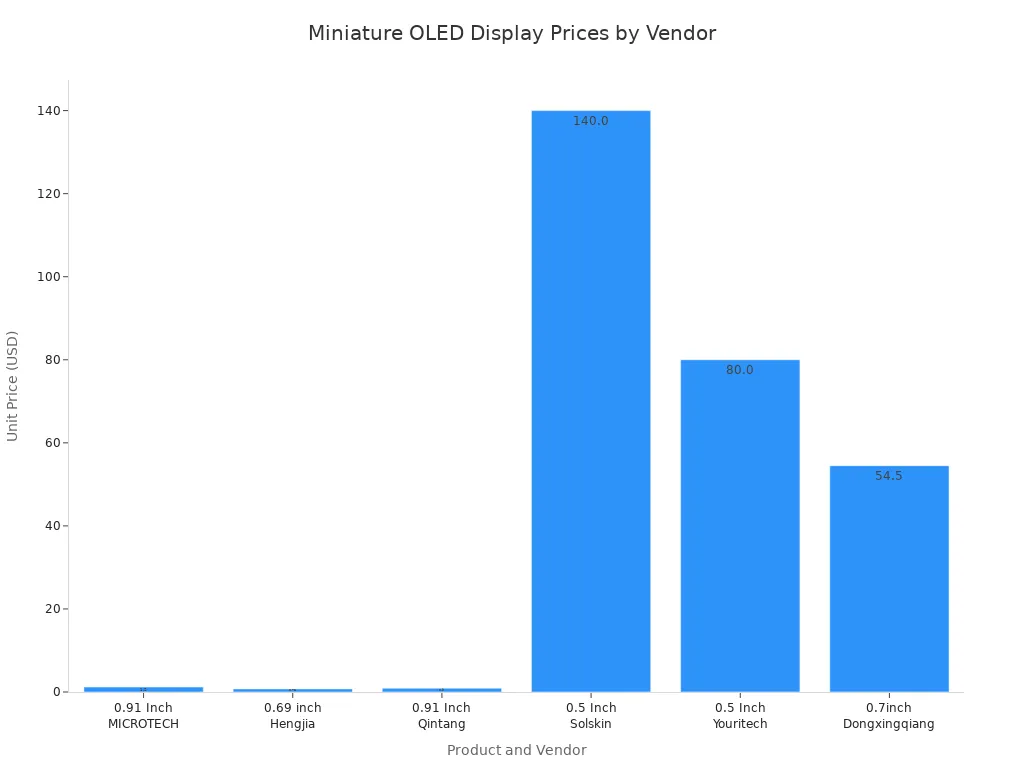
You can see that some screens cost less than $1. High-resolution micro OLEDs can cost over $100. If you want a simple screen for your DIY project, you can buy a cheap one. If you need a sharp screen for VR or AR, you will pay more.
Here’s a quick tip:
I2C needs fewer pins and is good for small screens. SPI is faster and better for quick graphics. Pick the interface that fits your project.
When you compare miniature OLED displays, check the resolution, brightness, and viewing angle. High resolution gives you clear pictures. Brightness is important if you use the screen outside. Wide viewing angles help in VR and AR projects. OLED screens also help your battery last longer.
Top miniature OLED displays
0.96-inch I2C monochrome OLED
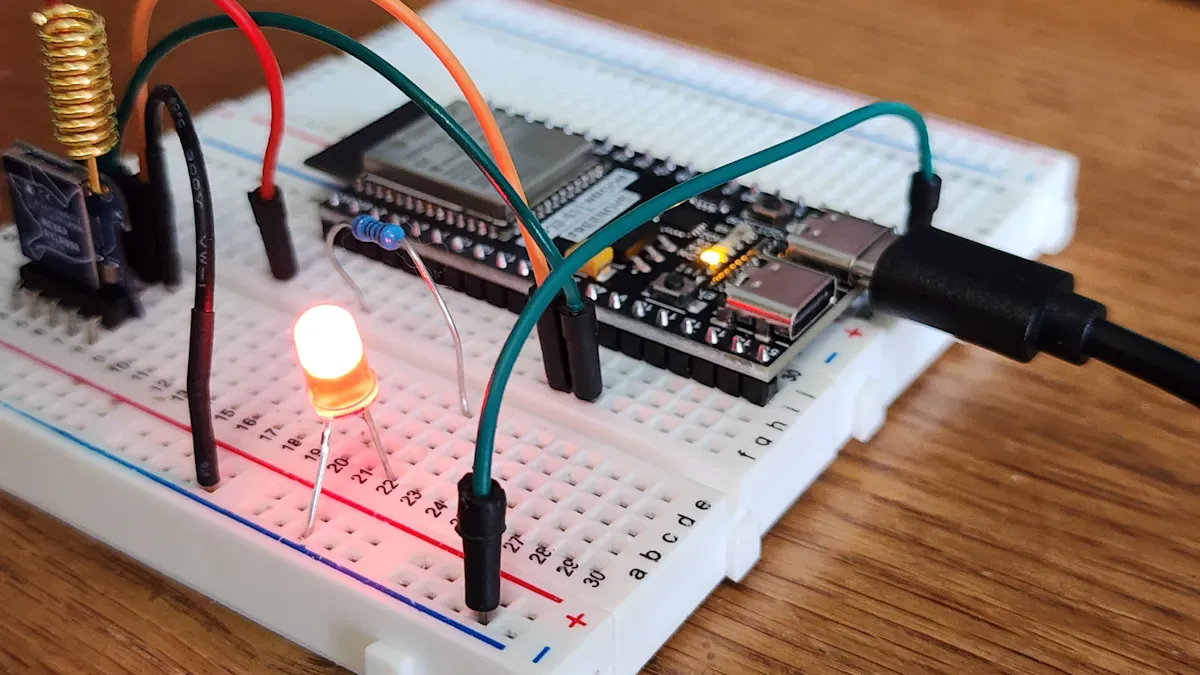
This miniature OLED display is very common in DIY projects. The 0.96-inch I2C monochrome OLED is popular because it is bright and clear. You can see the screen even when you are outside. It is easy to connect because it only needs a few wires. This makes it good for simple projects. The screen does not use much power, so it works well with batteries.
Here are some things that make it special and where you might use it:
Standout Features | Common Use Cases |
|---|---|
Low power consumption | Portable gadgets |
High contrast | Sensor readouts |
Simple wiring | Wearable tech |
Wide library support | Home automation panels |
You can use this screen with Arduino, Raspberry Pi, and ESP32 boards. There are many libraries, so you can find code fast. If you want to make a raspberry pi project or a sensor display, this screen is a good pick.
Let’s see how it compares to other sizes:
Aspect | 0.96-inch OLED Displays | Other Sizes |
|---|---|---|
Cost | Usually costs more for its small size. | Bigger screens cost less per inch. |
Ease of Use | Easy to wire and program with fewer pins. | Needs more wires and control pins. |
Availability | Only comes in small sizes, under 3 inches. | Many sizes from small to large. |
Durability | Can break from static or water. | Stronger but backlight may wear out. |
Color Accuracy | Colors look bright and lively. | Colors are good but not as bright as OLED. |
Use Cases | Great for small, low-power projects. | Better for big screens or very bright needs. |
Drawbacks | Can get burn-in if image stays too long. | Thicker and not as sharp as OLED. |
Pros:
Very simple to use
Works with many microcontrollers
Good for sensor displays or wearables
Cons:
Only shows one color
Can break easily
Not the cheapest for its size
Tip: If you want a screen that is easy and works well, pick this one. It is the most used miniature OLED display for a reason.
Micro OLED (OLEDoS) advancements
Micro OLED screens with OLEDoS technology are making small electronics better. OLEDoS means OLED on Silicon, which gives you a great display in a tiny space. Each pixel lights up by itself, so you get deep blacks and strong contrast. These screens are very thin and light, so they are good for wearables or flexible gadgets.
Here is what makes OLEDoS different:
Advantage | Description |
|---|---|
True Blacks and High Contrast | Each pixel lights up alone and can turn off, so you get perfect black. |
Ultra-Thin and Lightweight | No backlight, so the screen is thinner and lighter. |
Energy Efficiency | Uses less power, especially with dark images. |
Wide Viewing Angles | Colors and contrast stay good from any angle. |
Flexibility | Can be made on bendy materials for curved or wearable devices. |
High Pixel Density | Has more pixels than regular OLEDs. |
You can use these screens in smart glasses, AR/VR headsets, or as a flexible display for wearables. They work with Arduino and Raspberry Pi, but you may need special drivers for new flexible display tech. If you want a high-res flexible display that bends or fits in small spaces, OLEDoS is a good choice.
Pros:
Bends and is very thin
Has lots of pixels and strong contrast
Saves power with dark images
Cons:
Costs more
Needs gentle handling
May need harder coding
Note: If you want to try new flexible OLED panels, OLEDoS gives you the best flexible display for cool projects.
High-res micro OLEDs (0.39-inch, 1920x1080)
If you want a screen with lots of detail and color, try high-res micro OLEDs like the 0.39-inch 1920x1080 display. This miniature OLED display has many pixels in a small area. You get a sharp display with quick response and deep blacks. These screens are great for AR/VR headsets, camera viewfinders, and other small, powerful devices.
Here is what these screens offer:
Specification | Description |
|---|---|
Image Quality | Looks sharp because it connects right to silicon. |
Contrast Ratio | Has strong contrast for better visuals. |
Color Gamut | Shows many colors that look bright and real. |
Response Time | Changes fast for smooth moving images. |
Brightness | Gets bright enough to see in many places. |
Resolution | High resolution (1920x1080) for clear pictures and words. |
Power Consumption | Uses little power, so batteries last longer. |
Color Accuracy | Shows colors that look true to life. |
You will find these screens in:
Virtual reality headsets
Augmented reality devices
Smartwatches
Camera viewfinders
Other small, high-tech gadgets
You can connect these screens to Raspberry Pi or Arduino, but you must be careful with the flexible display. They cost more than normal OLEDs, but you get a top display for advanced projects.
Pros:
Very high resolution
Fast and smooth images
Good for small, flexible gadgets
Cons:
Costs a lot
Needs special drivers
Harder for beginners to use
If you want the best flexible display for AR or VR, pick this screen. It is a top choice for high-res flexible displays.
Affordable OLED modules for DIY
You do not need to spend much to get a good miniature OLED display for your DIY project. Some of the best cheap screens are SSD1306 and SSD1331 modules. These flexible OLED panels show clear images and work with almost any microcontroller.
Here are some choices:
SSD1331: 96×64-pixel 16-bit color display, also $2-4
These screens are a good deal for your project. You get clear images, even outside. The flexible display tech lets you use them in wearables, home automation, or any raspberry pi project. They are strong and have good software help.
Let’s compare them to LCD kits:
Feature | OLED Assembly | LCD Kit |
|---|---|---|
Visual Fidelity | Looks almost like the original | Loses contrast outside |
Durability | Very strong from the factory | Not as strong as OLED |
Usability | A bit harder to learn for DIY | Easier for people to set up |
Cost | $412–$565 | $195–$272 |
Performance in Daylight | Easy to see in sunlight | Works best inside |
Software Compatibility | Few problems after repair | May have more problems |
Pros:
Very cheap
Flexible and simple to use
Good for most DIY projects
Cons:
Lower resolution than fancy screens
Some only show one color
Takes time to learn wiring and code
Tip: If you want a flexible, good display for your next project and do not want to spend a lot, these modules are a great choice. They give you the benefits of flexible OLED panels and flexible display tech for a low price.
You can use these screens with Arduino, Raspberry Pi, and ESP32. They are great for beginners and anyone who wants to try flexible display tech in their projects.
Buying guide for DIY projects
Choosing by project needs
You want the right screen for your diy electronics projects. Start by thinking about your project type. Do you need a simple sensor readout, a wearable, or a smart home panel? Each project has its own needs. For quick reference, check this table:
Criteria | What to Consider |
|---|---|
Display Type | OLED gives bright colors and deep blacks. |
Resolution | High resolution shows more detail but needs more power. |
Interface Protocol | I2C is simple, SPI is faster. |
Driver Chip | Make sure it works with your board (like SSD1306). |
Power Needs | Check voltage and current, especially for batteries. |
Size | Measure your space before you buy. |
Library Support | Look for good Arduino or Raspberry Pi libraries. |
Tip: Always match your screen to your project’s size and power needs.
Size and resolution tips
Screen size changes how you use your project. Small screens fit in wearables or tiny gadgets. Medium screens work well for smart home panels. Large screens help in industrial electronics. Here are some quick tips:
Small screens are best for portable and space-saving projects.
Medium screens balance detail and portability.
Large screens suit complex controls or when you need to see from far away.
High resolution looks sharp but can slow down your microcontroller. Pick what fits your project best.
Interface options (I2C, SPI)
You will see I2C and SPI a lot in diy. I2C uses only two wires, so wiring stays simple. SPI is faster and better for moving lots of data, but it needs more pins. Here’s a quick look:
Feature | I2C | SPI |
|---|---|---|
Wires Needed | 2 | 4+ |
Speed | Slower | Faster |
Setup | Easier | Needs more pins |
Best For | Simple projects | Fast graphics, animations |
If you want easy wiring, go with I2C. If you need speed, try SPI.
Budget and value
Most miniature OLED screens cost about $16.50 in 2026. Prices go up for bigger or flexible screens. Think about what you need. Higher resolution and flexible screens cost more. Brand and supply also change the price. For most diy enthusiasts, a basic OLED gives great value.
Power use goes up with more pixels and brightness.
Dark themes save energy and help your screen last longer.
OLED screens look great but can get burn-in if you leave the same image too long.
Note: Check online forums and tutorials. You will find help for wiring, coding, and fixing common mistakes.
Common mistakes to avoid
Mistake | How to Avoid |
|---|---|
Cable fragility | Handle connectors gently |
Firmware errors | Use the right code for your screen |
Compatibility issues | Double-check your board and screen |
Skill level | Start simple, then try harder builds |
You can learn a lot from the diy community. Many people share guides and code for your projects.
Where to buy miniature OLED displays
Trusted online sources
You want to buy a miniature OLED display for your project. You can find many good options online. Here are some trusted places to start:
Adafruit: This site sells high-quality OLED modules. You get clear specs and lots of tutorials.
SparkFun: You can find many display types here. They also have guides for wiring and coding.
Digi-Key and Mouser: These big electronics stores have a wide selection. You can search by size, resolution, and price.
AliExpress and Amazon: You will see many sellers and prices. Look for stores with good reviews and lots of sales.
You can also check the XOD Community forum or Arduino forums if you want to see what other makers buy. People often share links to good deals and trusted sellers.
Official distributors
Buying from an official distributor gives you peace of mind. You know you get a real product. Many big brands list their official sellers on their websites. For example:
Brand | Official Distributor Examples |
|---|---|
Seeed Studio | seeedstudio.com |
Waveshare | waveshare.com |
Adafruit | adafruit.com |
SparkFun | sparkfun.com |
You can also find official stores on Amazon or eBay. Look for the brand name in the seller’s info. If you buy from a distributor, you get support and a warranty.
Avoiding counterfeits
Fake OLED displays can cause problems. They might not work well or last long. Here are some tips to help you avoid them:
Buy from trusted stores or official distributors.
Check reviews and ratings before you buy.
Look for clear specs and real photos.
Ask questions in forums if you are not sure.
If you run into trouble, you can get help from the maker community. Many users on the XOD Community forum talk about fixing SSD1306 OLED issues. They share tips for problems like screen flashing or freezing. Sometimes, changing the screen resolution or using a different board helps. You can also find help on Arduino forums and Reddit.
Tip: Always test your display when it arrives. If you see problems, ask for help online. The community is friendly and ready to help you troubleshoot.
You have many great miniature OLED displays to choose from. The 0.96-inch I2C OLED works best for simple projects and beginners. If you want high detail, try a micro OLED with OLEDoS. Budget shoppers can pick SSD1306 or SSD1331 modules. Advanced makers may enjoy high-res micro OLEDs for AR or VR.
Tip: Check out forums and tutorials. You will find help, code, and ideas from other makers. Happy building! 🚀
Miniature OLED Display Picks for Easy DIY Projects
Choosing the right miniature OLED display for your next DIY electronics project comes down to balancing resolution, size, interface, and driver chip based on your project’s needs. The most popular 0.96‑inch, 128×64 resolution, I2C interface, SSD1306‑based monochrome OLED is the top choice for most beginners due to its excellent ease of use and vast community support.
Below is a breakdown of different screen sizes with a quick comparison table to help you make the best decision.
🛠️ Key Things to Know About OLED Displays
Excellent image quality – OLED pixels are self‑emissive, delivering true black – beautiful in dark environments and far superior to LCD in contrast.
Very low power consumption – When displaying black or dark content, the corresponding pixels simply turn off, making OLEDs ideal for battery‑powered projects.
Understand the “driver chip” – This is the display’s “brain” that interprets your commands. The most common drivers:
SSD1306 – Entry‑level and the first choice for most 0.96‑inch screens.
SH1106 – Often used on 1.3‑inch screens; not fully compatible with SSD1306 – using the wrong driver can cause display shift or white edges.
SSD1327 – Premium choice for 128×128 screens; supports grayscale.
SSD1351 – Drives 1.5‑inch colour RGB OLEDs for rich colour.
📊 Mainstream Miniature OLED Display Comparison
Model / Parameter | 0.96″ SSD1306 (Entry‑level) | 1.3″ SH1106 (Comfortable reading) | 1.5″ 128×128 (Advanced grayscale) | 1.5″ 128×128 (Colour, vibrant) |
|---|---|---|---|---|
Key feature | Smallest size, highly adaptable, most popular | Larger viewing area, more comfortable reading distance | Higher resolution, can show grayscale images | 65K colour, more vivid visuals |
Resolution | 128×64 | 128×64 | 128×128 | 128×128 |
Driver chip | SSD1306 | SH1106 | SSD1327 | SSD1351 |
Interface | I²C / SPI | I²C / SPI | I²C / SPI | SPI (I²C configurable) |
Operating voltage | 3.3V / 5V | 3.3V / 5V | 3.3V / 5V | 3.3V / 5V |
Typical current | ~20mA | ~25mA | Not specified | Not specified |
Physical size (approx.) | ~27×27mm | ~34×30mm | 44.5×37mm | 45×37mm |
Popularity | Best for beginners – huge community, many tutorials | More comfortable to read – a great upgrade | Grayscale – smooth visuals for advanced applications | Vibrant colour – stunning, perfect for eye‑catching projects |
Search keywords | 0.96 OLED, SSD1306, I2C | 1.3 OLED, SH1106 | 1.5 OLED 128×128, SSD1327 | 1.5 RGB OLED, SSD1351, 65K Colour |
💡 How to Choose – A Clear Decision Guide
1. Identify your core application
Wearables or minimalist info display – Choose 0.96″ first. Its small size and pixel density (≈160 PPI) are great for small, sharp text or icons viewed up close.
Desktop dashboard or reading from a distance – 1.3″ is better. The larger pixel pitch provides a more comfortable reading experience at 50‑80 cm.
Need to show graphics or grayscale images – A 1.5″ 128×128 display gives you more pixels for richer visuals than simple text.
Eye‑catching colour UI – If your project needs colour logos, images, or simple animations, the 1.5″ RGB OLED is the way to go.
2. Choose your interface
I²C – Uses only 2 data pins (SDA, SCL). Simplest wiring, but lower refresh rate. Good for static or slowly changing content.
SPI – Uses 4 or more data pins; wiring is a bit more complex, but refresh rate is much higher. Better for simple animations.
3. Consider cost and budget
Miniature OLEDs typically cost between $3 and $15 USD – not a huge burden.
For personal DIY or tight budgets, the 0.96″ screen offers unbeatable value.
4. Other tips
Strongly recommend I2C – Even if a screen supports both SPI and I²C, I²C (only 4 wires) is far simpler than SPI (often 7+ wires) – ideal for beginners and reduces connection headaches.
Be careful with driver chips – less is more
SSD1306 has the best ecosystem support and works seamlessly with powerful libraries like U8g2. Unless you have a specific reason, avoid SH1106 to dodge compatibility issues.Choose reputable suppliers
Look for well‑known brands like Waveshare. Their products usually include good wiki documentation and libraries, helping you avoid common pitfalls.
💎 Summary
Selecting an OLED display for your project is a trade‑off between viewing area, display quality, and development complexity. Here are three clear paths:
Beginner / no‑brainer choice – For most DIY projects, the 0.96″ I2C SSD1306 offers unbeatable community support and the lowest entry barrier – great for quickly prototyping your idea.
Comfortable reading – If you need to look at the screen for longer periods, the 1.3″ SH1106 provides a noticeably more comfortable reading experience.
Advanced / eye‑catching projects – When you need graphics, grayscale, or colour, look at 1.5″ 128×128 resolution screens.
What do you plan to build? A desktop clock, a sensor data monitor, or something else? Tell me your specific project direction, and I can give you a more precise recommendation.FAQ
What microcontrollers work with miniature OLED displays?
You can use Arduino, Raspberry Pi, ESP32, and STM32 boards. Most OLED modules have libraries for these. Check the display’s datasheet for compatibility.
How do I connect an OLED display to my project?
You connect the display using I2C or SPI pins. I2C uses two wires. SPI uses four or more. Follow the wiring diagram in the product manual.
Can I use a miniature OLED outdoors?
Yes, you can use it outside. OLED screens show bright images and deep blacks. Sunlight may affect visibility, so pick a display with high brightness.
Do OLED displays get burn-in?
Yes, burn-in can happen if you leave the same image on too long. You can prevent this by using screen savers or changing the display often.
Where can I find code examples for OLED displays?
You can find code on GitHub, Arduino forums, and Adafruit’s website. Many makers share sample projects and libraries. Try searching for your display’s model.
See Also
Enhance Your Project With These OLED Display Tips
A Beginner’s Guide To Using Transparent OLED Displays
Understanding The Basics Of Transparent OLED Technology