How to Install and Set Up a Horizontal Touch Information Kiosk
Shenzhen TopAdkiosk Display Technology Co., Ltd.
Add.: 2F, Bldg 10, Changfeng Industrial Park, Dongkeng, Fenghuang, Guangming, Shenzhen, China 518132
Mobile/WHATSAPP: 86-138 25769658
Email: marketing@topadkiosk.com topadkiosk@gmail.com
Skype: pghenry1
Wechat: adkioskhenry
English Web.: http://www.topadkiosk.com/
https://www.topkioskdisplay.com/
http://www.ad-kiosk.com/
https://www.toplcddisplay.com/
http://www.multitouchdigitalsignage.com/
https://www.youtube.com/channel/UCYVYNJHxLVEcQD8fuUxXNTA/videos?view_as=subscriber
https://www.facebook.com/TOPADKIOSKSHENZHEN/?ref=bookmarks
You can set up a horizontal touch information kiosk by following easy steps and using the right tools. Careful planning helps you avoid problems like spending too much money and fixing things often. Picking the best hardware and software makes your kiosk work well and keeps it reliable. Safety is important, so you need to secure every part. User navigation can be hard, so you should use a simple design. Look at the table below for big challenges:
Challenge | Impact |
|---|---|
Limits how much you can spend | |
Maintenance challenges | Causes downtime and costs more money |
User navigation complexities | Makes it slow and frustrates visitors |
If you want more information about horizontal touch information kiosks, go to https://www.topkioskdisplay.com/.
Key Takeaways
Set clear goals and know who will use your kiosk. This makes the user experience better.
Pick a spot where people can see and reach your kiosk. Make sure it is safe and easy for everyone to use.
Choose hardware and software that match your budget and needs. This helps your kiosk work well and stay reliable.
Try out every feature of the kiosk before using it. Testing with users finds confusing parts and makes the kiosk work better.
Plan for regular cleaning and updates to your kiosk. This helps it last longer and keeps users happy.
Plan Your Horizontal Touch Information Kiosk
Define Goals and Audience
You start planning your touch screen kiosk project by setting clear goals. Ask yourself what you want the kiosk to do. Do you want to help visitors find information, speed up check-in, or boost sales? You need to know your audience. Are they students, shoppers, or travelers? Understanding your users helps you create a better user experience. Talk to staff and customers. Ask them what they need and if they would use a kiosk. Look at the age, interests, and number of people who visit your space. Review foot-traffic estimates to see how busy your area gets. Align your goals with what your organization wants and what users expect.
Tip: Good user experience makes your touch screen kiosk easy to use and increases satisfaction.
Select Location and Budget
Choose a spot for your kiosk that people can see and reach easily. Place it where visitors pass by often, like entrances or busy halls. Make sure the area is safe and meets accessibility rules. You want everyone, including people with disabilities, to use the kiosk. Decide how many kiosks you need based on visitor demand. Think about the type of kiosk that fits your space. Floor-standing kiosks work well in lobbies. Counter-top models fit small desks. Wall-mounted displays save space in narrow halls.
Set a budget before you buy anything. The cost of a touch screen kiosk ranges from $1,500 to $20,000. The price depends on the size and type of touchscreen. Capacitive screens cost more but last longer. Larger screens raise the price. Plan for extra features like printers or scanners if needed. Make sure your kiosk has reliable internet for updates and support.
Metric | Description |
|---|---|
Tracks how many people use the kiosk and interact with it. | |
Transaction Volume | Shows how often visitors use the kiosk. |
Customer Satisfaction Scores | Measures how happy users are with their experience. |
Note: Planning your touch screen kiosk project carefully helps you avoid problems and makes your kiosk successful.
Hardware Setup for Touch Screen Kiosk
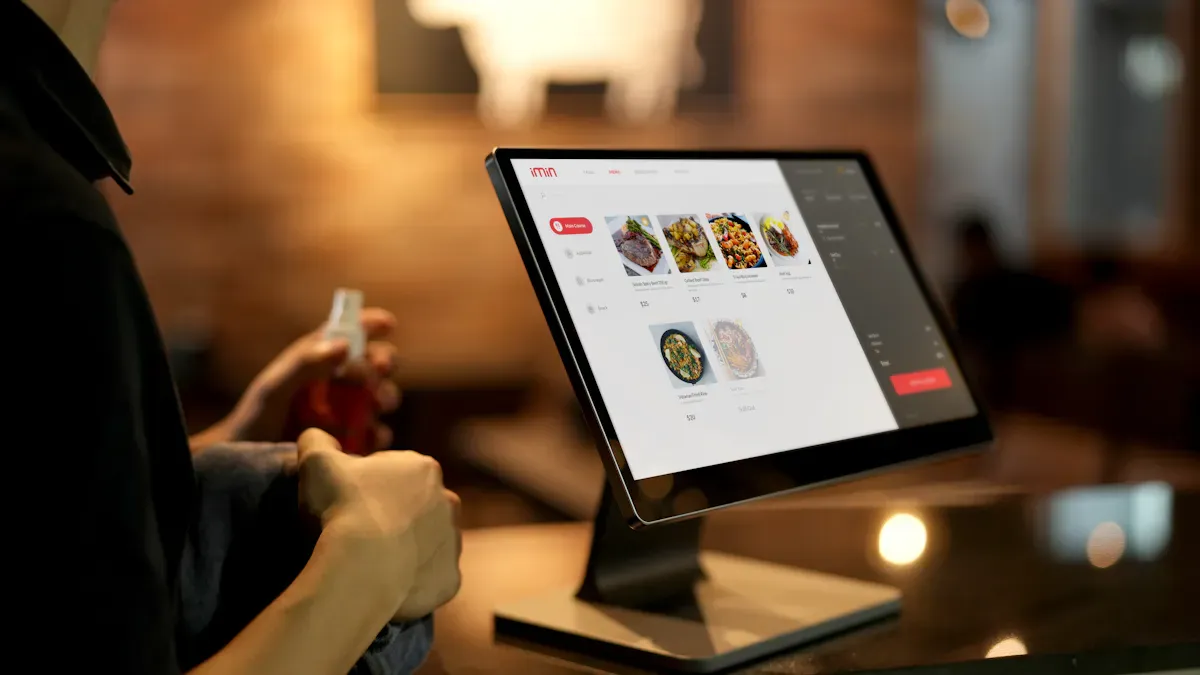
A horizontal touch information kiosk helps people get information fast. You can find these kiosks in places like airports, malls, hospitals, and museums. The main parts are a big touchscreen, a strong case, and simple software. The kiosk lets users touch the screen to use digital content. You can add things like barcode scanners, printers, or speakers to make the kiosk more helpful. The hardware must be strong and dependable because many people use the touchscreen kiosk every day.
Unpack and Position the Kiosk
First, move the kiosk to the spot you chose earlier. Be careful when moving the kiosk. Take off the travel case lid and side panel. This step protects the kiosk from scratches or bumps. Check if there is enough space around the kiosk. Make sure people can walk by the touchscreen kiosk easily. Put the kiosk on a flat surface. The screen should face where most visitors walk. Good placement helps more people use the touchscreen kiosk.
You should know the main hardware parts before setting up the kiosk. These parts are:
Input devices like barcode scanners, keypads, card readers, or RFID
Output devices such as printers, speakers, or LED indicators
CPU and enclosure
Connectivity options for internet or network
Check the screen for cracks or marks. Look at the case to see if it has dents. Test the touchscreen to see if it works when you touch it. If you find any problems, contact your supplier before you go on.
Tip: Keep the touchscreen kiosk away from sunlight or bright lights. This helps users see the screen better.
Secure and Anchor the Kiosk
You need to anchor the kiosk so it stays safe. If the touchscreen kiosk is loose, it can fall and hurt someone. Use anchor points on the base or back of the case. Follow the instructions from the maker. Use bolts or brackets to attach the kiosk to the floor or wall. Make sure the kiosk does not shake. Push gently on the touchscreen kiosk to check if it is steady.
The environment is important for your touchscreen kiosk. Look at the table below for the best conditions:
Environmental Factor | Recommendation |
|---|---|
Weatherproofing | |
IP Ratings | Pick kiosks with IP65 or higher for water and dust protection. |
Climate Resistance | Inside parts should handle temperature changes without problems. |
Screen Visibility | Screens must be easy to see in sunlight for users. |
Durability | Use strong materials like aluminum or stainless steel to handle tough weather. |
Toughened Glass | The screen should be toughened to stop scratches and help users see well. |
If you set up the touchscreen kiosk outside, make sure it has a weatherproof case. Choose a model with toughened glass. This keeps the touchscreen safe from scratches and damage.
Note: If customers cannot reach the kiosk, they may get upset and leave. Always check that everyone can use the touchscreen kiosk.
Connect Power and Data Cables
Plug the power cable into a safe outlet. Use a surge protector to keep the touchscreen kiosk safe from power spikes. Connect the data cables for internet or network. You can use Ethernet or Wi-Fi. Keep cables neat and out of the way. Use cable ties or covers to stop tripping or damage. Good cable management helps the touchscreen kiosk work well.
Here are common mistakes you should avoid when setting up your touchscreen kiosk:
Do not use a messy layout. This makes the touchscreen kiosk hard to use.
Do not put too many choices on one screen. Users get confused.
Make sure the touchscreen reacts quickly to every touch.
Give clear instructions on the touchscreen kiosk.
Prepare for bad lighting. Users must see the screen all the time.
Do not let cables hang loose. This can cause accidents or damage.
Check the warranty for your touchscreen kiosk hardware. Most kiosks have a standard warranty. See the table below for details:
Warranty Type | Typical Term | What’s Covered | Common Exclusions |
|---|---|---|---|
Standard OEM Warranty | 12 months | Parts & labor for main parts | Consumables, accidental damage, software bugs |
Extended Warranty | Up to 3-5 years | Advance replacement parts, phone support | Consumables, improper operator use |
Tip: Register your touchscreen kiosk for warranty help. Keep all papers in a safe place.
A well-installed touchscreen kiosk lasts longer and works better. Take your time with each step. Test the touchscreen and all devices before you start the software setup.
Software Installation for Touchscreen Kiosk
Install Operating System
You must pick the right operating system for your touch screen kiosk. The operating system helps the touchscreen work and connect to other devices. Most kiosks use Windows, Android, Linux, or Chrome OS. Each system is good for different things. Windows is used in government and healthcare. Android is common for small or cheaper kiosks. Linux is strong for infrastructure kiosks. Chrome OS is getting popular in schools and libraries.
Operating System | Key Features |
|---|---|
Windows | Most common, works with many devices, stable in government and healthcare. |
Android | Growing fast, best for small and low-cost kiosks. |
Linux | Used in infrastructure kiosks, growing because of appliance-style controllers. |
Chrome OS | Small use, mostly in education and libraries, growing with ChromeOS Flex. |
Follow the instructions from your hardware provider to start installing. Make sure the touchscreen works when you touch it after setup. Test basic functions before moving to the next step.
Add Interactive Display Screens Software
After you set up the operating system, install software for interactive display screens. This software lets users touch the kiosk and see digital content. There are many platforms for different needs. Some are best for schools, others for stores or museums. Here is a table of top options:
Rank | Platform | Best For | Starting Price (Per Screen/Year) | Stand-Out Feature |
|---|---|---|---|---|
1 | Rocket Alumni Solutions | Education & Donor Recognition | $1,295 | WCAG-certified templates & analytics heatmaps |
2 | Intuiface | Multimedia Storytelling | $1,380 | No-code gesture builder |
3 | Nanonation | Museums & Visitor Centers | $1,500 | Hardware agnostic RDM |
4 | EloView (Android) | Retail fleets | $960 | Built-in device provisioning |
5 | Scala | Corporate Communications | $1,100 | Advanced content rules engine |
6 | Rise Vision | Budget Digital Signage | $360 | Education pricing tier |
7 | Omnivex | Enterprise Wayfinding | $1,800 | Live data visualization |
8 | Moki Total Control | Device Security | $660 | Deep lockdown policies |
9 | Kioware | Browser-Based Kiosks | $250 (one-time) | Lightweight Windows shell |
10 | NoviSign | SMB Interactive Menus | $325 | Drag-and-drop widgets |
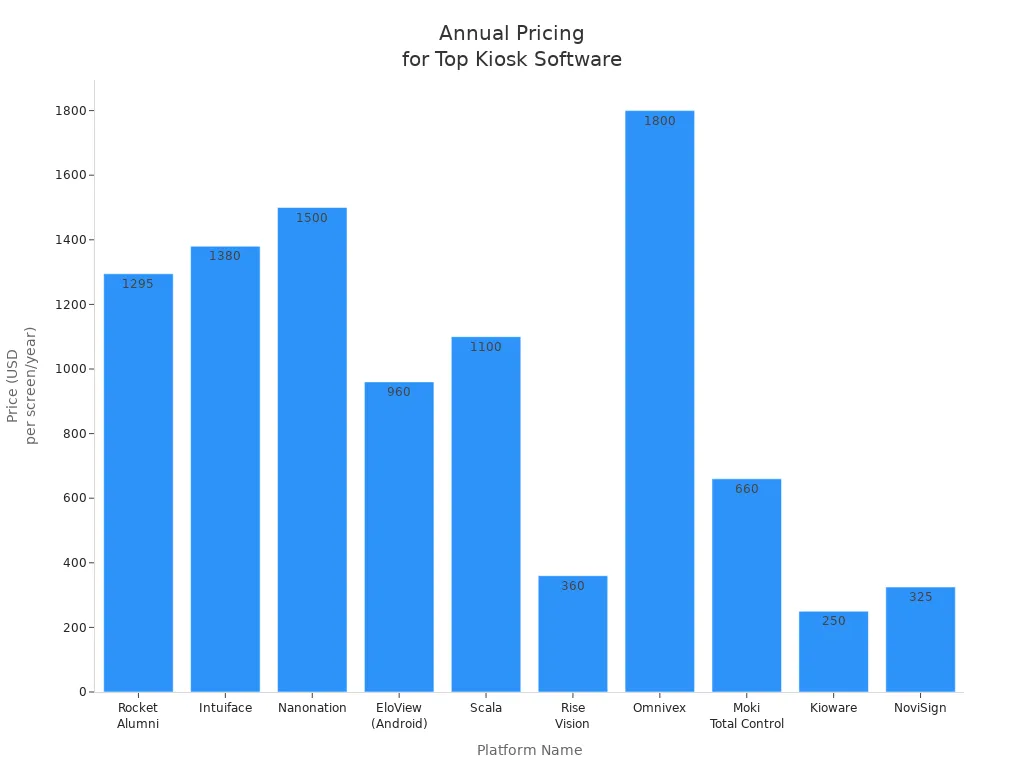
Choose software that fits your goals and budget. Make sure it has all the features you want for your touch screen kiosk.
Configure Kiosk Mode and Content
You need to set up kiosk mode to keep your touchscreen safe and focused. Kiosk mode locks the device so users only see what you want. Follow these steps for a smooth setup:
Give your profile a name and write a short description.
Pick Kiosk from the menu to make a profile for kiosk mode.
Choose single app mode if you want only one app, or multi-app mode for more apps.
Select the apps you want to allow on your touch screen kiosk.
Set device restrictions to control what users can do.
Decide if you want users to access basic settings.
Save and publish your kiosk mode profile.
Test the profile on one device before using it on all kiosks.
Tip: Always test your touchscreen and interactive display screens after setup. Make sure the content is clear and easy to use.
Add accessibility features like large fonts, voice help, and tactile buttons. This helps everyone use your touch screen kiosk, including people with disabilities.
Test, Secure, and Maintain the Kiosk
Test Touchscreen and Features
Test every part of your touch screen kiosk before use. Start by checking if the touchscreen works with each tap and swipe. Try all the buttons and links on the screen. Test the sound, printers, and other devices you added. Ask people like your users to try the kiosk. Watch how they move through the screens. This helps you see if anything is confusing or missing.
Here is a table of important testing steps:
Testing Procedure | Description |
|---|---|
User Testing with Representative Audiences | Check if real users can use the kiosk easily. Watch them to find confusing spots or missing information before everyone uses it. |
Performance Optimization and Load Testing | Make sure the kiosk works well when many people use it. Test if big files or lots of users slow it down. |
Contingency Planning for Technical Issues | Have backup plans for problems like broken parts or lost internet. Train staff and have printed guides ready for these times. |
Tip: Test your touch screen kiosk after every update or change.
Set Up Security and Compliance
Protect your touch screen kiosk from hackers and bad use. Use encryption to keep data safe when stored or sent. Set up multi-factor authentication for staff who manage the kiosk. Only give each person the access they need. Update software often to fix security problems. Add session timeouts so the kiosk logs out users after a short time. Use tamper-proof cases to stop people from opening the kiosk without permission.
Follow rules that help everyone use your touch screen kiosk. The table below shows two important standards:
Standard | Description |
|---|---|
ADA | Kiosks must have features so people with disabilities can use them. |
Section 508 | Kiosks must have built-in accessibility features. These rules make sure everyone can use the kiosk. |
Add speech output for users with vision problems. Give instructions in Braille for starting speech mode. Make sure users can control the volume. At least one way to use the kiosk must work with one hand.
Schedule Maintenance and Updates
Keep your touch screen kiosk working well with regular care. Clean the touchscreen and outside every week with special wipes. Check inside parts like fans, filters, and wires each month. Update the software every three months to fix bugs and improve security.
Cloud-based management lets you update many kiosks at once from any computer. You do not need to visit each kiosk. Remote updates make it easy to change the operating system or add new features. Good content management systems let you update screens with simple tools, even if you are not a tech expert.
Note: Regular updates and cleaning help your touch screen kiosk last longer and work better for everyone.
You can put together a horizontal touch information kiosk by doing these things: First, pick the best hardware and software for your needs. Next, build the kiosk and make sure it is safe. Then, put in the operating system and the kiosk software. After that, check every feature and set up security. Last, plan to clean and update the kiosk often. Use a checklist to keep your kiosk working well and update the software when needed. If you have big problems, ask a professional for help. Keeping good notes and checking the kiosk often helps it last longer and work better for everyone.
FAQ
What is a horizontal touch information kiosk?
You use a horizontal touch information kiosk to give visitors quick access to digital content. The screen sits flat or at a low angle. This design works well for maps, directories, and interactive displays in public spaces.
How do you keep a kiosk clean and working?
You should clean the screen with a soft, damp cloth every week. Check cables and parts each month. Update software often. Regular care helps your kiosk last longer and work better.
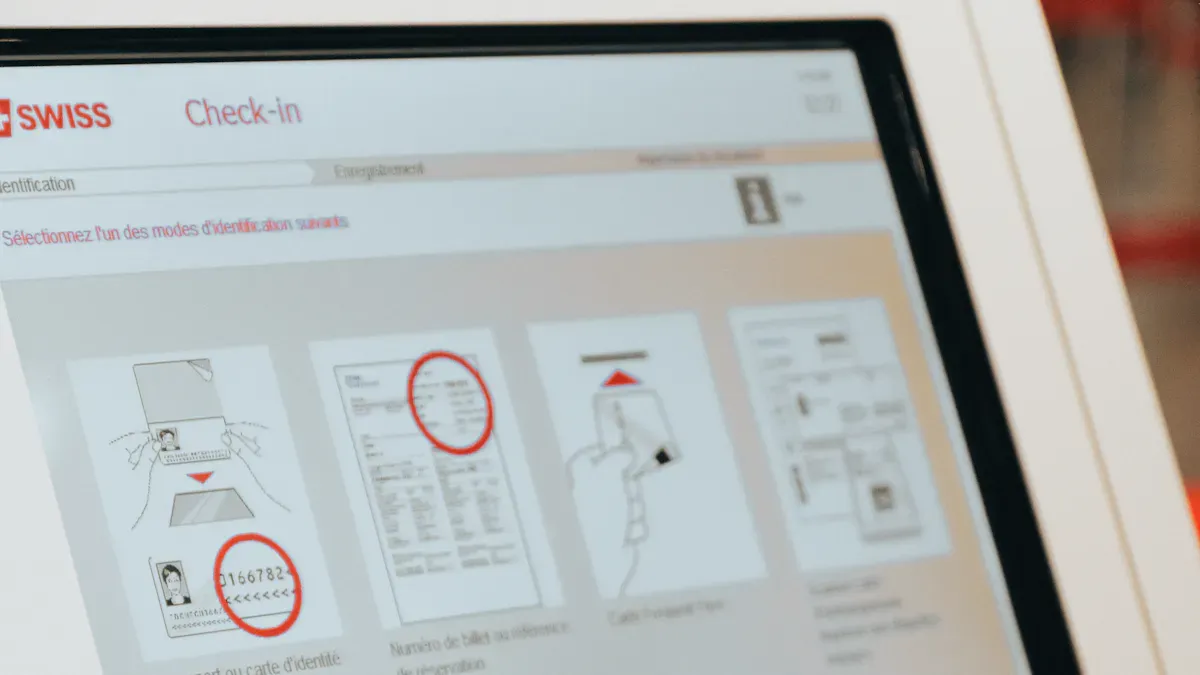
Can you use the kiosk for self-service tasks?
Yes, you can use the kiosk for self-service. Visitors can check in, find directions, or get information without help from staff. This saves time and improves the user experience.
What should you do if the touchscreen stops working?
First, restart the kiosk. If the screen still does not respond, check the cables and power. If you see damage, contact your supplier for help. Always keep support contact details nearby.
How do you update content on the kiosk?
You can update content using cloud-based management tools. These let you change screens and add new information from any computer. You do not need to visit the kiosk in person.
See Also
A Comprehensive Manual for Setting Up Touch Screen Kiosks
Essential Characteristics of Today’s Advanced Touch Screen Kiosks
Discover 10 Unexpected Applications for Touch Screen Kiosks in 2026
Selecting the Top LCD Kiosk Installation Service in Your Area
Effective Solutions for Common Kiosk Problems to Ensure Efficiency