How to Upgrade Your Kiosk to an LCD Display Model in 2026
Add.: 2F, Bldg 10, Changfeng Industrial Park, Dongkeng, Fenghuang, Guangming, Shenzhen, China 518132
Mobile/WHATSAPP: 86-138 25769658
Email: marketing@topadkiosk.com topadkiosk@gmail.com
Skype: pghenry1
Wechat: adkioskhenry
English Web.: http://www.topadkiosk.com/
https://www.topkioskdisplay.com/
http://www.ad-kiosk.com/
https://www.toplcddisplay.com/
http://www.multitouchdigitalsignage.com/
You might wonder if you can upgrade your old kiosk to an LCD display model. The answer is yes, and it makes sense for many reasons. LCD displays cut costs, speed up service, and help you collect valuable data about your customers. You also get a modern look that grabs attention and keeps people coming back. If you plan well and check compatibility, you can avoid problems. Think about safety and, if needed, talk to a pro or check resources like http://www.topadkiosk.com/. Before you start, take a good look at your current setup and ask yourself if you are ready for the change. When you want to know how to upgrade an existing kiosk to an LCD display model, careful steps make all the difference.
Key Takeaways
Upgrading to an LCD display makes your kiosk look better and work better, so more people will want to use it.
LCD displays save energy, are easier to see, and help you serve people faster, which makes customers happier.
Make sure your hardware and software will work with the new display before you upgrade, so you do not have problems.
Use the correct tools and be careful when you install the display, so everything goes well.
Keep your kiosk working well and safe by doing regular maintenance and updating the software.
How to upgrade an existing kiosk to an LCD display model: benefits and considerations

Advantages of LCD displays in kiosks
When you think about how to upgrade an existing kiosk to an lcd display model, you want to know what you gain. LCD screens bring a lot of value to your kiosk. They make everything look brighter and clearer. You get better energy savings, too. Some LED displays in touch screen kiosks can save up to 75% more energy than old models. That means lower bills and less heat. LCD displays also give you wide viewing angles and high contrast, so everyone sees the screen well.
Here’s a quick look at how LCD displays compare to older technology:
Feature | LCD Displays | Older Technologies |
|---|---|---|
Brightness | 350-700 nits | Lower brightness levels |
Contrast | 1,000:1 to 5,000:1 | Lower contrast ratios |
Viewing Angle | 178° | Limited viewing angles |
Energy Efficiency | More energy-efficient with LED | Less energy-efficient |
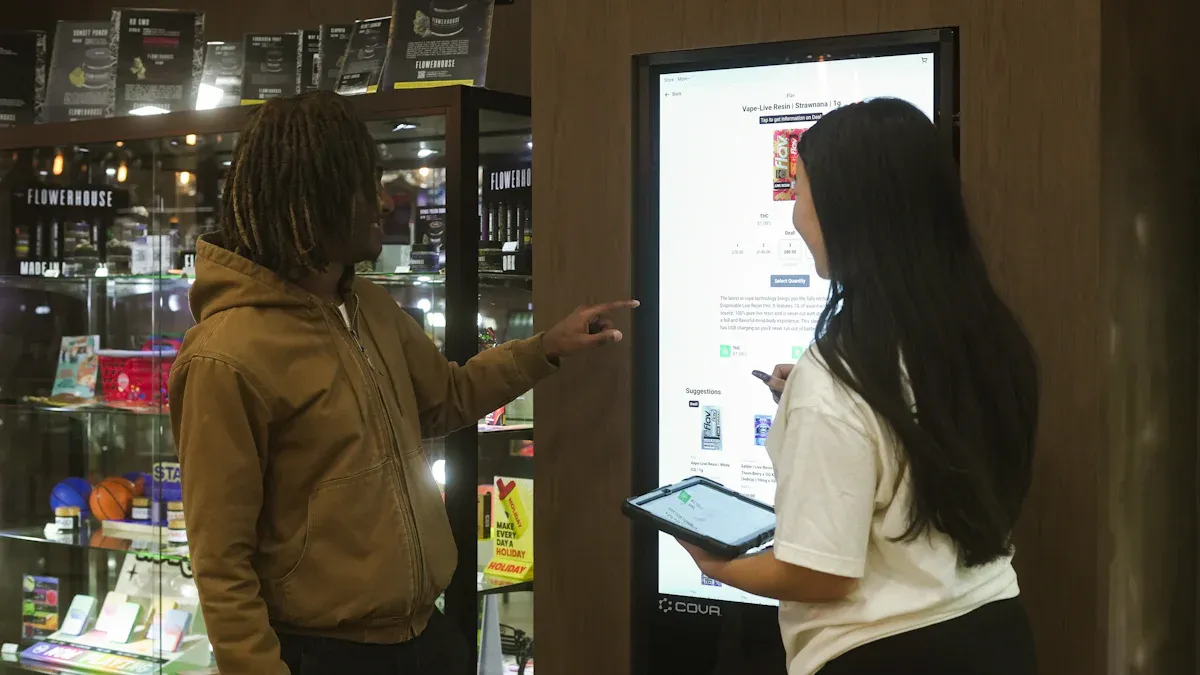
LCD displays also help you serve customers faster and better. You can add touch screens, support many languages, and make your kiosk more accessible. Studies show that 65% of customers visit more often when kiosks are available.
Compatibility and technical requirements
Before you start the process of how to upgrade an existing kiosk to an lcd display model, check your current hardware and software. Ask yourself these questions:
Does your kiosk have enough space for a new LCD display?
Can your system handle touch screen features?
Is your software ready for new display technology?
Think about where you will put your kiosk. Indoor and outdoor locations need different types of LCD displays. Outdoor models need to handle sunlight, rain, and heat. You should also know how you want people to use your kiosk. Will they order food, get information, or buy tickets? This helps you pick the right features.
Potential challenges and how to avoid them
You may face some problems when you learn how to upgrade an existing kiosk to an lcd display model. Here are common issues and tips to avoid them:
Customers might change settings or misuse the kiosk. Use kiosk software for remote management.
Security is important. Update your software often to protect against hackers.
Keeping content fresh can be hard. Use a central system to update all kiosks at once.
Outdoor kiosks face weather and vandalism. Choose weather-resistant displays and add security features.
Network problems can stop your kiosk from working. Pick a good network provider and use backup options.
Tip: Always test your LCD display and software before you let customers use the kiosk. This helps you catch problems early and keeps your kiosk running smoothly.
Hardware, tools, and professional consultation for upgrade
Essential hardware and tools needed
You need the right parts and tools for a smooth upgrade. Let’s see what you will use when you change your monitor. Here is a table that lists the main hardware parts:
Component Type | Description |
|---|---|
Industrial LCD Display | Shows clear pictures and works in sunlight and heavy use. |
Touch Interface | Lets people use the monitor easily and correctly. |
Compute Engine | Runs your kiosk apps and keeps things fast. |
Enclosure | Protects your monitor and makes your kiosk look nice. |
Peripherals | Adds things like printers or scanners for more choices. |
When you start, get these tools ready:
Philips head and flat screwdrivers
Socket set (¾" and 14mm are good)
Adjustable crescent wrench
Diagonal cutting pliers
Wire nuts and tape
Non-contact voltage detector
Appliance dolly (can hold at least 800 lbs)
Penetrating oil for stuck nuts
Sawzall or angle grinder for hard bolts
These tools help you take out old monitors and put in new lcd displays safely.
Ensuring compatibility and safety
You want your monitor to fit and work with your kiosk. Check if your lcd fits the space and connects to your system. Make sure all cables are tight and not broken. Look at the display for damage before you finish the job.
Here is a table with safety steps you should follow:
Safety Precaution | Description |
|---|---|
Hardware Inspection | Find problems early to keep your monitor working well. |
Environmental Monitoring | Watch temperature and humidity to protect your lcd and monitor. |
Physical Component Checks | Make sure every part works and nothing is broken. |
Cable Management | Keep cables neat and safe to stop problems. |
Preventive Maintenance | Regular checks save money and stop breakdowns. |
Theft Protection | Add locks or alarms to keep your kiosk safe. |
Tip: If you are not sure about safety or if things fit, talk to a consulting firm. They can check your system, find risks, and help you plan your upgrade.
Step-by-step guide to upgrade your kiosk to an LCD
Upgrading your kiosk to a new lcd display can feel like a big job, but you can handle it with the right steps. This step-by-step guide will walk you through the installation process, from powering down your old screen to setting up your new lcd touchscreen monitor. If you get stuck, you can always check a video walkthrough for extra help.
Power down and remove existing display
Start by making sure your kiosk is completely powered off. Safety comes first! Here’s how you can safely remove your old display:
Pull on the tab to remove the PIN pad, then disconnect its cable.
Unscrew and disconnect the USB cable from the imaging scanner.
Disconnect and unscrew the receipt printer from its bracket.
Unplug the coupon sensor cable from the I/O daughtercard.
Support the display head with one hand and remove the securing nuts and screws.
Place the display head gently on a cushioned surface to avoid damage.
Tip: Take photos or record a quick video walkthrough as you go. This helps you remember where each part goes during reassembly.
Disconnect old components and prepare for new LCD
Now, get ready for the new installation. Remove any leftover brackets, cables, or hardware that won’t work with your new lcd. Clean the area and check for any damage or dust. Make sure you have all the parts for your new lcd touchscreen monitor before you start the next step.
Double-check that all old cables are out of the way.
Lay out your new cables and accessories so you can reach them easily.
If you’re unsure about any part, watch a video walkthrough for a visual guide.
Install the new LCD display and connect cables
It’s time for the main installation. Here’s what you need to do:
Decide on the right hardware device for your display. Make sure it fits your kiosk.
Connect the monitor to your host device using an HDMI cable. Choose a TV or monitor with HD or 4K resolution for the best results.
Avoid using home screen sharing devices for long-term solutions. They can cause problems later.
Power on the monitor and check that it receives enough power.
Manage your cables neatly to prevent damage during installation.
If you want touchscreen capabilities, make sure the touch interface is connected properly.
Note: Many people find it helpful to have both mechanical and electrical teams check the installation site. This helps you avoid mistakes and keeps your lcd safe.
Configure hardware and calibrate software
After the installation, you need to set up your hardware and software. This step makes sure your new lcd works perfectly.
Connect a mouse if the touch screen is not working right away.
Use calibration tools like
xinput_calibratorto align the touch screen. If you use Windows, follow the calibration instructions for your version.If calibration does not fix touch accuracy, check for damage or consider upgrading to a better model.
Set up digital signage software to manage your content. Here’s a quick look at two popular options:
Software
Description
Features
Mvix
Offers reliable signage players bundled with free cloud CMS.
Interactive wayfinding, touchscreen solutions, and content design services.
SiteKiosk
Provides a comprehensive suite of accessibility features for kiosks.
Customizable accessibility menu, integrated screen reader, and enhanced contrast mode.
Test your display and make sure everything works. Try out all the features, including touchscreen capabilities, to see if they respond correctly.
If you run into problems, check a video walkthrough for troubleshooting tips.
Callout: Always test your new lcd before letting customers use the kiosk. This step-by-step guide helps you catch issues early and keeps your installation smooth.
Selecting the right LCD for your kiosk upgrade
Size, resolution, and feature considerations
You want your lcd to fit your kiosk and look great. Start with the size. Small kiosks work well with 15 to 22-inch screens. Large kiosks can use displays up to 65 inches. Think about your audience. If you expect older users, bigger buttons and larger text help a lot. Higher resolution makes images and text clear. Full HD or 4K lcd screens show sharp details. This helps people read menus or instructions, even in bright light. A good lcd also keeps your guide easy to follow and makes your kiosk stand out.
Here’s a quick table to help you compare:
Selection Criteria | Details |
|---|---|
Environment Assessment | Indoor kiosks need 300-400 nit brightness. Outdoor needs 1000+ nits. |
User Experience | Larger buttons for elderly users. |
Technical Integration | Payment systems must meet PCI rules. Good network is key. |
Use Case | Pick screen size and cost for your application. |
Connectivity options and customization features
You need the right connections for your lcd. Most guides suggest HDMI for video and audio. USB lets you add touch or other devices. Network interfaces help you manage content from far away. Many lcd displays offer cool features. You can get touch screens, tough glass, and even water-resistant models. Some lcds have built-in media players. This makes it easy to update your guide or menu without extra hardware.
Feature | Description |
|---|---|
Touch Technology | Fast, multi-touch for easy navigation. |
Durability Features | Tempered glass, 7H hardness, resists scratches. |
Content Management | Built-in media players, remote updates. |
Screen Sizes | 15 to 65 inches for any kiosk. |
Brightness Levels | 400 to 1000 nits for any light. |
Resolution | Full HD or 4K for sharp images. |
Connectivity Options | HDMI, USB, network for easy setup. |
Energy Efficiency | LED backlighting cuts cost. |
Tip: Look for lcds with IP65 ratings if you need dust or water resistance. This keeps your guide running in tough spots.
Ensuring compatibility with existing kiosk hardware and software
You want your lcd to work with your current system. Test your new lcd with your hardware and software before you finish your upgrade. Try these steps from the guide:
Do load tests to see if your system handles busy times.
Check accessibility with screen readers.
Test your lcd in real lighting.
Watch users try your guide to spot problems.
You can start with one kiosk as a pilot. Fix any issues, then expand. This step-by-step guide helps you avoid mistakes and keeps your cost low.
Troubleshooting common issues during upgrade
Upgrading your kiosk can feel exciting, but sometimes things do not go as planned. You might run into a few common problems. Let’s look at how you can solve them and keep your new display working great.
Display not powering on
If your new display does not turn on after installation, do not panic. You can follow these steps to find the problem:
Step | What to Do |
|---|---|
1 | Plug another device into the outlet to make sure it works. |
2 | Check all cables. Push them in tight. Loose cables can stop power. |
3 | Look at the LED light on the power supply. Green means it works. If not, try a different power source. |
4 | Watch the LED on the monitor. Amber means power but no video signal. Green means power is on, but you may need repairs. |
Tip: Always check the simplest things first. Many problems come from loose cables or outlets that do not work.
Compatibility and calibration errors
Sometimes, the touch screen does not work right. You might see the cursor jump or not respond. Here’s what you can do:
Look at the screen for dirt or cracks.
Check cables for damage.
Make sure the power supply gives steady voltage.
Calibrate the touch screen often to keep it accurate.
You can also fix calibration by following these steps:
Click on Tablet PC Settings.
Find the Display section and choose Calibrate.
Touch the points on the screen as shown.
Save your changes.
Setting a regular calibration schedule helps your display stay accurate, especially if many people use your kiosk every day.
Software configuration problems
You might see blank screens or menus that do not show up right. This can happen if the software does not match your new hardware. Try restarting the system first. If that does not work, check for updates to your digital signage software. Make sure you install the right drivers for your display. If you still have trouble, ask a professional for help. Keeping your software up to date helps your upgrade run smoothly and keeps your kiosk ready for customers.
You can make your kiosk stand out when you upgrade to an LCD display. This change gives you bright graphics, easy touch screens, and better ways for customers to interact. You get large buttons, clear menus, and features that help everyone use your kiosk. With good planning and the right steps, you avoid problems and keep your kiosk running smoothly. If you need help, ask a pro. Your new display will attract more users and help your business grow.
Interactive screens empower users and make self-service simple.
High-resolution displays grab attention and boost engagement.
Accessibility features open your kiosk to more people.
Here is the English version of the guide on how to upgrade your kiosk to an LCD display model in 2026.
How to Upgrade Your Kiosk to an LCD Display Model in 2026
Upgrading your self‑service kiosk to an LCD display in 2026 is a strategic investment that improves user experience, operational efficiency, and future‑proofs your equipment. Below is a practical guide covering upgrade paths, key 2026 trends, cost estimates, and actionable steps.
💡 Overview of Upgrade Paths
Path | Core Action | Pros | Cons | Best For |
|---|---|---|---|---|
🔄 Modular Upgrade | Keep existing enclosure, power supply, and mainboard; replace only the display panel, driver board, and touch module. | Lowest cost, minimal business disruption, quick ROI. | Limited by original chassis dimensions and compatibility. | Working enclosures that only need better display quality and touch responsiveness. |
🏗️ Full Replacement | Retire old unit; purchase a brand‑new, fully integrated LCD kiosk. | Latest performance, seamless integration of new features (AI, sensors), easier maintenance. | Highest upfront investment, longer deployment. | Heavily aged equipment or when you need advanced AI capabilities. |
⚡ AI‑Enabled Retrofit | Add an AI accelerator module (via USB or PCIe) to an existing kiosk to enable on‑device intelligence. | Low‑cost way to add AI without replacing whole kiosk, protects past investment. | Requires some technical integration; software/hardware compatibility matters. | Adding analytics, voice, or computer vision without major hardware changes. |
📈 Why 2026 Is the Right Time to Upgrade
Three technology trends make 2026 an ideal year for LCD kiosk upgrades:
Edge AI integration – New LCD kiosks (or retrofitted ones) can run local AI models for voice ordering, foot‑traffic analysis, and gesture recognition. This reduces cloud latency and improves data privacy. Even older units can gain AI power with modules like the Hailo‑8.
Higher image quality with lower power – Mini‑LED backlights deliver up to 4x the brightness of standard LCDs and 10,000:1 contrast. Meanwhile, new pixel architectures (e.g., Super Pixel) reduce display IC power by ~10% and SoC power by ~25%.
Improved durability for harsh environments – Industrial and outdoor LCDs now operate reliably from -20°C to 60°C and offer IP66/IP65 protection, perfect for outdoor or semi‑outdoor deployment.
💰 2026 Cost Breakdown (Estimates)
Cost Category | Component | Estimated Price (USD) |
|---|---|---|
Hardware (one‑time) | 21.5″ industrial LCD panel | $150 – $400 |
Capacitive touch module (G+G) | $50 – $150 | |
AI‑capable mainboard (e.g., RK3588) or standard board | $100 – $300+ | |
Metal enclosure + mounting kit | $100 – $300 | |
Software & Integration | OS license (Android / Windows IoT) | $50 – $150 |
Application software (retail, healthcare, etc.) | $200 – $1,000+ (or subscription) | |
Custom integration services (backend, POS, etc.) | $1,000 – $5,000+ | |
Recurring costs | CMS / SaaS subscription | Varies (monthly per screen) |
Extended warranty & maintenance | Varies | |
Cloud storage & data transfer | Varies |
Note: Prices are estimates. Actual costs depend on supplier, configuration, and order volume.
🛠️ 2026 Upgrade Action Plan
Step 1 – Assess your current kiosk
Check enclosure condition, power supply health, and existing wiring.
Define what you need: better display? touch? AI? lower power?
Step 2 – Choose your upgrade path
Use the table in the overview section to pick modular, full replacement, or AI retrofit.
Step 3 – Select the right display technology
Use Case | Recommended Technology | Why |
|---|---|---|
Basic indoor information display | STN‑LCD | Mature, stable, cost‑effective for controlled light. |
Premium visual experience | PMOLED or Mini‑LED | True blacks, high contrast, wide viewing angles; Mini‑LED gives extreme brightness. |
Outdoor / semi‑outdoor | High‑brightness industrial LCD (e.g., TES CH‑LCD) | Sunlight readable, wide temperature range, IP dust/water resistance. |
Add AI interactivity | AI module (Hailo‑8) or AI mainboard | On‑device wake‑on‑face, gesture recognition, people counting – low latency, private. |
Domestic / sovereign compliance (China) | Full China‑made solution (e.g., Chuto) | BOE / CSOT display, Kylin/UOS OS, secure supply chain. |
Step 4 – Find reliable suppliers
Display panels & modules: AUO, BOE, Hangzhou Lihuang Technology.
Complete solutions & industrial components: TES (Touch Embedded Solutions) – outdoor screens, AI hosts.
China‑made sovereign solutions: Chuto Technology.
AI acceleration modules: Hailo.
Step 5 – Build your budget
Include hardware + software + integration + first‑year recurring costs. Always ask for a formal quote.
Step 6 – Pilot before rolling out
Run a small‑scale proof of concept (POC) with 1–2 units. Validate performance, software compatibility, and ROI. Then deploy in phases.
💎 Summary
Upgrading to an LCD display kiosk in 2026 is a smart move. Lower power consumption, dramatically better image quality, and affordable edge AI integration mean you can modernise your kiosk fleet while reducing long‑term costs. Whether you choose a modular swap, full replacement, or AI retrofit, the key is to match the technology to your real‑world use case.
Would you like a printable checklist or a one‑page supplier comparison table for 2026?
FAQ
Can I upgrade my kiosk to an LCD display by myself?
You can handle basic upgrades if you feel comfortable with tools and electronics. For complex wiring or software, you should call a pro. Safety comes first. If you feel unsure, ask for help.
What size LCD screen works best for my kiosk?
Pick a screen that fits your kiosk and matches your users. Small kiosks use 15–22 inch screens. Large kiosks need up to 65 inches. Bigger screens help older users and show more details.
Do I need special software for a new LCD display?
Yes, you need software that supports your LCD’s features. Touch screens and digital signage need drivers and apps. Check with your LCD supplier for the best options.
How do I keep my new LCD display safe from damage?
Use tempered glass for extra strength. Clean the screen with a soft cloth. Lock your kiosk when not in use. For outdoor kiosks, pick weatherproof models.
See Also
Top LCD Display Kiosks For Retail Spaces In 2026
LCD Display Kiosks With Touch Screen Features In 2026
Selecting Sturdy LCD Display Kiosks For Shopping Malls In 2026
Leading LCD Display Kiosk Producers To Consider In 2026
Selecting The Ideal LCD Digital Signage For Your Company In 2026