How to set up a self-service kiosk

Add.: 2F, Bldg 10, Changfeng Industrial Park, Dongkeng, Fenghuang, Guangming, Shenzhen, China 518132
Mobile/WHATSAPP: 86-138 25769658
Email: marketing@topadkiosk.com topadkiosk@gmail.com
Skype: pghenry1
Wechat: adkioskhenry
English Web.: http://www.topadkiosk.com/
https://www.topkioskdisplay.com/
http://www.ad-kiosk.com/
https://www.toplcddisplay.com/
http://www.multitouchdigitalsignage.com/
https://www.youtube.com/channel/UCYVYNJHxLVEcQD8fuUxXNTA/videos?view_as=subscriber
https://www.facebook.com/TOPADKIOSKSHENZHEN/?ref=bookmarks
You can set up a self-service kiosk by following a clear process that starts with planning and ends with ongoing management. Many consumers now prefer self-service options, with over 66% choosing kiosks instead of staff interaction. You need to focus on steps like selecting hardware and software, preparing the site, customizing the interface, and training staff. Common challenges include integrating with existing systems and designing kiosks for all age groups. A well-designed kiosk improves customer satisfaction and keeps your business running smoothly.
Key Takeaways
Define clear goals for your self-service kiosk to enhance customer experience and reduce wait times.
Choose user-friendly hardware and software that integrates well with your existing systems for smooth operations.
Ensure your kiosk meets accessibility standards to serve all customers effectively.
Regularly monitor performance and schedule maintenance to keep your kiosk running efficiently and securely.
Customize the kiosk interface to reflect your brand and make it easy for users to navigate.
Set Self-Service Kiosk Goals
Define Business Needs
You should start by understanding what you want your self-service kiosk to achieve. In retail and hospitality, these kiosks help you serve customers faster and make their experience better. When you let customers handle their own transactions, you reduce wait times and improve satisfaction. You also make your business run more smoothly and cut down on costs. Many businesses use kiosks to manage busy periods, improve order accuracy, and give customers more control over their choices.
Tip: Write down your main goals, such as reducing lines, increasing sales, or making service available all day.
Some common benefits include:
Faster service and shorter wait times
More convenience and flexibility for customers
Fewer mistakes in orders
List Key Features
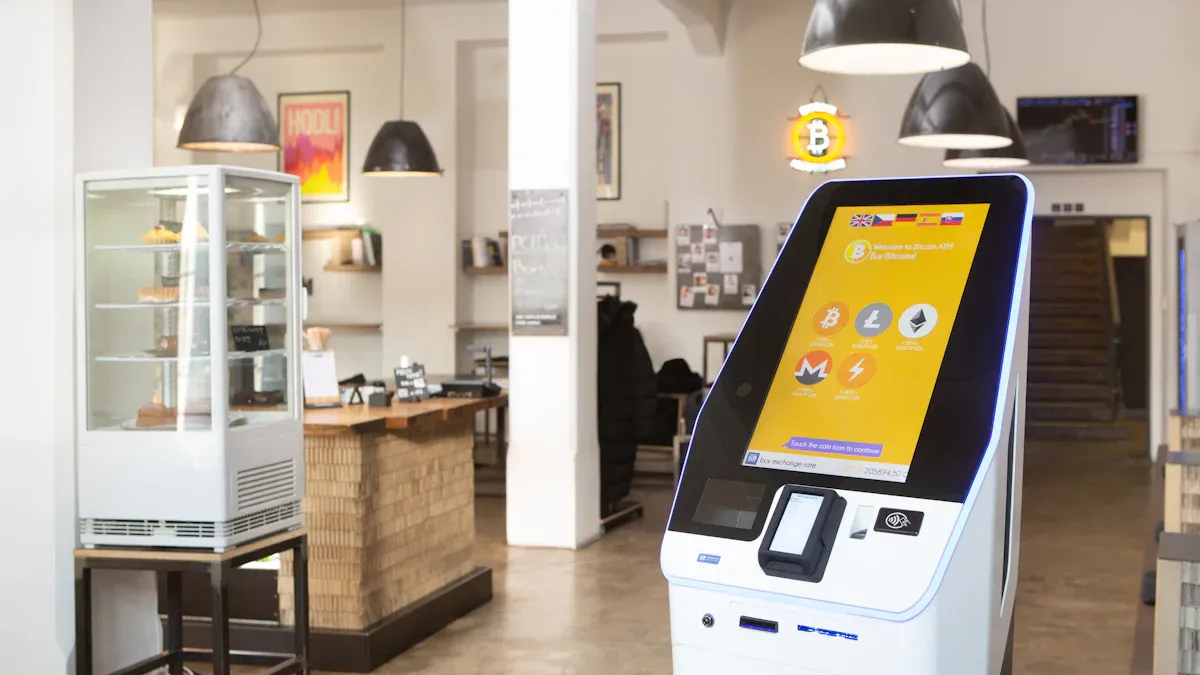
Next, you need to decide which features matter most for your business. A good self-service kiosk should be easy to use and secure. Many businesses look for features like an intuitive touchscreen, cloud-based management, and strong security. You may also want options for mobile payments or contactless cards. The table below shows some popular features and their descriptions:
Feature | Description |
|---|---|
Intuitive Touchscreen | User-friendly interface for easy navigation |
Cloud-based Management | Manage and update kiosks from anywhere |
Payment Management Options | Accept mobile, contactless, and card payments |
Physical Security | Protects the kiosk from theft or damage |
Remote Monitoring | Alerts you to problems and helps you fix them quickly |
Plan Budget and Timeline
You should set a clear budget and timeline before you start. The cost of a self-service kiosk depends on the type you choose. For example, a floor-standing or countertop unit usually costs between $2,000 and $3,000. Outdoor systems can cost more, from $4,000 to $15,000. Handheld devices are less expensive, ranging from $300 to $800. Planning your budget helps you avoid surprises and keeps your project on track.
Kiosk Type | Cost Range |
|---|---|
Floor-standing | $2,000 - $3,000 |
Countertop | $2,000 - $3,000 |
Handheld Devices | $300 - $800 |
Outdoor Systems | $4,000 - $15,000 |
Note: Give yourself enough time for each step, from choosing hardware to training staff.
Choose Hardware and Software
Select Kiosk Hardware
You need to choose hardware that matches your business needs and goals. Start by looking for devices that work well with your current systems. Hardware should be easy for customers to use and strong enough to last in busy places. Many businesses also want kiosks that show their brand and can be customized. When you compare options, check for features like upselling tools, clear data reports, and good support from the vendor. Here are some important points to consider:
Make sure the hardware fits with your existing systems.
Look for options that let you add your logo or colors.
Choose screens that are simple for everyone to use.
Pick kiosks that help you suggest extra products.
Check if the device gives you useful reports.
Select hardware that is tough and looks good.
Ask about training and support.
Compare prices and think about your return on investment.
Tip: Enroll your devices in a Mobile Device Management (MDM) system. This helps you keep them secure and makes updates easier.
Pick Kiosk Software
The right software makes your self-service kiosk easy to use and manage. Choose software that lets you update menus, prices, or products from anywhere. Good software should also protect customer data and work with different payment types. Look for programs that offer cloud-based management, remote monitoring, and strong security features. Test the software to see if it is simple for both staff and customers.
Integrate with Systems
You should connect your kiosk to your point-of-sale (POS) and inventory systems. This keeps prices and stock levels correct. Use real-time syncing to stop customers from buying items that are out of stock. Many businesses use pre-built connectors or APIs to link kiosks with their current systems. Here are some best practices:
Best Practice | Description |
|---|---|
Real-time inventory sync | Prevents selling items that are not available. |
Bidirectional data flow | Updates sales and reports right away. |
Promotion synchronization | Makes sure discounts and specials work at the kiosk. |
Customer loyalty integration | Lets customers earn and use points at the kiosk. |
Seamless communication with POS | Keeps prices and stock levels accurate by linking the kiosk with the POS system. |
Note: A well-integrated self-service kiosk helps you avoid errors and gives your customers a smooth experience.
Prepare Location and Connections
Assess Accessibility
You must make your self-service kiosk easy for everyone to use. Accessibility standards help you meet legal requirements and serve all customers. The Americans with Disabilities Act (ADA) and Section 508 require kiosks in public spaces to be accessible. You should also follow Web Content Accessibility Guidelines (WCAG) 2.1 Level AA for digital interfaces. The table below shows important standards:
Accessibility Standard | Description |
|---|---|
ADA | Makes kiosks accessible to people with disabilities. |
Section 508 | Adds requirements for federal agencies. |
WCAG 2.1 Level AA | Sets digital accessibility rules. |
You need to include features like voice control, adjustable text size, and multiple input methods. Make sure all touchpoints are reachable at a height of no more than 48 inches. Provide clear forward access for wheelchair users. Add tactile input or screen readers and audio navigation.
Set Up Power and Network
Reliable power and network connections keep your kiosk running smoothly. You should use dedicated power lines and wired networks for best results. Make sure you have enough space to meet ADA guidelines. Protect your kiosk from heat, dust, and weather with environmental controls. Use secure network segments and VPNs to keep data safe. Connect all cables and payment systems properly.
Tip: Wired networks offer more stability than wireless connections.
Ensure Security
Security protects your kiosk from tampering and data breaches. You must use data encryption for all communications and avoid storing sensitive data locally. Set access controls so only authorized staff can change settings. Place your kiosk in visible areas to prevent theft or vandalism. Use kiosk mode to restrict user access. Encrypt payment transactions and enable remote management for real-time monitoring. Automatic resets after inactivity help protect user information.
Regular software updates and security checks keep your kiosk safe.
Cyber security prevents data breaches and protects customer privacy.
Self-Service Kiosk Setup
Install Hardware
You need to follow a step-by-step process to install your self-service kiosk hardware. Start by placing the kiosk in the chosen location. Make sure the area is clean and has enough space for users. Connect the power supply and network cables. Secure the kiosk to the floor or counter to prevent movement or theft. Attach any accessories, such as printers or scanners, according to the manufacturer’s instructions. Double-check all connections before turning on the device.
Here is a simple checklist to guide you:
Place the kiosk in the prepared spot.
Connect power and network cables.
Secure the kiosk to prevent tampering.
Attach accessories like printers or card readers.
Turn on the device and check for startup errors.
Tip: Always follow the manufacturer’s guidelines for installation to avoid damage and ensure safety.
Configure Software
After installing the hardware, you need to set up the software. Begin by installing the kiosk application on the device. Use the instructions provided by your software vendor. Connect the software to your point-of-sale and inventory systems. This step keeps prices and stock levels up to date. Set up user accounts and permissions for staff. Test the software to make sure it works as expected.
Sometimes, you may face issues during configuration. The table below shows common problems and how to fix them:
Issue Type | What to Check | How to Fix |
|---|---|---|
No Network or Connectivity Failure | Look for signal indicators or Ethernet activity. | Reboot the kiosk and router if accessible. |
Test connectivity from another device nearby. | Reconnect to the network and check credentials. | |
Check if the issue is local or network-wide. | Notify IT if the issue affects multiple kiosks. | |
App Crashing or Kiosk Mode Not Holding | Check if the kiosk is still locked to its app. | Relaunch the kiosk application or restart the system. |
Look for any error messages or logs. | Roll back recent changes if instability continues. | |
Confirm recent software installations or updates. | Reapply kiosk mode settings or reinstall the app configuration. |
Note: Test each function after setup to catch problems early.
Customize Self-Service Kiosk Interface
You should personalize the interface to match your brand and make it easy for users. Add your logo, colors, and images. Arrange menu items or services in a clear order. Use large buttons and simple language. Make sure the interface works well for all ages and abilities.
To increase sales, add upsell prompts and cross-selling options. For example, suggest a combo meal when a customer selects a burger. Use automation so every transaction gets an upsell offer. Sync the kiosk with your inventory system to show only available items.
Strategy | Description |
|---|---|
Menu Bundling | Create sets like a burger, fries, and a drink to increase order value and make choices easier. |
Automation | Apply upselling logic to every transaction for consistent results. |
Cross-Selling | Suggest complementary products to enhance the shopping experience and boost sales. |
Tip: Live inventory syncing prevents customers from ordering out-of-stock items.
Enable Payment and Security
You must set up secure payment options for your self-service kiosk. Follow payment security standards to protect customer data. Use PCI DSS-compliant systems to control cardholder data and reduce fraud. Make sure your kiosk supports EMV for contactless payments. Use end-to-end encryption for all payment data. Do not store sensitive information on the kiosk.
PCI standards help control cardholder data and prevent credit card fraud.
EMV compliance is required for contactless transactions.
Use tamper-resistant hardware and encrypt payment data during transit.
Never store payment data locally on the device.
Note: Secure payment processing builds trust with your customers.
Test and Launch
Before you open your self-service kiosk to the public, you need to test every part. Run full check-in cycles to make sure all hardware and software work together. Test the payment system, printer, and network connection. Try different transactions to see if the kiosk responds correctly. Check that upsell prompts and inventory syncing work as planned.
Test hardware under heavy use to find hidden problems.
Make sure all features work together smoothly.
Fix any issues before launch to avoid user frustration.
Train your staff before launch. Teach them basic troubleshooting steps, customer assistance, and how to monitor the system. Use hands-on practice and real-life scenarios. Station an employee near the kiosk during busy times to help customers.
Support Option | Description |
|---|---|
Manufacturer Support | Offers remote monitoring, software updates, and proactive maintenance. |
Third-Party Service Providers | Provide extra support and maintenance services. |
In-House IT Teams | Handle troubleshooting and ensure quick responses to issues. |
Tip: Well-trained staff and strong support resources keep your self-service kiosk running smoothly.
Monitor and Maintain
Track Performance
You need to monitor your self-service kiosk to understand how well it works. Tracking performance helps you spot trends and fix problems quickly. You can use key performance indicators (KPIs) to measure success. These KPIs show how many transactions happen, how much money each transaction brings in, and which products customers like best. You also see if complaints go down and if you save on labor costs. The table below shows common KPIs:
KPI Type | Description |
|---|---|
Transactional KPIs | Number of transactions, revenue per transaction, hourly activity |
Soft Metrics | Reduced complaints, labor savings, improved efficiency |
Informational KPIs | Customer behavior, popular pages, frequently scanned products |
Tip: Review these metrics often to keep your kiosk running smoothly and to improve customer satisfaction.
Schedule Maintenance
You must create a maintenance schedule to prevent downtime. Daily cleaning keeps the kiosk looking good and working well. Weekly or monthly checks help you find worn-out parts before they break. Preventive maintenance includes cleaning, software updates, hardware inspections, and staff training. Regular inspections and remote monitoring help you catch issues early. Common problems include frozen screens, paper jams, faulty card readers, and unresponsive touch displays. You can avoid these by sticking to your schedule.
Clean the kiosk every day.
Check components weekly or monthly.
Inspect touchscreens, card readers, printers, and barcode scanners.
Update software regularly.
Train staff to spot and report issues.
Consistent maintenance prevents big problems, reduces repair costs, and keeps customers happy.
Update Features
You should update features often to meet changing user needs and technology trends. Collect feedback from customers to learn what they want. Updates work like patches in video games, making the kiosk better and more secure. Recent updates include software improvements, remote management, and automated alerts. These changes help you fix issues faster and keep the kiosk available. Security patches and compliance checks are important for protecting customer data.
Feature Update | Description |
|---|---|
Software Updates | Improve usability and add new functions |
Remote Management | Deploy updates from afar, saving time and money |
Automated Alerts | Notify maintenance teams quickly when problems arise |
Uptime Monitoring | Track kiosk availability and spot outage patterns |
Keep your self-service kiosk up to date to boost performance and enhance the user experience.
You can set up a self-service kiosk by following a clear plan. Start with your goals, choose the right hardware and software, prepare your site, and customize the interface. Launch your kiosk after testing and training staff. The process brings many benefits:
Benefit | Description |
|---|---|
Improve space management | Mount kiosks on walls or counters to save space. |
Let customers order without staff help. | |
Enhance customer control | Customers browse and pay independently. |
Increase revenue while reducing costs | Upselling and anonymous ordering boost sales. |
Improve consumer insight | Track preferences for better service. |
Next, monitor your kiosk, keep content updated, and provide IT support. You can consult vendors or run a pilot to refine your setup.
FAQ
How long does it take to set up a self-service kiosk?
You can usually set up a self-service kiosk in one to two weeks. This includes planning, installation, software setup, and staff training. Large projects may take longer.
What payment methods can a self-service kiosk accept?
Most kiosks accept credit cards, debit cards, mobile wallets, and contactless payments. Some also support cash or QR code payments. Check your software and hardware for supported options.
Do I need to update my kiosk software often?
Yes. You should update your kiosk software regularly. Updates fix bugs, improve security, and add new features. Set a schedule for checking and installing updates.
How do I keep my kiosk secure?
Use strong passwords, enable device management, and update software often. Place your kiosk in a visible area. Encrypt all payment data to protect your customers.
What should I do if my kiosk stops working?
Restart the device.
Check power and network connections.
Contact your support team if problems continue.
Tip: Train your staff to handle basic troubleshooting.
Building a self-service kiosk is an end-to-end process that blends hardware, software, design, and strategy. To make this manageable, I've broken down the journey into six key phases, from initial planning to long-term maintenance.
Phase | Key Focus | Critical Questions to Ask |
|---|---|---|
1. Planning | Defining purpose, environment, and user needs | What is the single primary task? Where will it be used (indoor/outdoor)? Who are the users? |
2. Design | Enclosure, user interface, and accessibility | Is the physical design robust? Is the UI intuitive and large enough? Is it ADA compliant? |
3. Hardware | Selecting and sourcing components | What peripherals (printer, scanner, etc.) are necessary? How will they be integrated? |
4. Software | Choosing the right operating system and platform | What is the best OS? Build custom, use an SDK, or buy a turnkey solution? |
5. Assembly & Build | Putting everything together | Do I build from scratch (e.g., 3D printing) or assemble pre-made parts? |
6. Deployment & Maintenance | Installation, testing, and long-term care | Where is the optimal placement? How will remote monitoring and updates be handled? |
Phase 1: Define Your Kiosk's Purpose and Context
Before purchasing a single component, you must have a clear plan. A successful implementation starts by answering a few foundational questions:
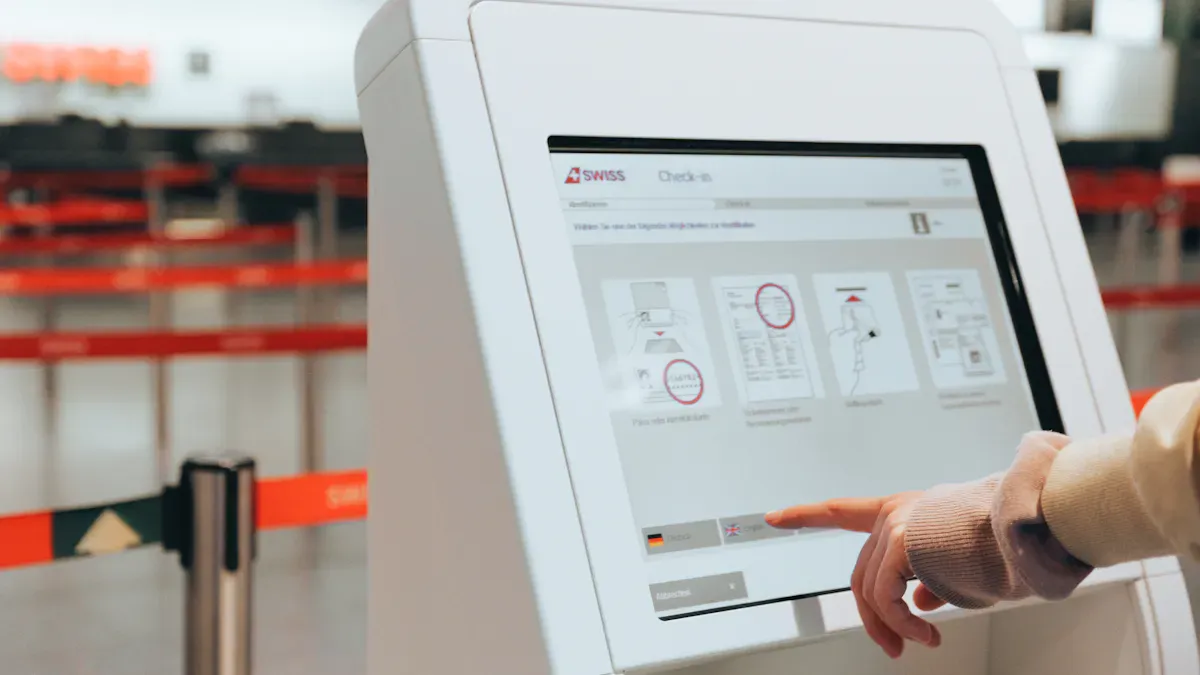
Define the Primary Task: What is the single most important thing you want your kiosk to do? Be specific. Common tasks include placing orders, checking in for appointments, wayfinding, or making payments. The goal should be for a user to complete the core task in under 60 seconds.
Understand Your Environment: Where will the kiosk live?
Indoor: Needs protection from spills and bumps.
Outdoor: Requires a rugged design that is waterproof, UV-resistant, and can handle temperature extremes. All components must be outdoor-rated.
Know Your Users: Your audience will dictate many design choices. Are they likely to be first-time users or repeat customers? Will they be in a hurry? Will they include people with disabilities or who speak other languages?
Create a Scoping Document: Write down all your requirements, including the specific features you need and how the kiosk will integrate with your existing systems (like your Point-of-Sale or inventory management). This document will be crucial when you start talking to vendors.
Phase 2: Design for Usability, Accessibility, and Durability
The design phase covers both the physical cabinet and the on-screen user interface.
Physical & Enclosure Design:
Stability & Safety: The kiosk must be tip-resistant, with rounded edges to prevent injury and easy access panels for servicing.
Durability: Choose materials that match your environment. For a retail store, you might need materials that can resist frequent cleaning and occasional "retail abuse".
Branding: The physical design should align with your brand, be visible from a distance, and look trustworthy.
User Interface (UI) & Experience (UX) Design:
Clarity is King: The first screen should explain what the kiosk does in less than 3 seconds. Keep each screen focused on a single primary action to avoid overwhelming the user.
Touch-Friendly Targets: Use large, high-contrast buttons (touch targets should be at least 9–10mm) and an uncluttered layout. Always include clear "Back," "Cancel," and "Help" buttons on every screen.
Accessibility: This is mandatory, not optional. Design for all users by including features like:
Screen reader support and an audio guide for users with vision impairments.
A headphone jack for private audio in noisy environments.
High-contrast mode and alternative input options (like physical buttons or voice commands) for users with different needs.
Testing: Before launching, test your design with real users from your target audience. Observe where they hesitate or get confused, and measure how long it takes them to complete the main task.
Phase 3: Select Your Hardware Components
The hardware is the backbone of your kiosk. Every kiosk requires a core set of components, with additional peripherals depending on its function.
Core Components:
Cabinet/Enclosure: The outer shell that houses and protects all internal components.
Display: A reliable touchscreen is non-negotiable. Ensure it's readable in your specific lighting conditions (e.g., a sunlight-readable screen for outdoor use).
Computer (CPU): The "brain" of the kiosk. Options include industrial PCs (like LattePanda), single-board computers (like the popular and affordable Raspberry Pi), or even a locked-down tablet.
Common Peripherals:
Receipt Printer: Essential for any transaction-based kiosk. Choose a reliable, high-speed thermal printer.
Card Reader: For handling payments, a PCI-compliant card reader is a must. Look for one that supports EMV chips and contactless payments (NFC).
Barcode Scanner: Needed for retail checkout, library book returns, or event ticket scanning.
Other Peripherals: Based on your needs, you might also include a cash acceptor, speakers, microphone, webcam, or specialized printers (e.g., for wristbands or tickets).
Phase 4: Choose Your Software & Operating System
The software determines what your kiosk can do and how users interact with it. You have several paths to choose from:
Option 1: DIY with a Single-Board Computer (Raspberry Pi)
Best for: Information kiosks, digital signage, or very simple interactive displays.
How it works: You can easily set up a Raspberry Pi to launch a full-screen web browser on boot, turning any display into a dedicated kiosk. This is a great, low-cost way to display a web app or a rotating set of information.
Option 2: Use a Software Development Kit (SDK)
Best for: When you need a custom application but want to avoid building every integration from scratch.
How it works: SDKs provide pre-built code libraries (APIs) for common tasks like processing payments, controlling printers, or handling touch input. For example, the
CUSS2.tsSDK is specifically for airline check-in kiosks, while others are more general.
Option 3: Purchase a Turnkey Software Solution
Best for: Businesses that want a proven, ready-to-go system without internal development resources.
How it works: Companies offer complete software packages tailored to specific industries, like restaurants (self-ordering) or retail (self-checkout). These often include remote management and monitoring platforms.
Kiosk Lockdown Software: Regardless of your chosen OS, you'll likely need software to "lock down" the kiosk. This restricts the device to only your approved applications, preventing users from accessing the underlying operating system or other unauthorized functions.
Phase 5: Assemble and Build the Kiosk
With your plan, design, hardware, and software in place, it's time to put it all together. Your approach will depend on your budget and technical skills.
DIY Path (3D Printing & Assembly): For a fully custom, low-cost solution, you can follow open-source projects like "Open Kiosk" . This approach involves:
Designing a custom enclosure using CAD software (e.g., Fusion 360).
3D printing the housing and internal mounting brackets.
Assembling components like a LattePanda MU, touchscreen, and thermal printer.
Installing open-source software (often web-based) that you can configure for your needs.
Semi-DIY / Integration Path: For a more robust but still hands-on solution, you can purchase commercial-grade components and a pre-fabricated enclosure from a vendor like Star Micronics, which offers housed printers, tablet stands, and secure enclosures. This path is ideal for businesses that want reliable, "kiosk-grade" hardware without building the entire enclosure from scratch.
Professional Path: For large-scale or high-stakes deployments, the safest route is to work with a specialized kiosk manufacturer. They will handle everything from engineering drawings and sheet metal fabrication to final assembly and testing.
Phase 6: Deploy, Test, and Plan for Maintenance
The launch is just the beginning. For long-term success, you need a solid plan for deployment and ongoing care.
Strategic Placement: The kiosk's physical location is crucial. It should be placed along the natural flow of customer traffic, be highly visible, and have enough space to accommodate wheelchair users and avoid bottlenecks.
Pilot Testing: Before rolling out to multiple locations, run a pilot program. Set up one kiosk in a real-world environment, observe users, and note any confusion points. Be prepared to make revisions to the UI or physical setup based on this feedback.
Remote Management & Monitoring: Implement a system for remote monitoring. This allows you to track uptime, check for errors, and manage software updates across your entire fleet of kiosks without needing to visit each one.
Plan for Service: Kiosks are public-facing machines that will eventually need service. Design your enclosure so that common tasks (like loading paper or replacing a card reader) can be done by field technicians without needing to disassemble the entire screen or cabinet.
Summary
Building a self-service kiosk is a rewarding project that can significantly improve your business operations. By following this structured guide—from rigorous planning and user-centered design to careful hardware selection and ongoing maintenance—you can create a reliable, secure, and user-friendly kiosk that serves both your business and your customers well.
If you'd like to dive deeper into any of these phases, such as selecting specific hardware or designing the software interface, just let me know!See Also
Understanding Self-Service Kiosks: Functionality and Operation Explained
Comprehensive Instructions for Setting Up a Touchscreen Kiosk
Effective Solutions for Common Kiosk Problems and Maintenance
Six Essential Tips for Selecting Interactive Kiosks Effectively
Selecting the Right LCD Kiosk Installation Service in Your Area