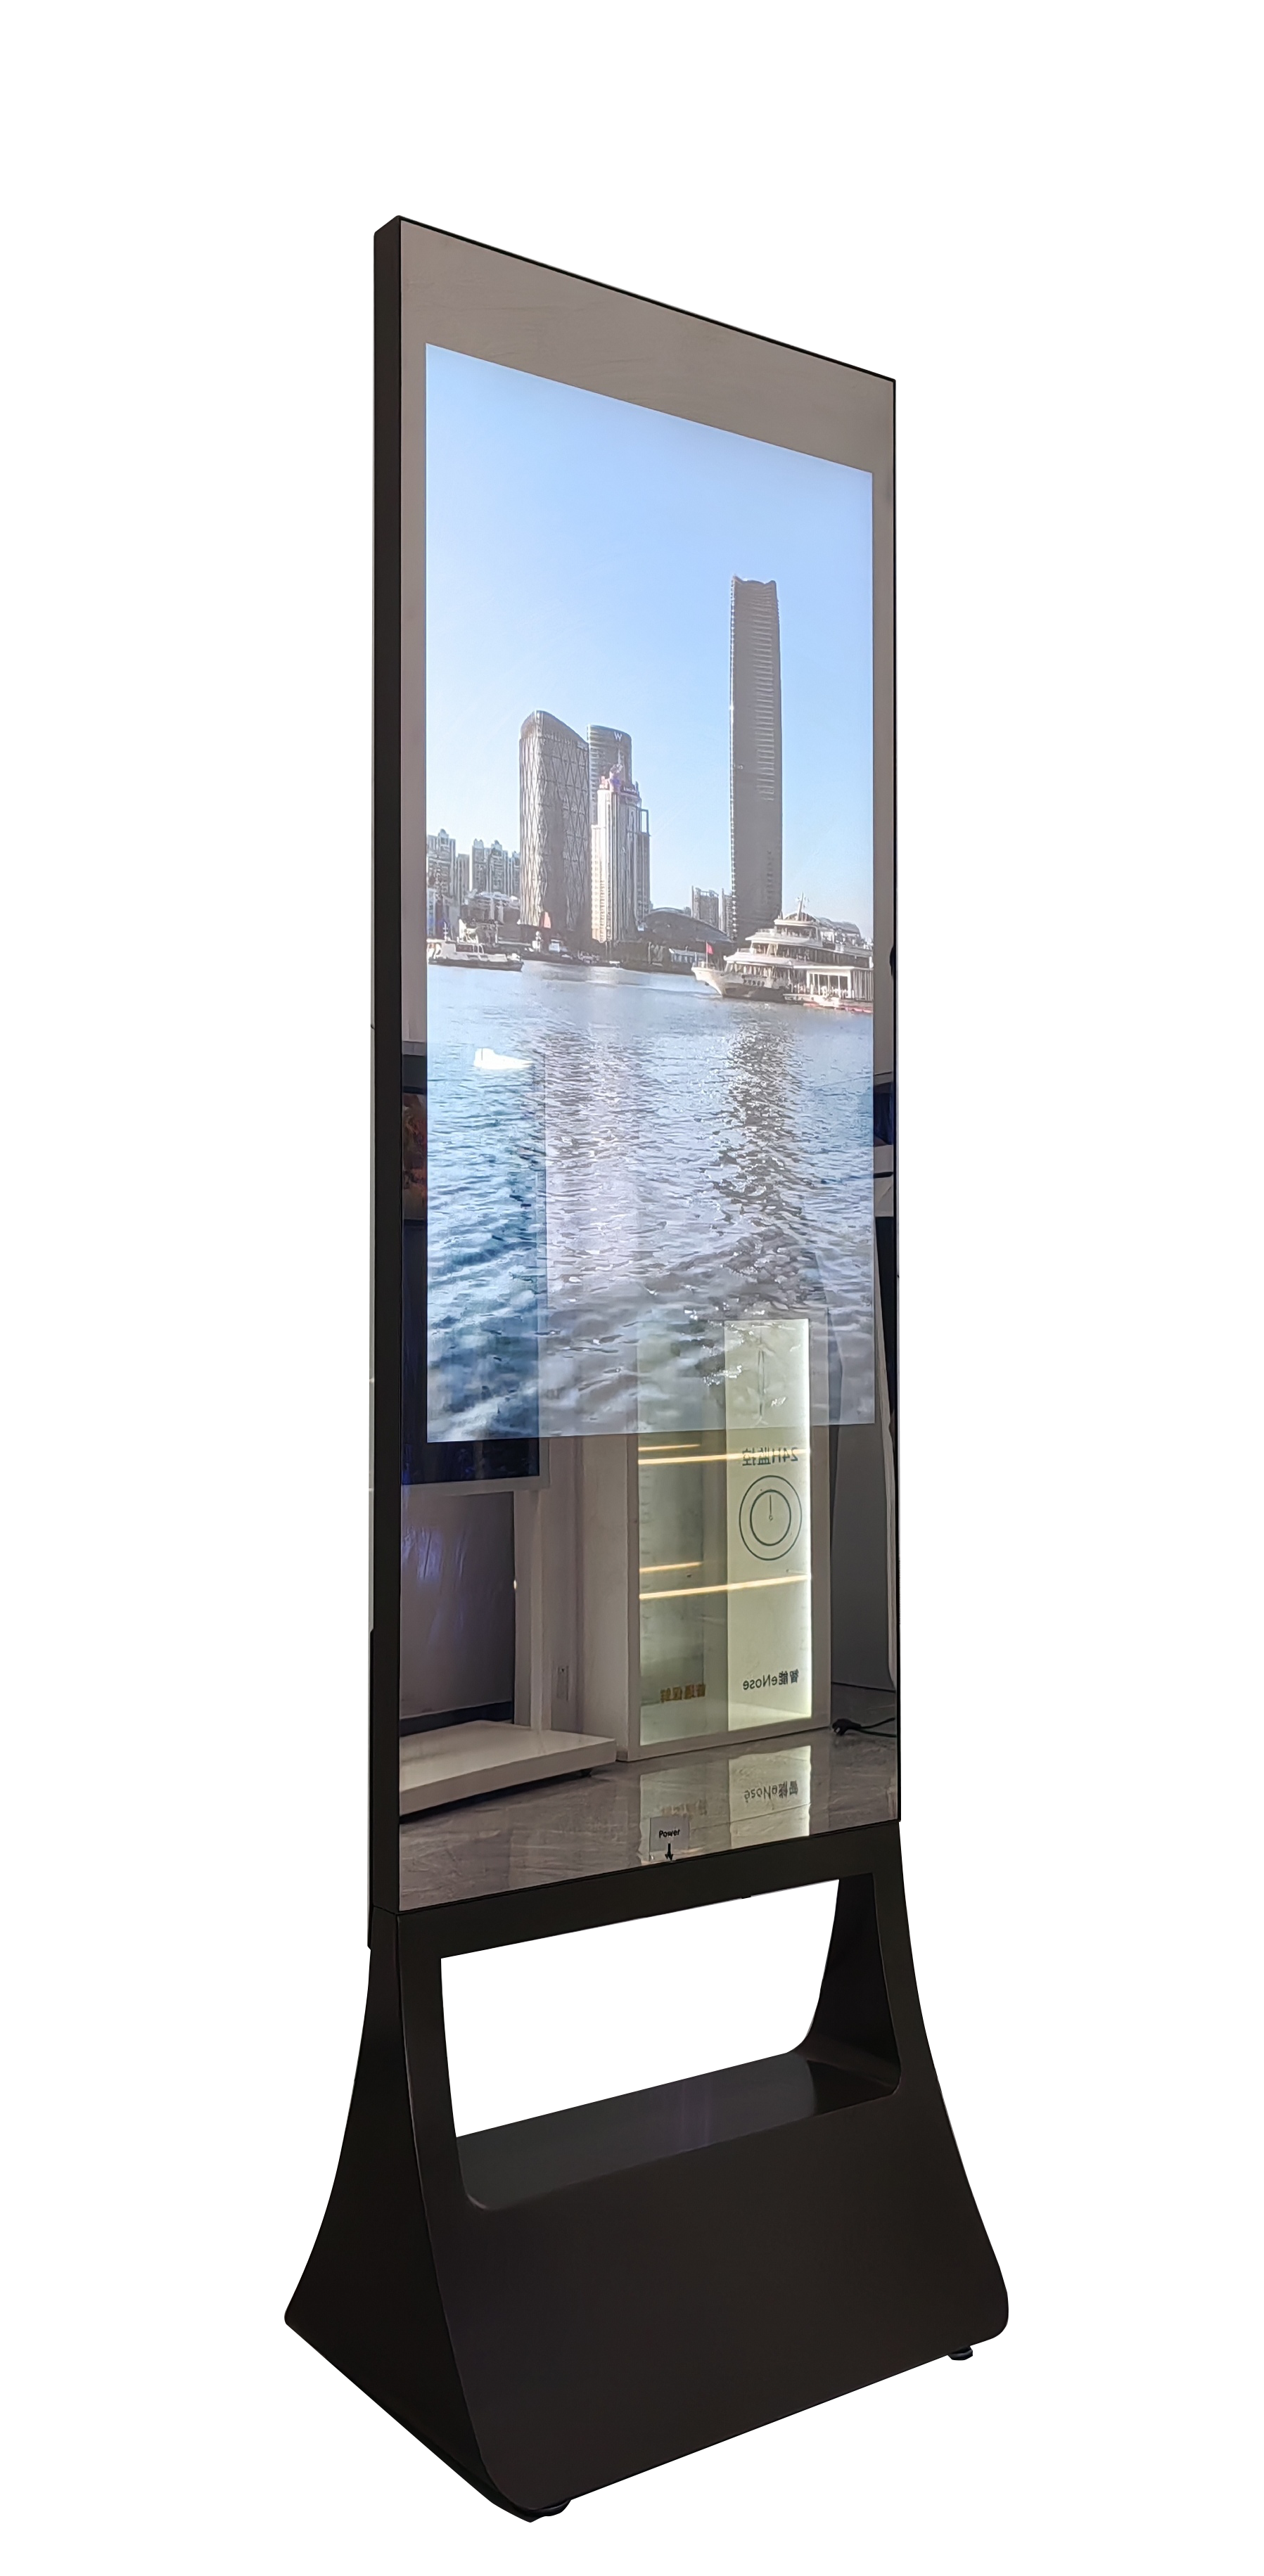
How to make a high quality touch and non touch LCD mirror display?
Shenzhen TopAdkiosk Display Technology Co., Ltd.
Add.: 2F, Bldg 10, Changfeng Industrial Park, Dongkeng, Fenghuang, Guangming, Shenzhen, China 518132
Mobile/WHATSAPP: 86-138 25769658
Email: marketing@topadkiosk.com topadkiosk@gmail.com
Skype: pghenry1
Wechat: adkioskhenry
English Web.: http://www.topadkiosk.com/
You can make a good touch or non-touch lcd mirror display. You need to pick advanced parts and build it carefully. In 2026, touchscreen models are most popular. The table below shows the market share:
Segment | Market Share |
|---|---|
Touchscreen | 55% |
Non-Touchscreen | 45% |
To get the best results, think about market growth. Also, look at smart home integration and new display ideas. Mirror display technology now has curved designs and in-cell touch. These features make the display look better and work better.
Key Takeaways
Pick the right LCD panel for your display. Transmissive panels are good in dark rooms. Reflective panels work best outside in bright places.
Choose mirror glass that is strong and looks nice. Look for glass that does not get smudges easily. This makes cleaning simple.
Make sure all parts fit together well. Check the control board and touchscreen layer. This helps you avoid problems when building.
Clean your display often to keep it looking new. Use a microfiber cloth and safe cleaners. This keeps your display working well.
Plan your spending carefully. Buy good parts and check for warranties. This helps your display last longer and gives you support.
lcd mirror display components
LCD panel types
You must pick the right LCD panel for your lcd mirror display. There are three main kinds: transmissive, reflective, and transflective. Transmissive LCDs use a backlight. This means you see bright pictures in dark rooms. Reflective LCDs work best outside in sunlight. They also save energy. But they do not look good when the room is dark. Transflective LCDs mix both features. You can use them in many different lights. In 2026, IPS panels are the most popular. They give you wide viewing angles and great color. Here is a simple comparison:
Panel Type | Advantages | Disadvantages |
|---|---|---|
TN | Low cost, fast response time | Limited viewing angles, poor color |
VA | Wide viewing angles, better color | Higher cost, screen uniformity issues |
IPS | Excellent color, wide angles | Light leakage, needs more backlight |
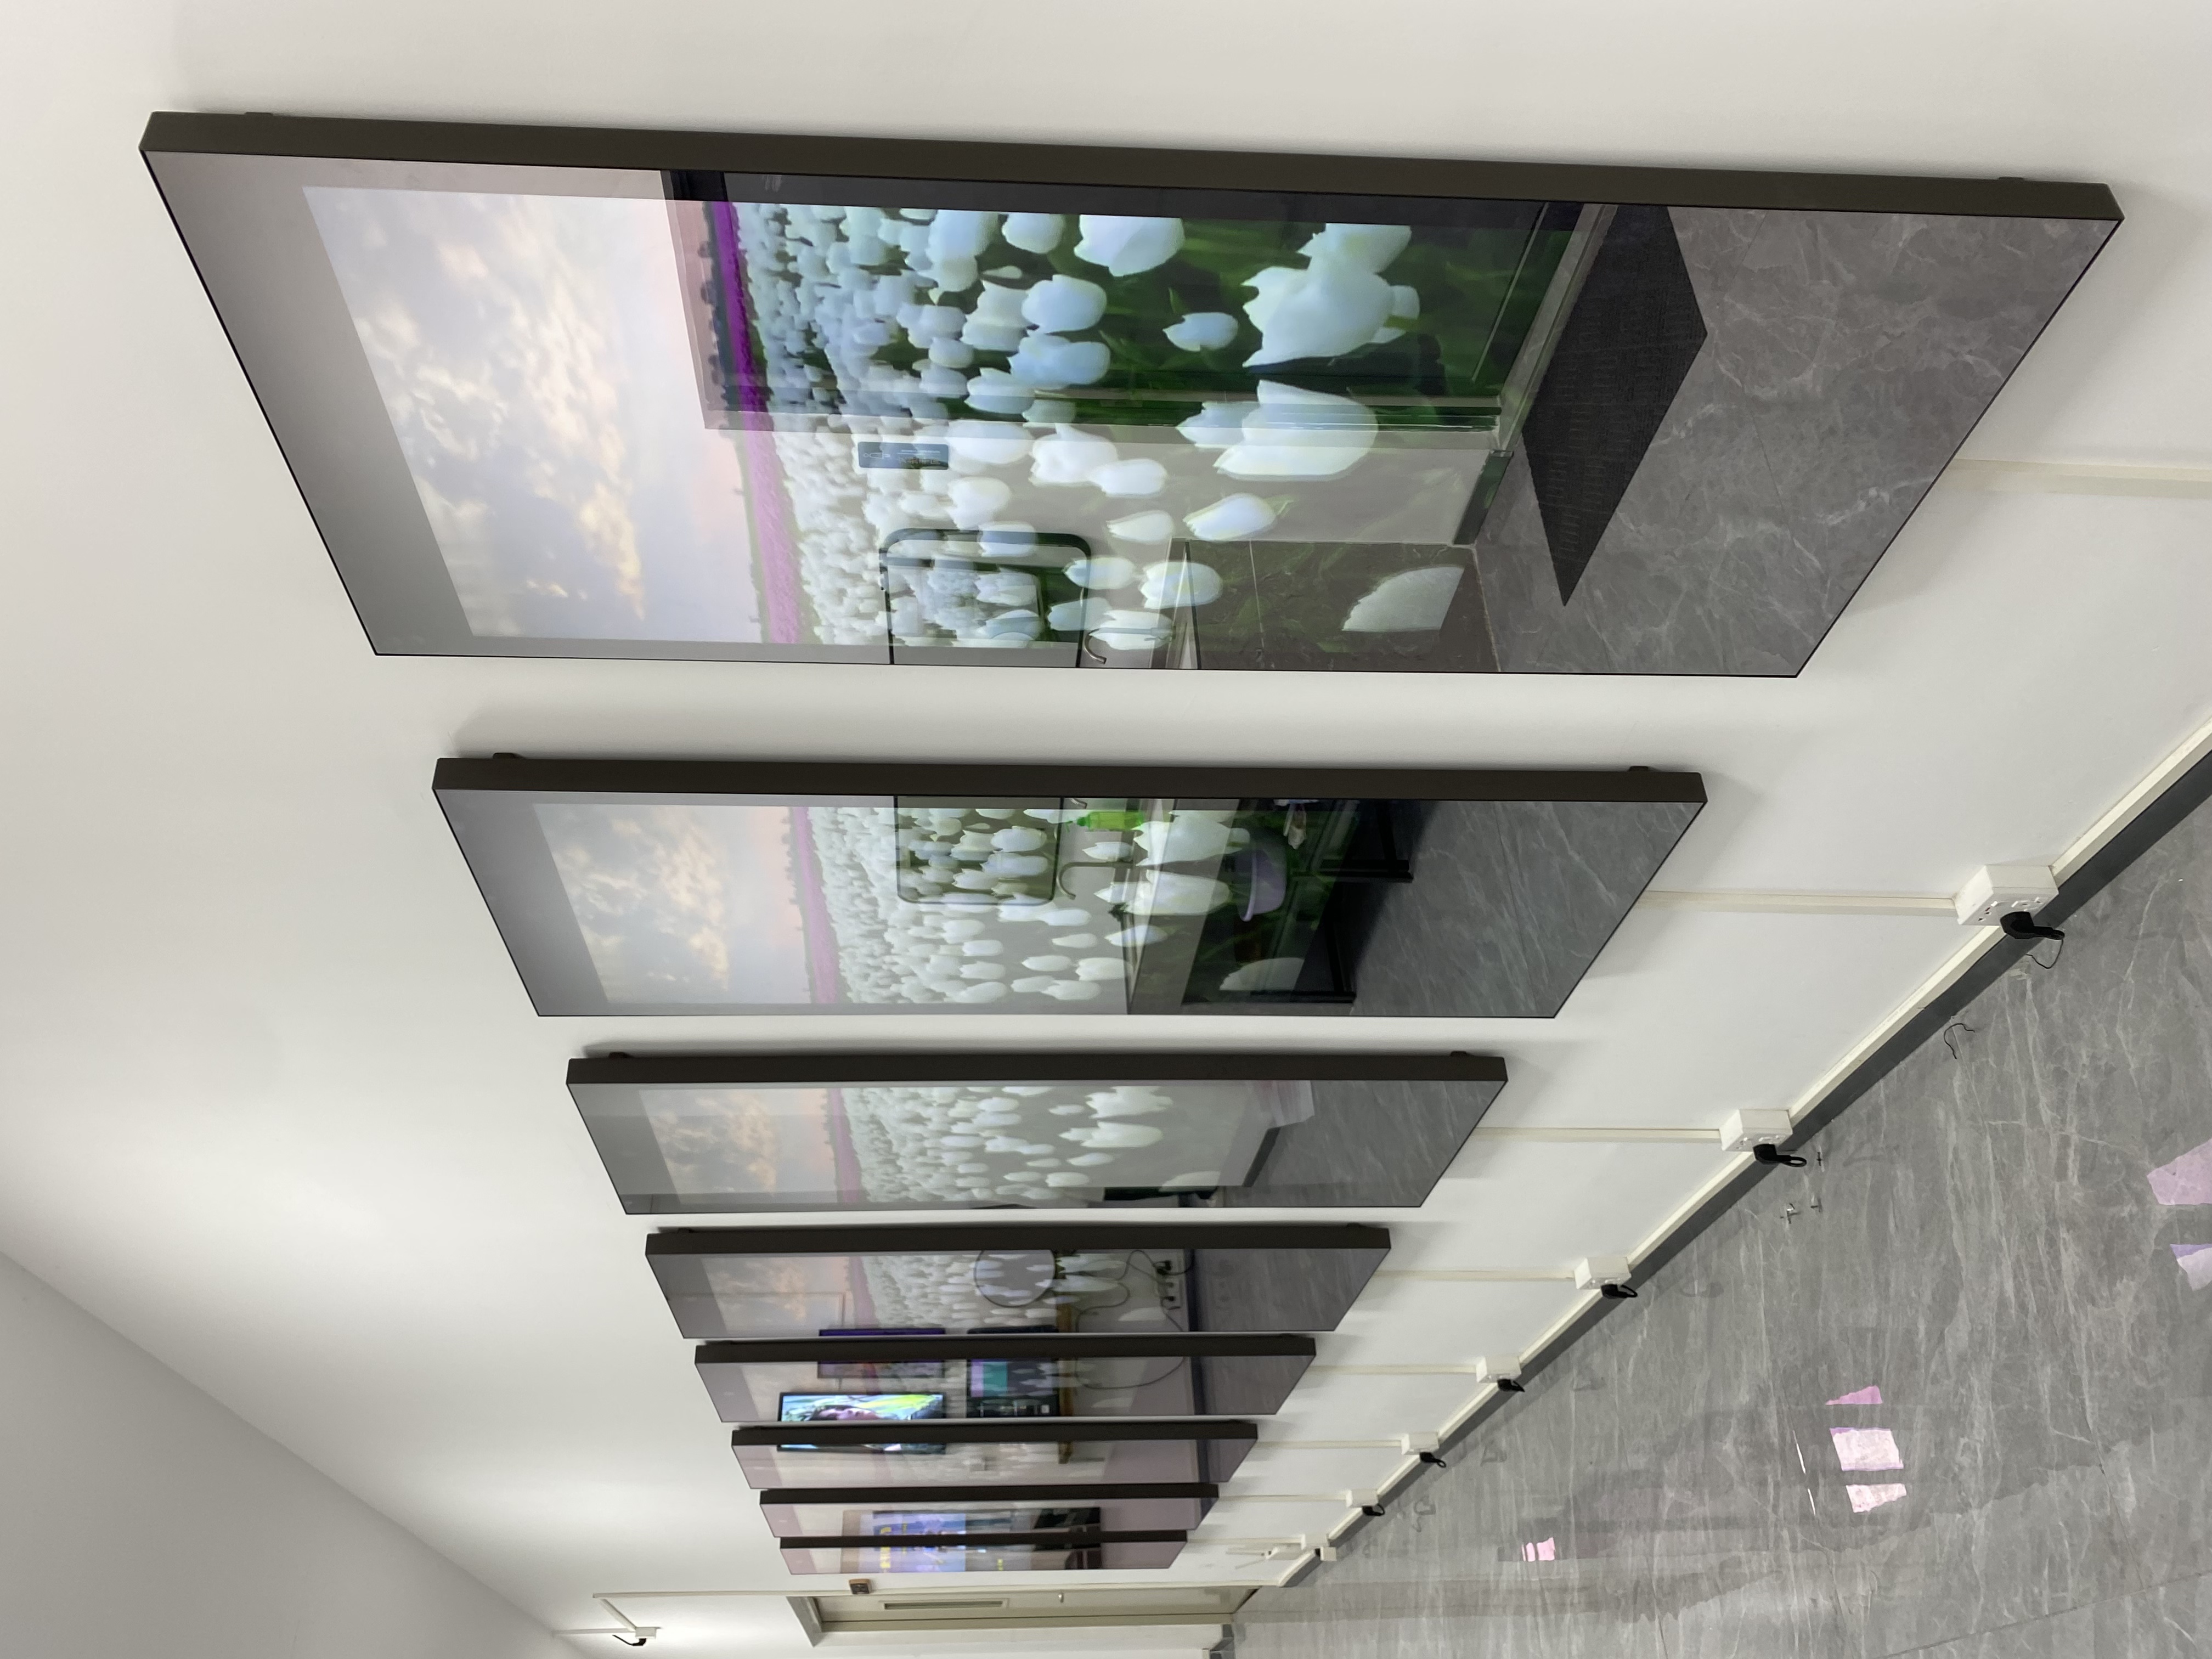
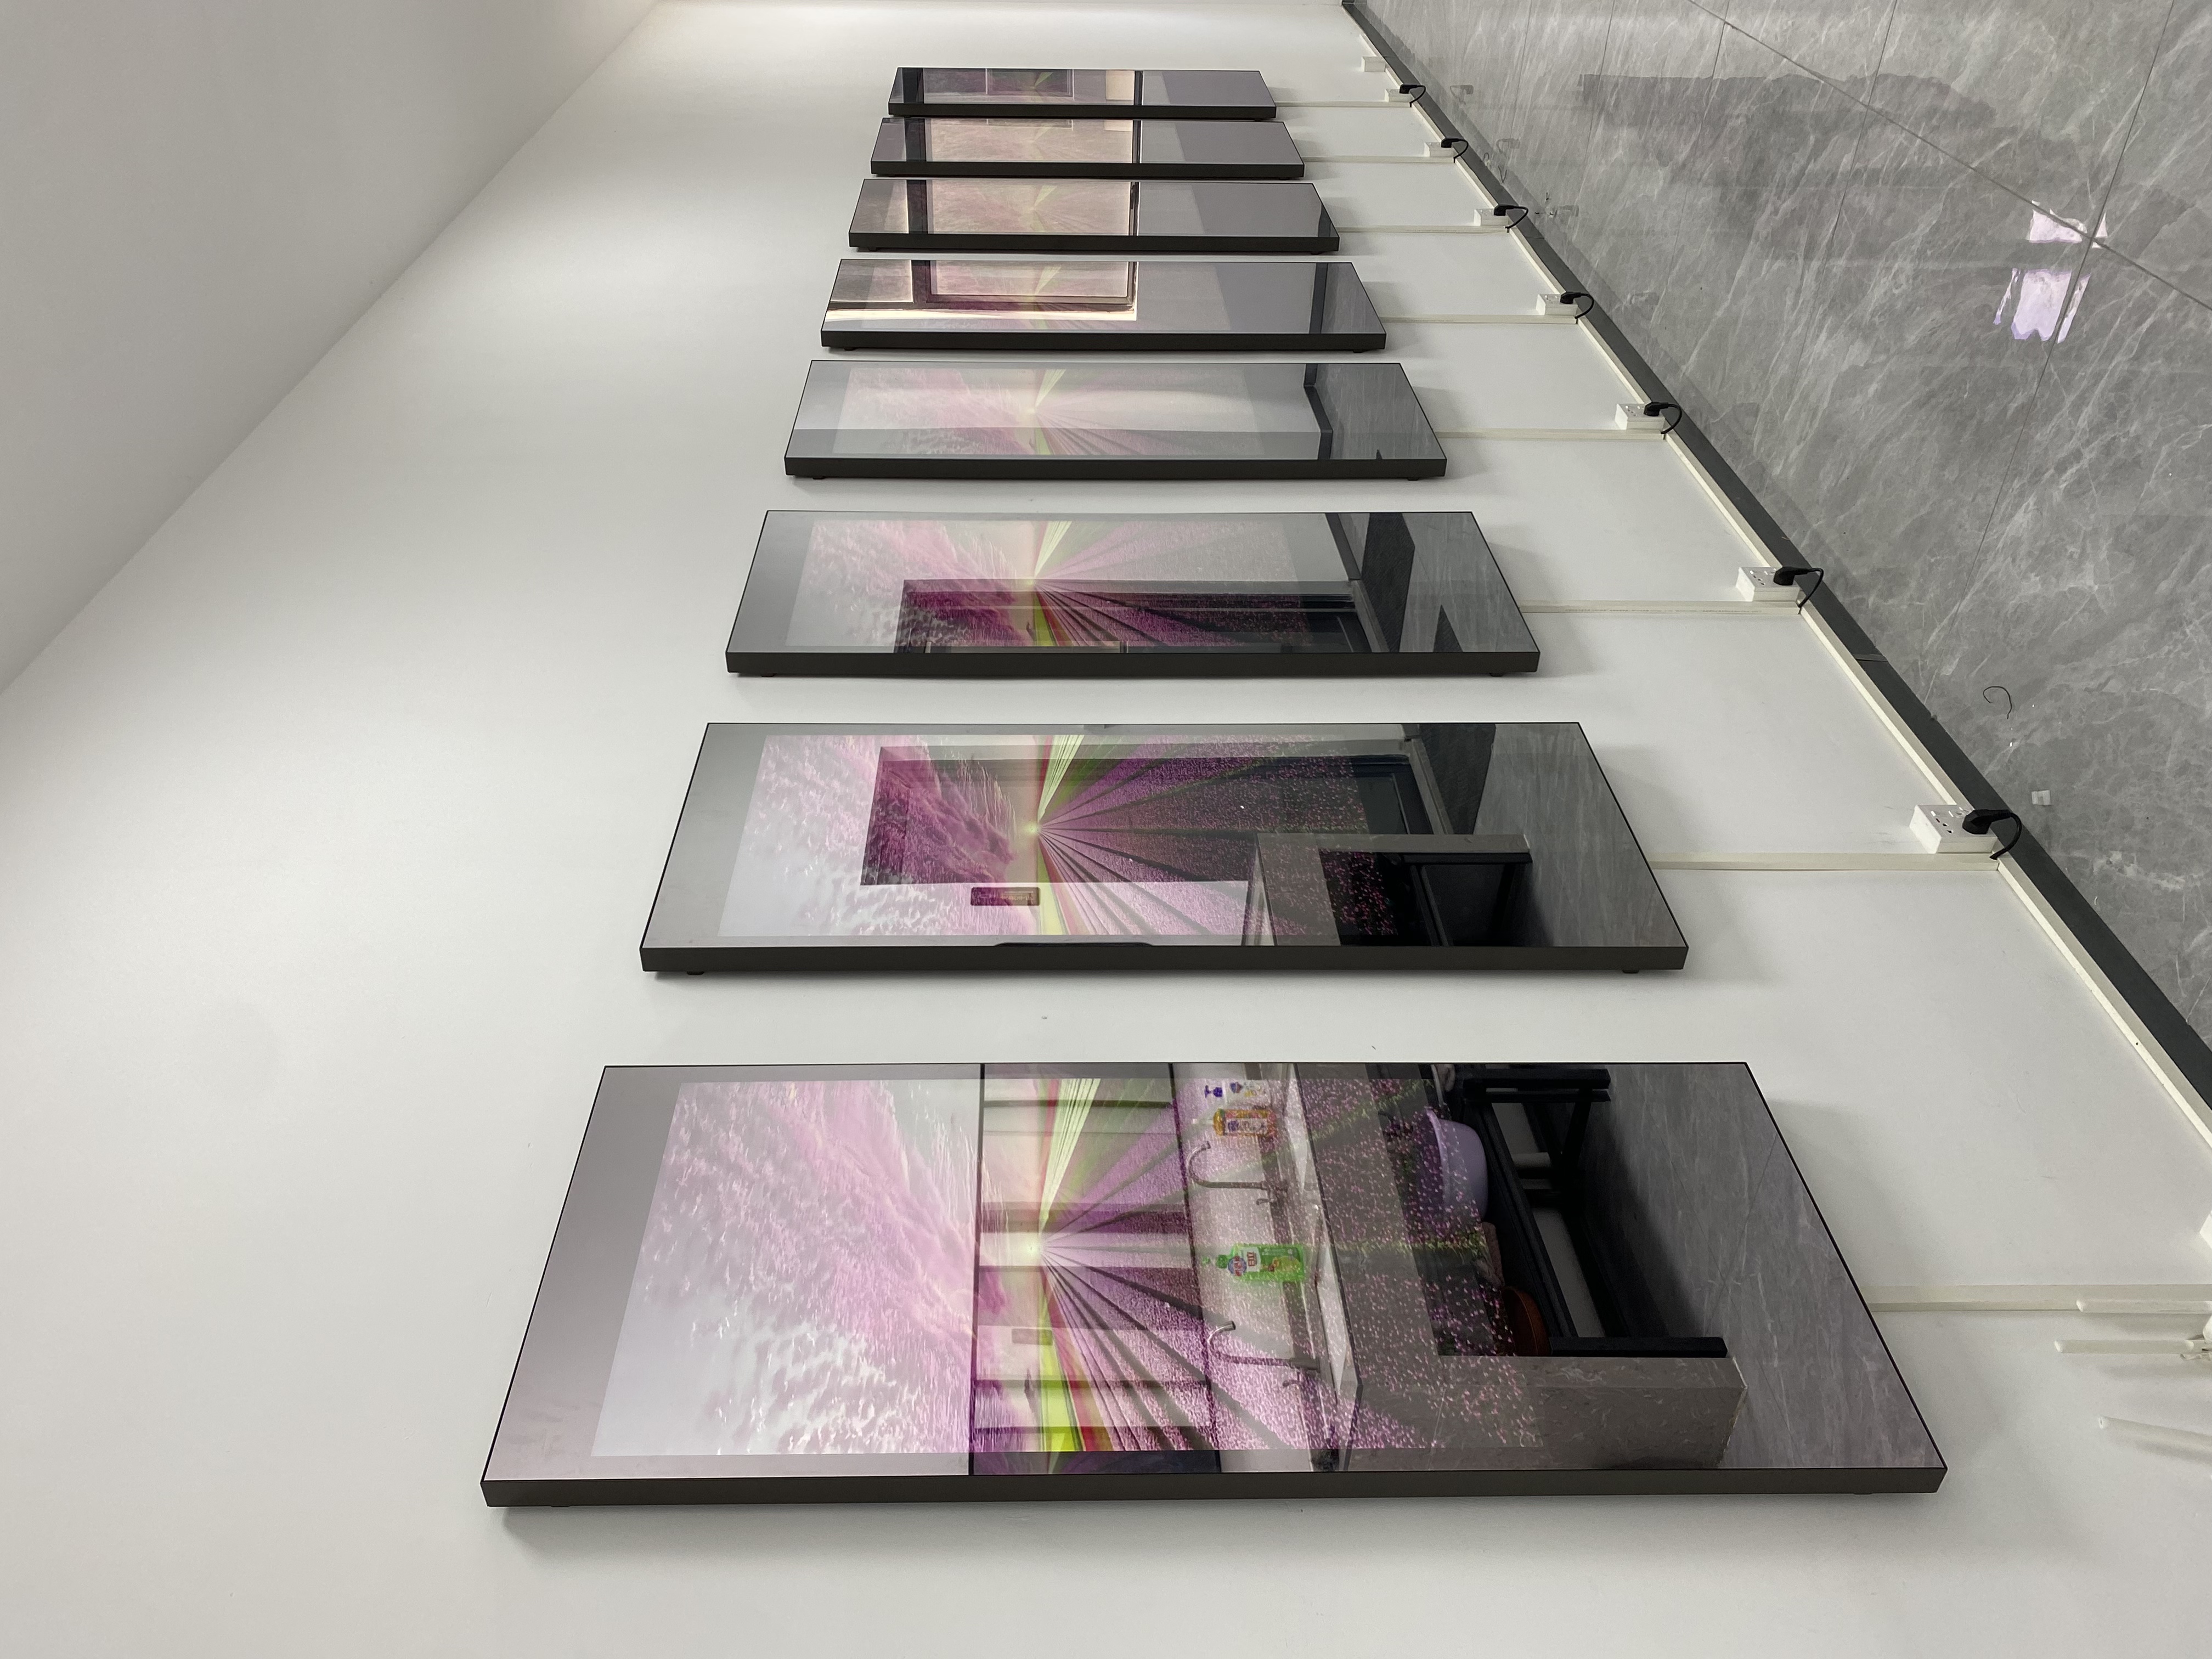
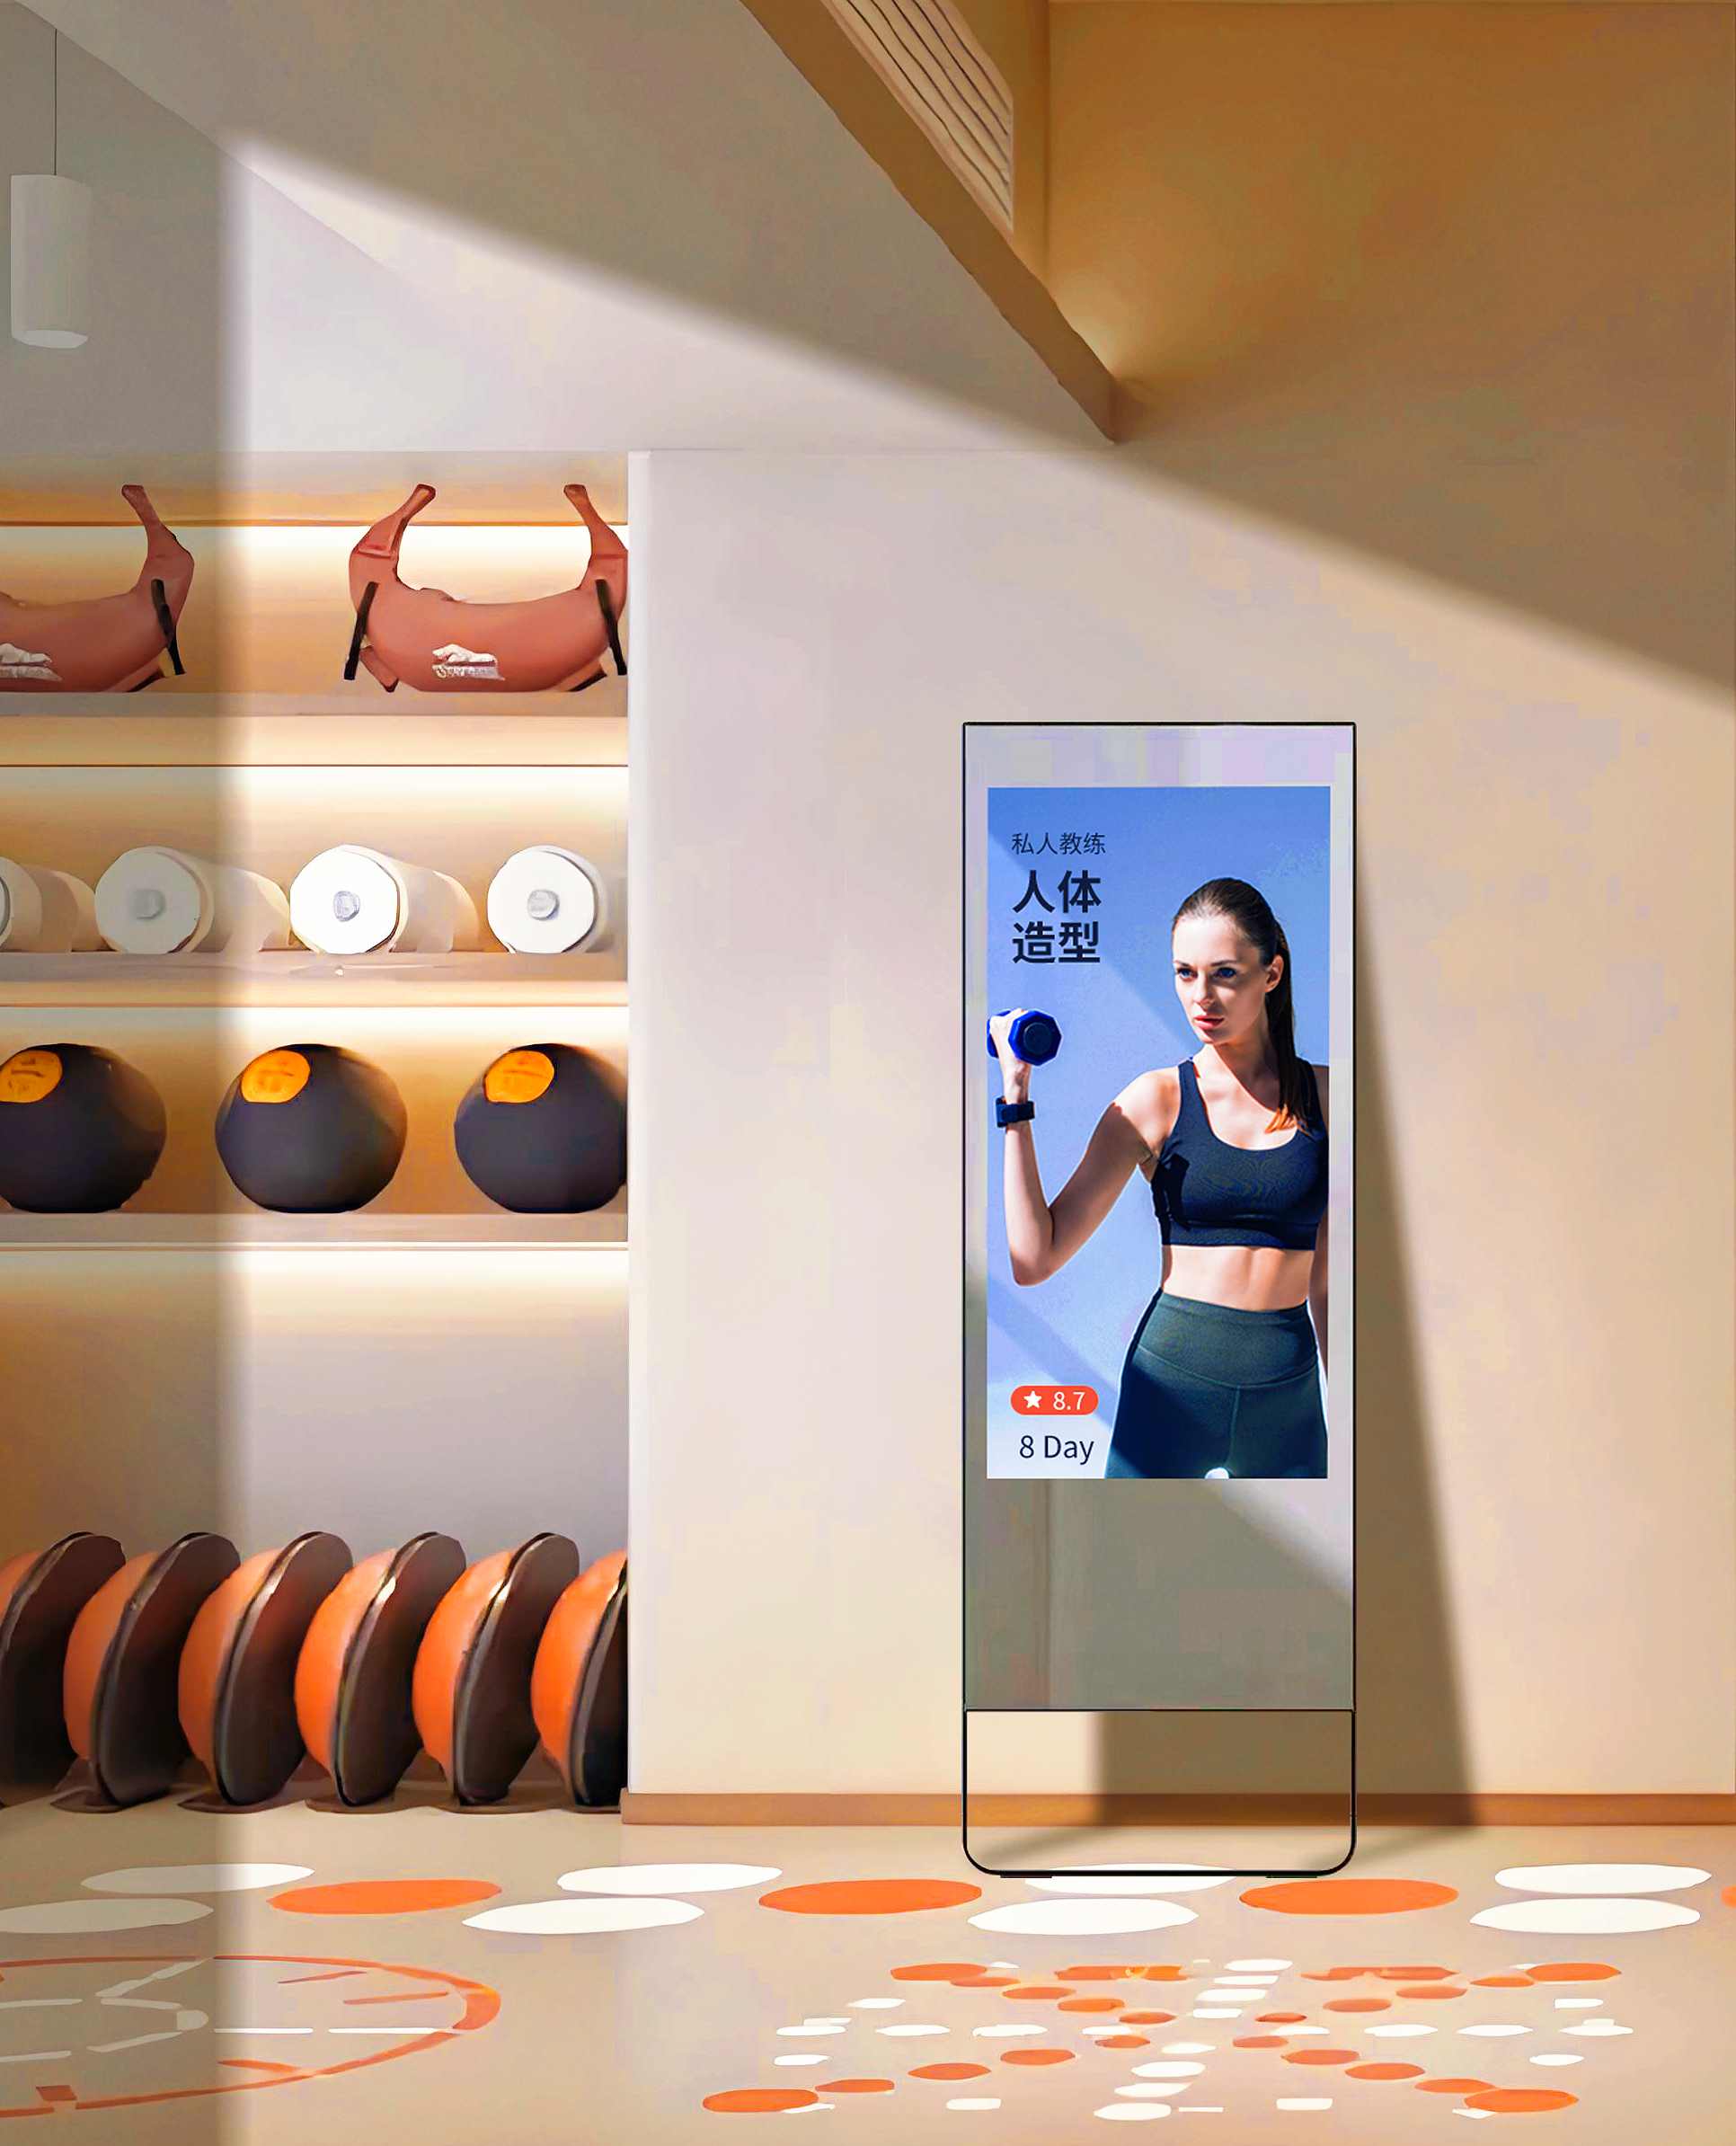
Mirror glass options
A mirror display lets you see yourself and digital images at once. It looks stylish and gives you privacy. The mirror glass sits on top of the LCD panel. It keeps the screen safe and gives it a special look. Some glass is easy to clean and does not show smudges. Other types might make the screen less bright or show fingerprints more. Here is a table to help you compare:
Advantages | Disadvantages |
|---|---|
Dual-purpose (mirror + display) | Lower screen brightness |
Strong protection | Mirror effect can distract |
Stylish and modern | Smudges may show easily |
Privacy benefits | Not ideal for gaming or editing |
Touchscreen layers
If you want a touch lcd mirror display, you need a touchscreen layer. This layer goes between the mirror glass and the LCD panel. It can sense your finger or a stylus. In 2026, in-cell touch is very popular. It makes the display thinner and faster. If you do not want touch, you can skip this layer.
Frame and housing
The frame and housing keep your lcd mirror display safe and nice looking. Metal frames last a long time and look fancy. But they can get hot or cold. Plastic or acrylic frames cost less and do not get damaged by water. They are good for bathrooms or kids’ rooms.
Frame Material | Pros | Cons | Best Uses |
|---|---|---|---|
Metal | Very durable, stylish | Temperature changes | Luxury, statement pieces |
Plastic/Acrylic | Light, affordable, resists water | Scratches, less fancy | Bathrooms, kids’ rooms |
Control boards
Control boards are like the brain of your lcd mirror display. You need to choose one that fits your screen size and resolution. Look for boards with HDMI or DisplayPort inputs. Make sure they support touch if you want that. In 2026, boards use less power and support 4K screens. They also work in hot or cold places and do not break from shaking.
Key Considerations | |
|---|---|
Display Specs | 1080p, 4K, panel size, refresh rate |
Interface Compatibility | HDMI, DisplayPort, LVDS, eDP, MIPI |
Power Requirements | 5V, 12V, energy efficiency |
Advanced Features | Touch support, on-screen controls |
Environmental | Temperature, humidity, vibration |
Tip: Always check that your parts work well together. This helps you avoid problems when you build your display.
Assembly steps
Preparing components
You start by gathering all your parts. Lay out the LCD panel, mirror glass, frame, control board, and cables on a clean table. Check each part for damage. Build the frame first. Paint or finish it if you want a custom look. Attach the back support to make the frame strong. This step helps your lcd mirror display last longer.
Tip: Wear gloves to keep fingerprints off the glass and screen.
Integrating touch features
If you want touch, add the touchscreen layer now. Make sure your touchscreen matches your LCD panel. Place the touch layer between the mirror glass and the LCD. Test the touch response before final assembly. You want smooth and accurate touch for the best user experience. If you do not need touch, skip this step.
Align the touch layer carefully.
Test for smooth touch response.
Mounting and wiring
Mount the LCD and mirror glass into the frame. Use soft pads to avoid cracks. Connect the control board to the LCD and power supply. Secure all wires so they do not move. Good mounting and wiring keep your display stable, even in busy or humid rooms. Hardwired power gives you steady performance.
Use cable ties for neat wiring.
Double-check all connections before closing the frame.
Software setup
Set up your software to match your hardware. Many builders use Magic Mirror or similar platforms. Choose software that fits your display’s resolution and touch features. The table below shows best practices for software setup:
Best Practice | Description |
|---|---|
User Engagement | Use easy menus and web-based controls. |
Scheduled Publishing | Set up automatic content updates. |
Version History and Rollback | Keep backups to undo mistakes. |
Hardware Compatibility | Match software to your display’s specs and touch type. |
Environmental Factors | Adjust brightness and settings for your room’s lighting. |
Note: Test everything before you hang your display on the wall. This step saves time and prevents problems later.
Quality factors for lcd mirror displays
Resolution and brightness
You want your lcd mirror display to look sharp and clear. The most important factors are resolution and screen brightness. Resolution tells you how many pixels fill the screen. More pixels mean you see more detail. In 2026, the best resolution for most mirror displays is 800x480. This size gives you crisp images and smooth text for smart mirrors and information panels.
Screen brightness measures how much light the display produces. If you use your display in a bright room, you need high screen brightness. The best range is 600 to 1000 nits. This level helps you see the screen even when sunlight shines on it. High screen brightness also makes colors pop and keeps the mirror effect strong.
Specification | Value |
|---|---|
Optimal Resolution | 800x480 |
Optimal Brightness | 600-1000 nits |
Tip: Choose an IPS panel for your lcd mirror display. IPS panels give you better screen brightness and keep the image clear from different angles.
Color accuracy and viewing angles
Color accuracy means the colors on your display look real and balanced. You want reds, blues, and greens to match what you see in real life. Viewing angles show how well you see the screen from the side. If you move around the room, you want the image to stay bright and colorful.
IPS technology leads the way in 2026. It keeps color accuracy high and reduces color shifts. You get a wide viewing angle, so the display looks good from almost any spot. However, lcd mirror displays can lose some brightness and contrast ratio when you look from the side. The table below compares lcd and OLED displays:
Aspect | LCD Displays | OLED Displays |
|---|---|---|
Color Tracking Error | Noticeable color imbalance errors | Visually indistinguishable from perfect |
Brightness at 30 degrees | Only 1% decrease | |
Contrast Ratio at 30 degrees | 50% decrease | Remains infinite |
Color Shifts at 30 degrees | Large shifts of 10 JNCD or more | Average shift of 1.7 JNCD |
Viewing Angle Impact | Significant degradation for off-axis | Minimal impact up to 30 degrees |
You can see that lcd mirror displays with IPS panels still perform well, but you may notice some drop in screen brightness and contrast ratio at wide angles. For most uses, the image stays clear and colors stay true.
Touch sensitivity
Touch sensitivity makes your lcd mirror display interactive. You can tap, swipe, or scroll right on the glass. In 2026, new touch layers respond faster and feel smoother. You get a better experience when you use apps, browse menus, or try on virtual clothes in stores.
Mirror displays now support direct touch, so you can control everything with your finger.
Touch technology lets you interact with content easily.
You see this in smart mirrors, retail try-on screens, and information kiosks.
Note: Always test touch sensitivity before you finish building your display. You want every tap and swipe to work the first time.
Durability
You want your lcd mirror display to last for years. Durability depends on the materials, cleaning, and where you place the screen. High-quality glass and frames protect the display from bumps and scratches. You should use pH-neutral cleaners and a microfiber cloth to keep the mirror shiny and clear.
Place your screen perpendicular to windows to reduce glare.
Use curtains or blinds to control harsh sunlight.
Clean the glass often to keep reflectivity and image quality high.
Update your software regularly to keep the display safe and fast.
Schedule routine checks and cleaning to prevent problems.
A strong frame and careful setup help your lcd mirror display keep its high screen brightness, color accuracy, and contrast ratio for a long time.
Sourcing and best tvs for 2026
Finding reliable vendors
You need good parts for your LCD mirror display. Go to big tech shows like CES or IFA. You can meet makers and see new products there. Use websites like Alibaba and Global Sources to find suppliers. These sites let you read reviews and compare items. Join groups and clubs in the industry to meet trusted makers. Ask experts for advice and referrals. Use lists like ThomasNet to find suppliers by quality and location. Visit places like Shenzhen to check products yourself. Always look at company websites for their history and details.
Criteria | Description |
|---|---|
Display Quality & Resolution | Higher resolution panels (e.g., 4K, 8K) offer sharper images with consistent color accuracy. |
Manufacturing Capacity & Scalability | Ability to produce large volumes without quality loss is crucial for high-demand segments. |
Investment in OLED, mini-LED, or quantum-dot technologies can provide competitive advantages. | |
Cost & Pricing Strategy | Competitive pricing while ensuring quality; consider total cost of ownership. |
Supply Chain Reliability | Timely delivery and stable supply chains reduce risks of production delays. |
Environmental & Compliance Standards | Adherence to environmental regulations and sustainability practices is increasingly preferred. |
Customer Support & Customization | Flexibility in design and responsive support can influence long-term partnerships. |
After-Sales Service & Warranty | Robust after-sales support ensures longevity and performance of panels over time. |
Tip: Always get a sample before you buy a lot.
Comparing top tv and lcd mirror display models
You want the best tvs for your project in 2026. Pick models that are bright and show colors well. The top tvs for 2026 use QD-OLED and Micro RGB. These models show clear pictures and work in bright rooms. Here is a table with the best models:
Model Name | Type | Key Features | Price Range |
|---|---|---|---|
Samsung 65-inch S95F OLED 4K TV | QD-OLED | High brightness, anti-glare screen, excellent for bright rooms | $2,000 - $3,000 |
Hisense 116-inch Micro RGB TV | Micro RGB | Massive size, advanced color accuracy | $20,000 - $30,000 |
Samsung 115-inch Micro RGB TV | Micro RGB | High-end display technology | $20,000 - $30,000 |
If you want to save money, choose a small smart mirror under $100. Medium mirrors cost between $150 and $300. Big mirrors cost more than $400.
Cost and warranty
Plan your budget before you buy anything. A cheap tv saves money, but do not pick low quality. Here are the average prices for LCD mirror displays in 2026:
Small smart mirrors: under $100
Medium smart mirrors: $150 to $300
Large mirrors: over $400
Check the warranty before you buy. Most top brands give you three years of warranty. Some let you add two or four more years. The MX-V5 (-7L) model gives up to seven years of coverage.
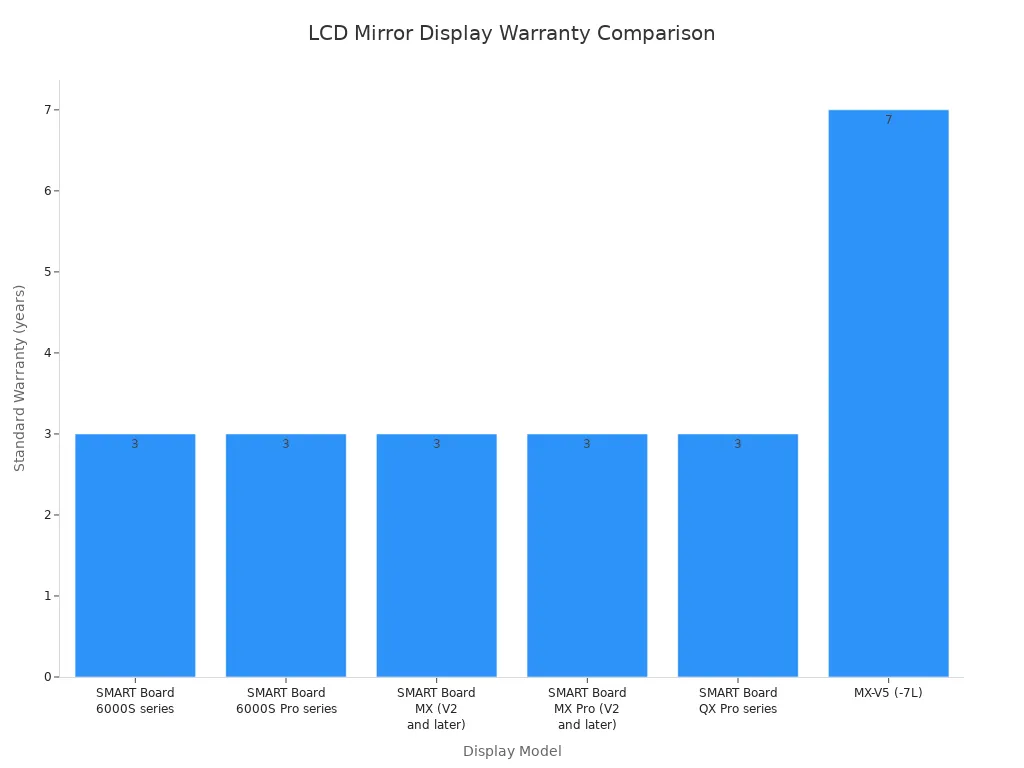
Note: Good support and a long warranty protect your money and keep your display working.
Troubleshooting and maintenance
Common issues
You may face some problems with your LCD mirror display. Many users report delays or lag when mirroring content. You can fix most issues by following simple steps. The table below shows common problems and how you can solve them:
Issue | Solution |
|---|---|
1. Update drivers (Wi-Fi, GPU, Display) |
Tip: Always check your cables and connections first. Loose wires often cause display problems.
Calibration and cleaning
You need to keep your display accurate and clean for the best performance. Regular calibration helps your touch and display features work well. Follow these steps:
Set the right temperature and humidity in your room.
Clean the screen to remove fingerprints and dust.
Check that all cables connect tightly.
Update your device drivers and firmware.
Use built-in calibration tools in your operating system.
Schedule recalibration if you use the display often or need high accuracy.
Cleaning your LCD mirror display keeps it looking new. Use this safe cleaning method:
Power down and unplug your display.
Use a soft, dry microfiber cloth to remove dust.
Dampen a corner of the cloth with distilled water or a screen-safe cleaner. Wipe away smudges gently.
Dry the surface with a clean part of the cloth.
Check the screen from different angles. Repeat if needed.
Note: Never use rough cloths or strong cleaners. These can scratch or damage your display.
Upgrades and repairs
You can keep your LCD mirror display working longer with good habits and careful upgrades. Try these best practices:
Clean the display and camera lens with a soft, lint-free cloth.
Handle the mirror gently. Avoid pressing hard or slamming it.
Protect your display from extreme heat or cold.
Make sure all installations are secure and safe from moisture or shaking.
If you notice problems, fix them early. Regular care helps your display stay bright, clear, and reliable for years.
You can make a high quality touch or non-touch LCD mirror display. Use good parts and follow easy steps. Look for new ideas like digital integration and saving energy. Clean your display often and update the software.
Checklist for success:
Make sure the IR touch overlay fits the mirror
Check if the operating system works with your display
Buy parts from trusted suppliers
Look at the warranty before buying
Remember, a well-built display works well and lasts a long time.
FAQ
What is the best way to clean my LCD mirror display?
You should use a soft, dry microfiber cloth. If you see smudges, dampen the cloth with water. Never spray cleaner directly on the screen. Avoid rough cloths or strong chemicals.
Can I use any TV for a mirror display?
You need a TV with high brightness and good color. IPS panels work best. Check if the TV fits your frame and supports your control board. Not all TVs give good results.
How do I fix touch not working on my mirror display?
First, check all cable connections. Make sure your software supports touch. Try restarting your device. If it still does not work, test the touch layer with another screen.
Is a touch LCD mirror display safe for bathrooms?
Yes, you can use one in a bathroom. Pick a frame that resists water, like plastic or acrylic. Make sure all wiring stays dry and safe from steam.
How long does an LCD mirror display last?
Most displays last five to seven years with good care. Clean the glass often. Keep the software updated. Protect the display from heat, cold, and moisture.
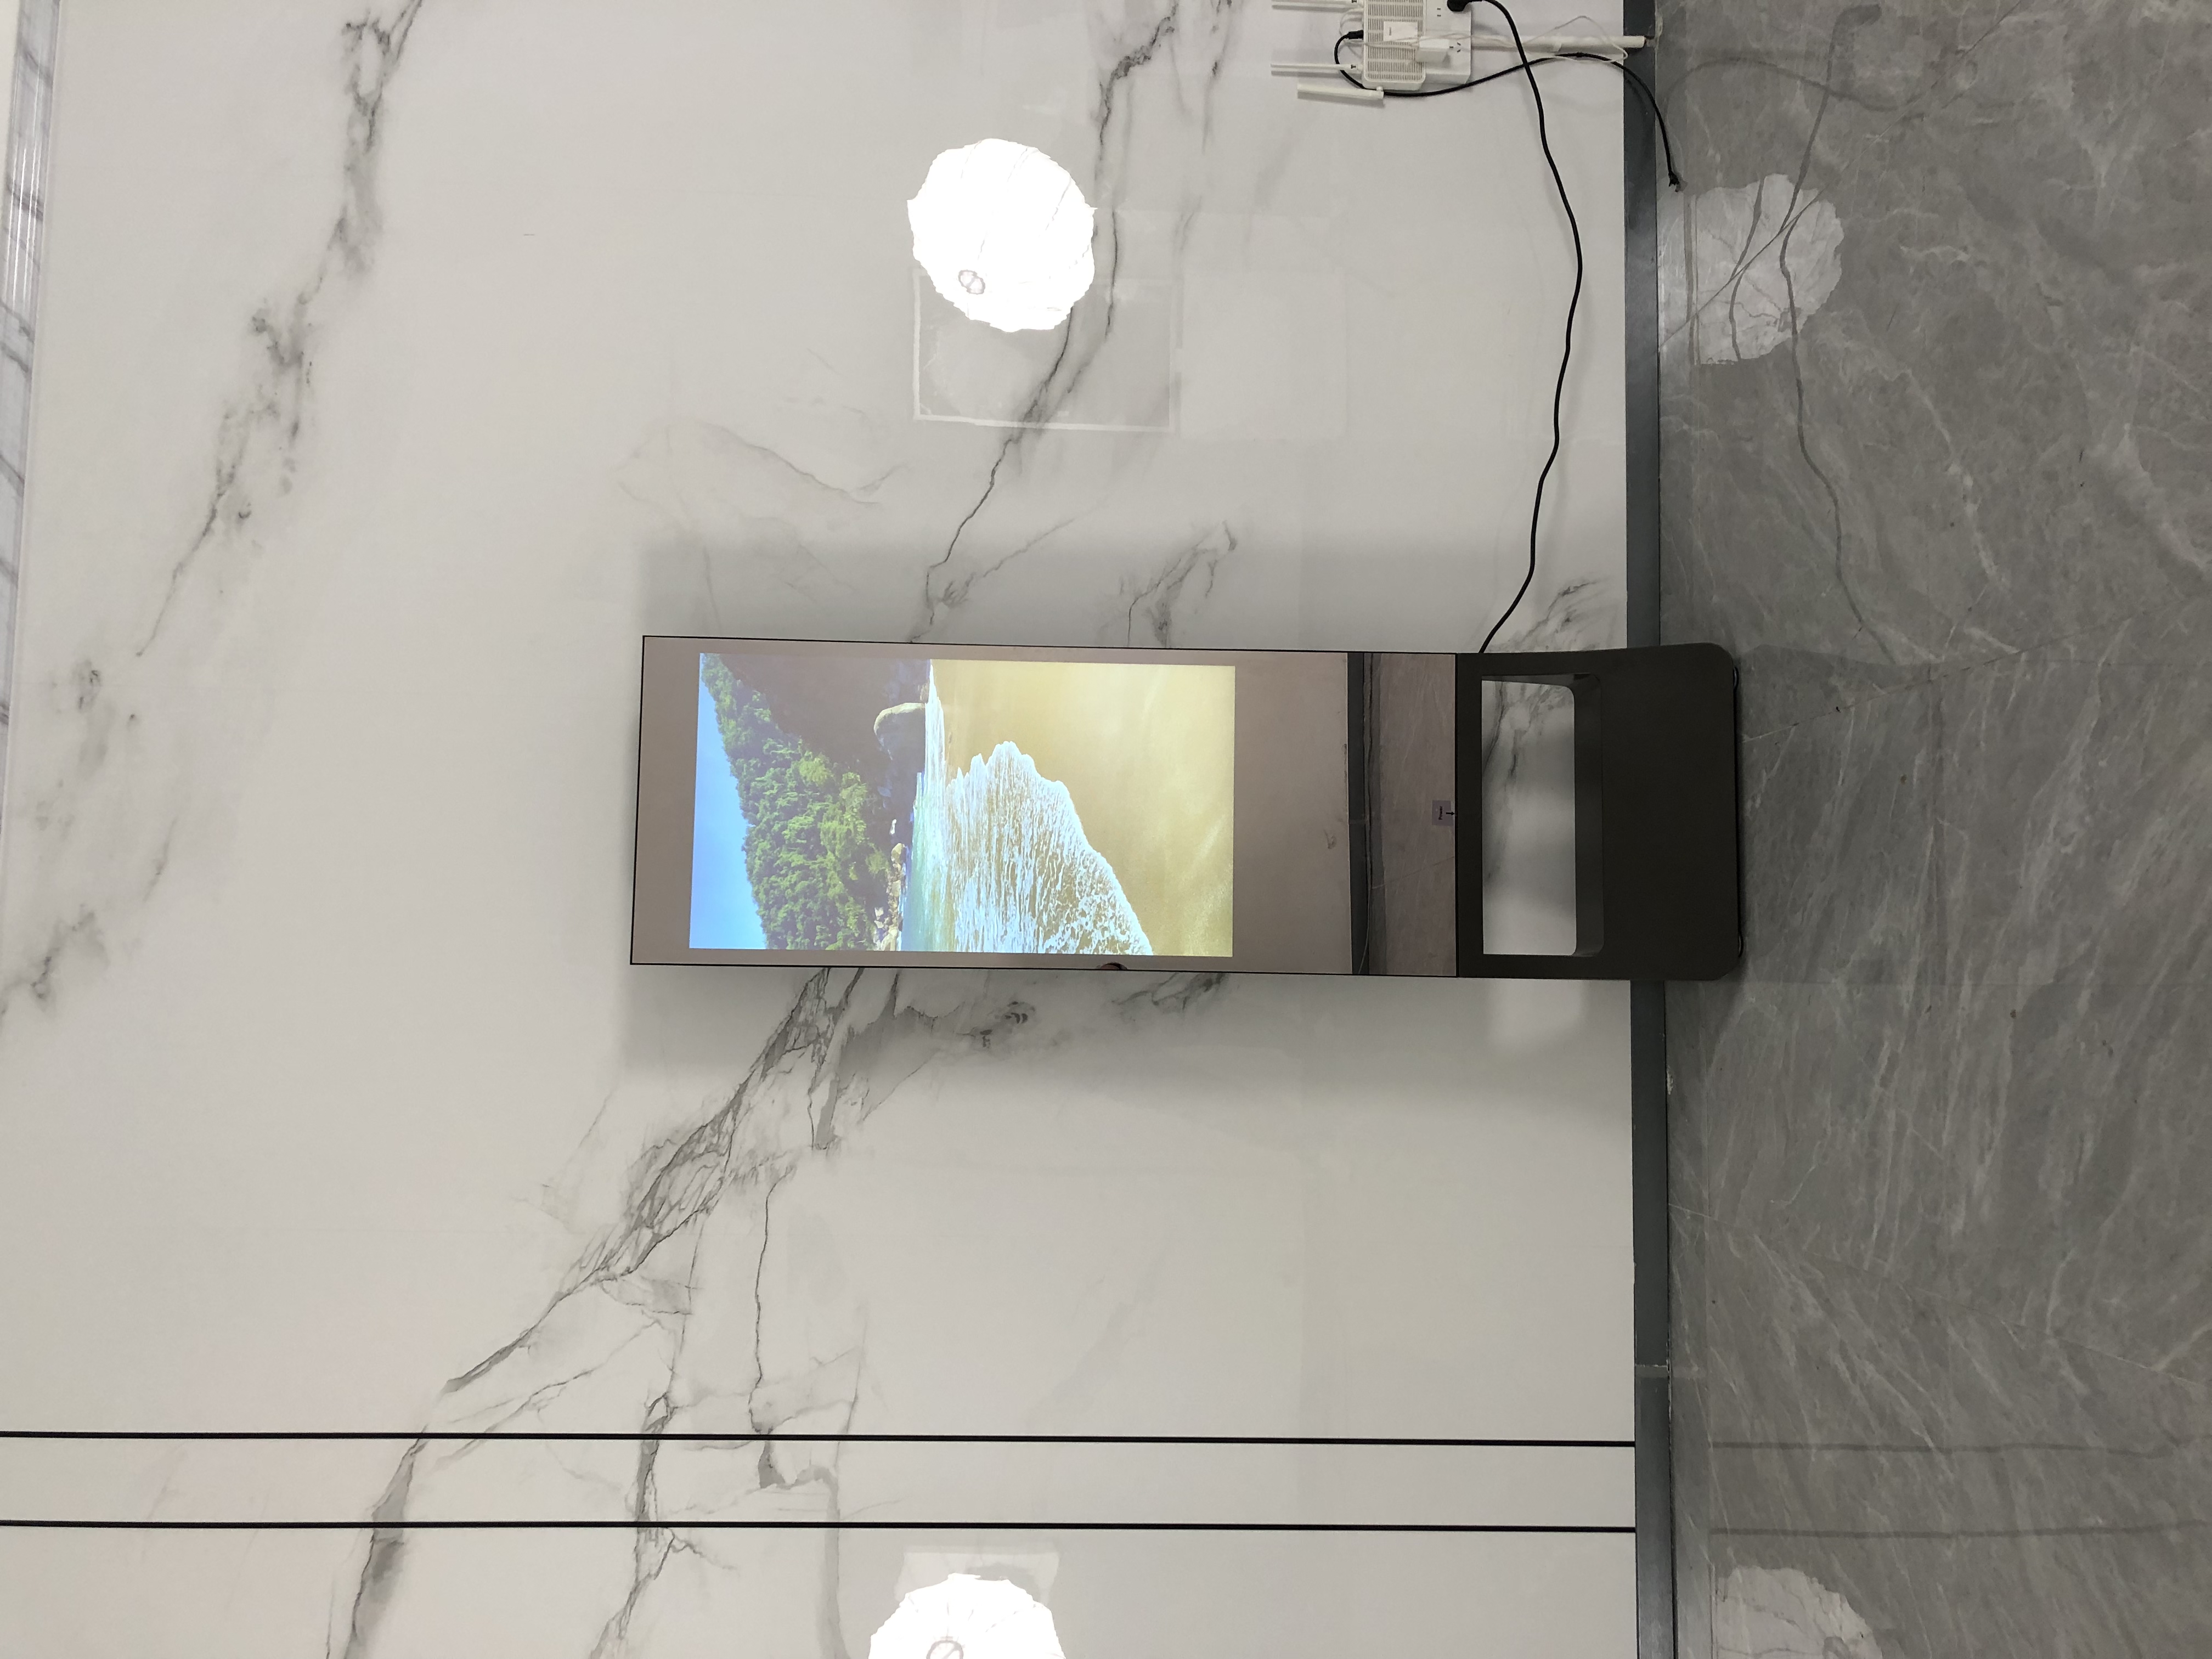
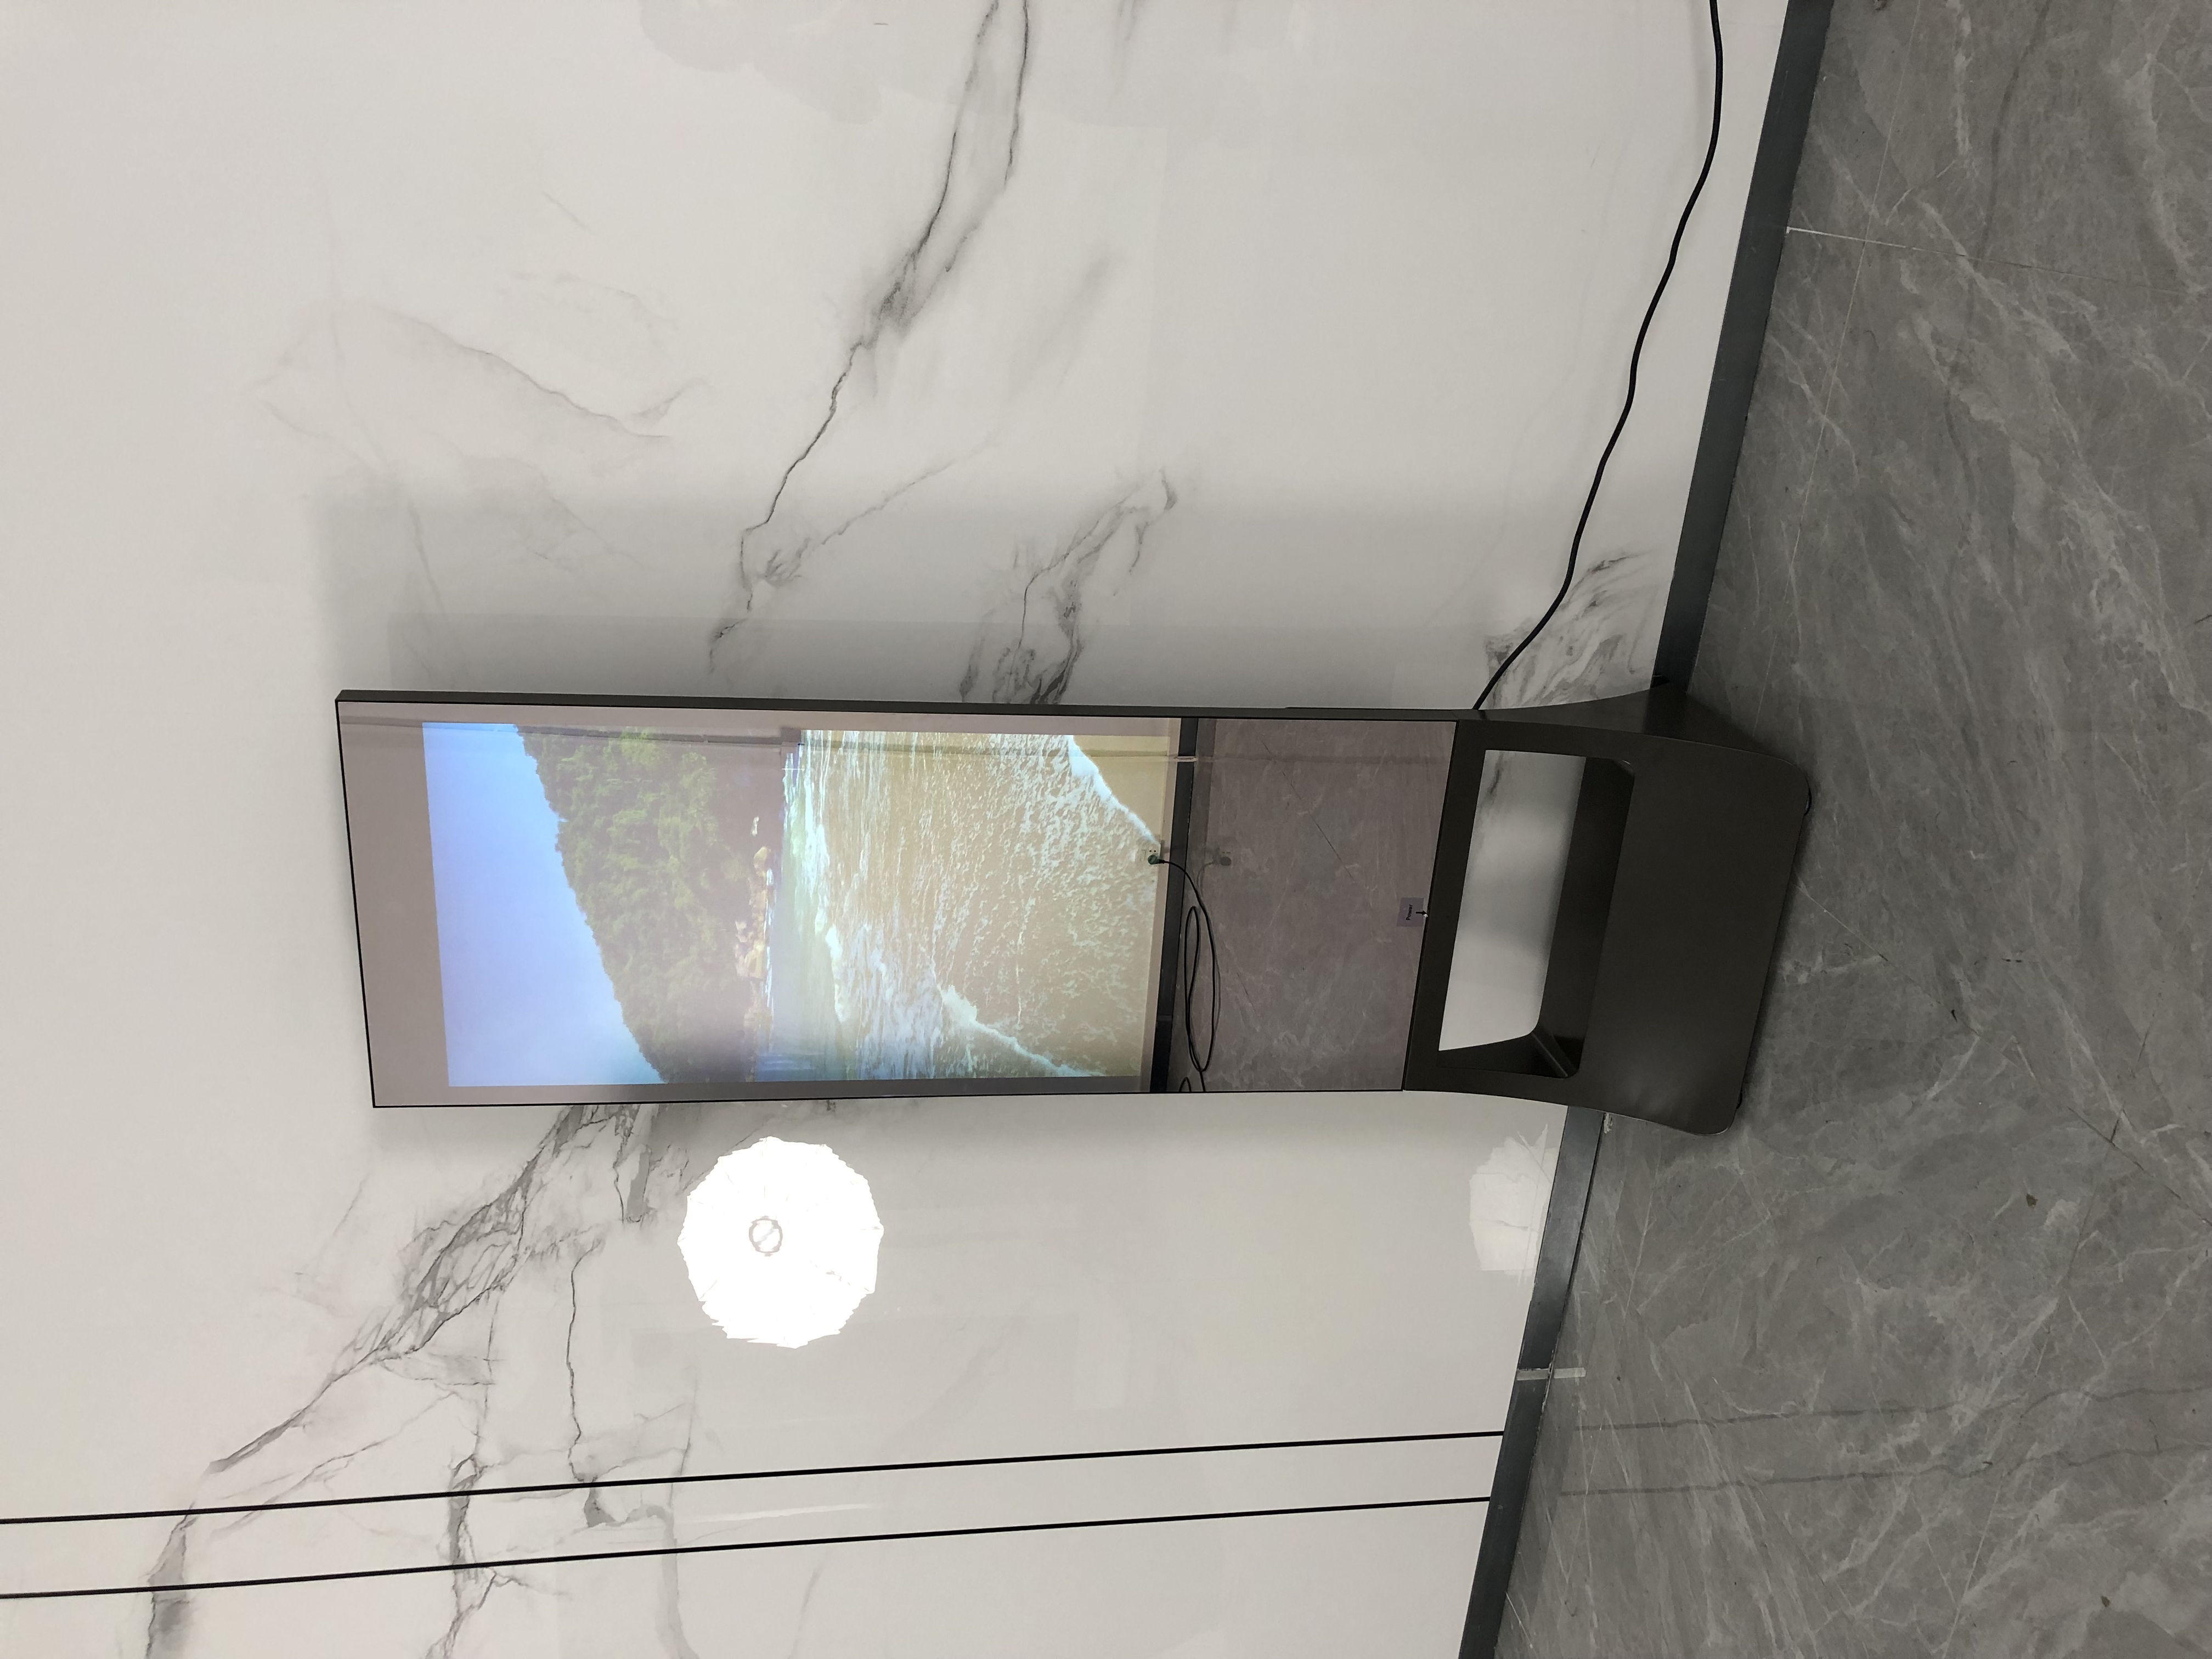
How to Make a Mirror LCD Display Signage with Touch and Non-Touch Options
Creating a mirror LCD display signage involves combining a standard LCD display with a reflective surface that functions as a mirror when the display is off and shows content when the display is active. Here's a comprehensive guide covering both touch and non-touch versions.
1. Core Technology Overview
A mirror display works by using a semi-transparent, semi-reflective layer placed in front of an LCD panel. When the backlight is off, light reflects off the mirrored surface, creating a standard mirror appearance. When the backlight is on, light from the LCD passes through the reflective layer, making the display content visible.
There are two primary technical approaches:
Two-way mirror film method: Applying semi-reflective film to standard glass
Integrated mirror display panel: Manufacturing with built-in reflective layers (patented technology by BOE and others)
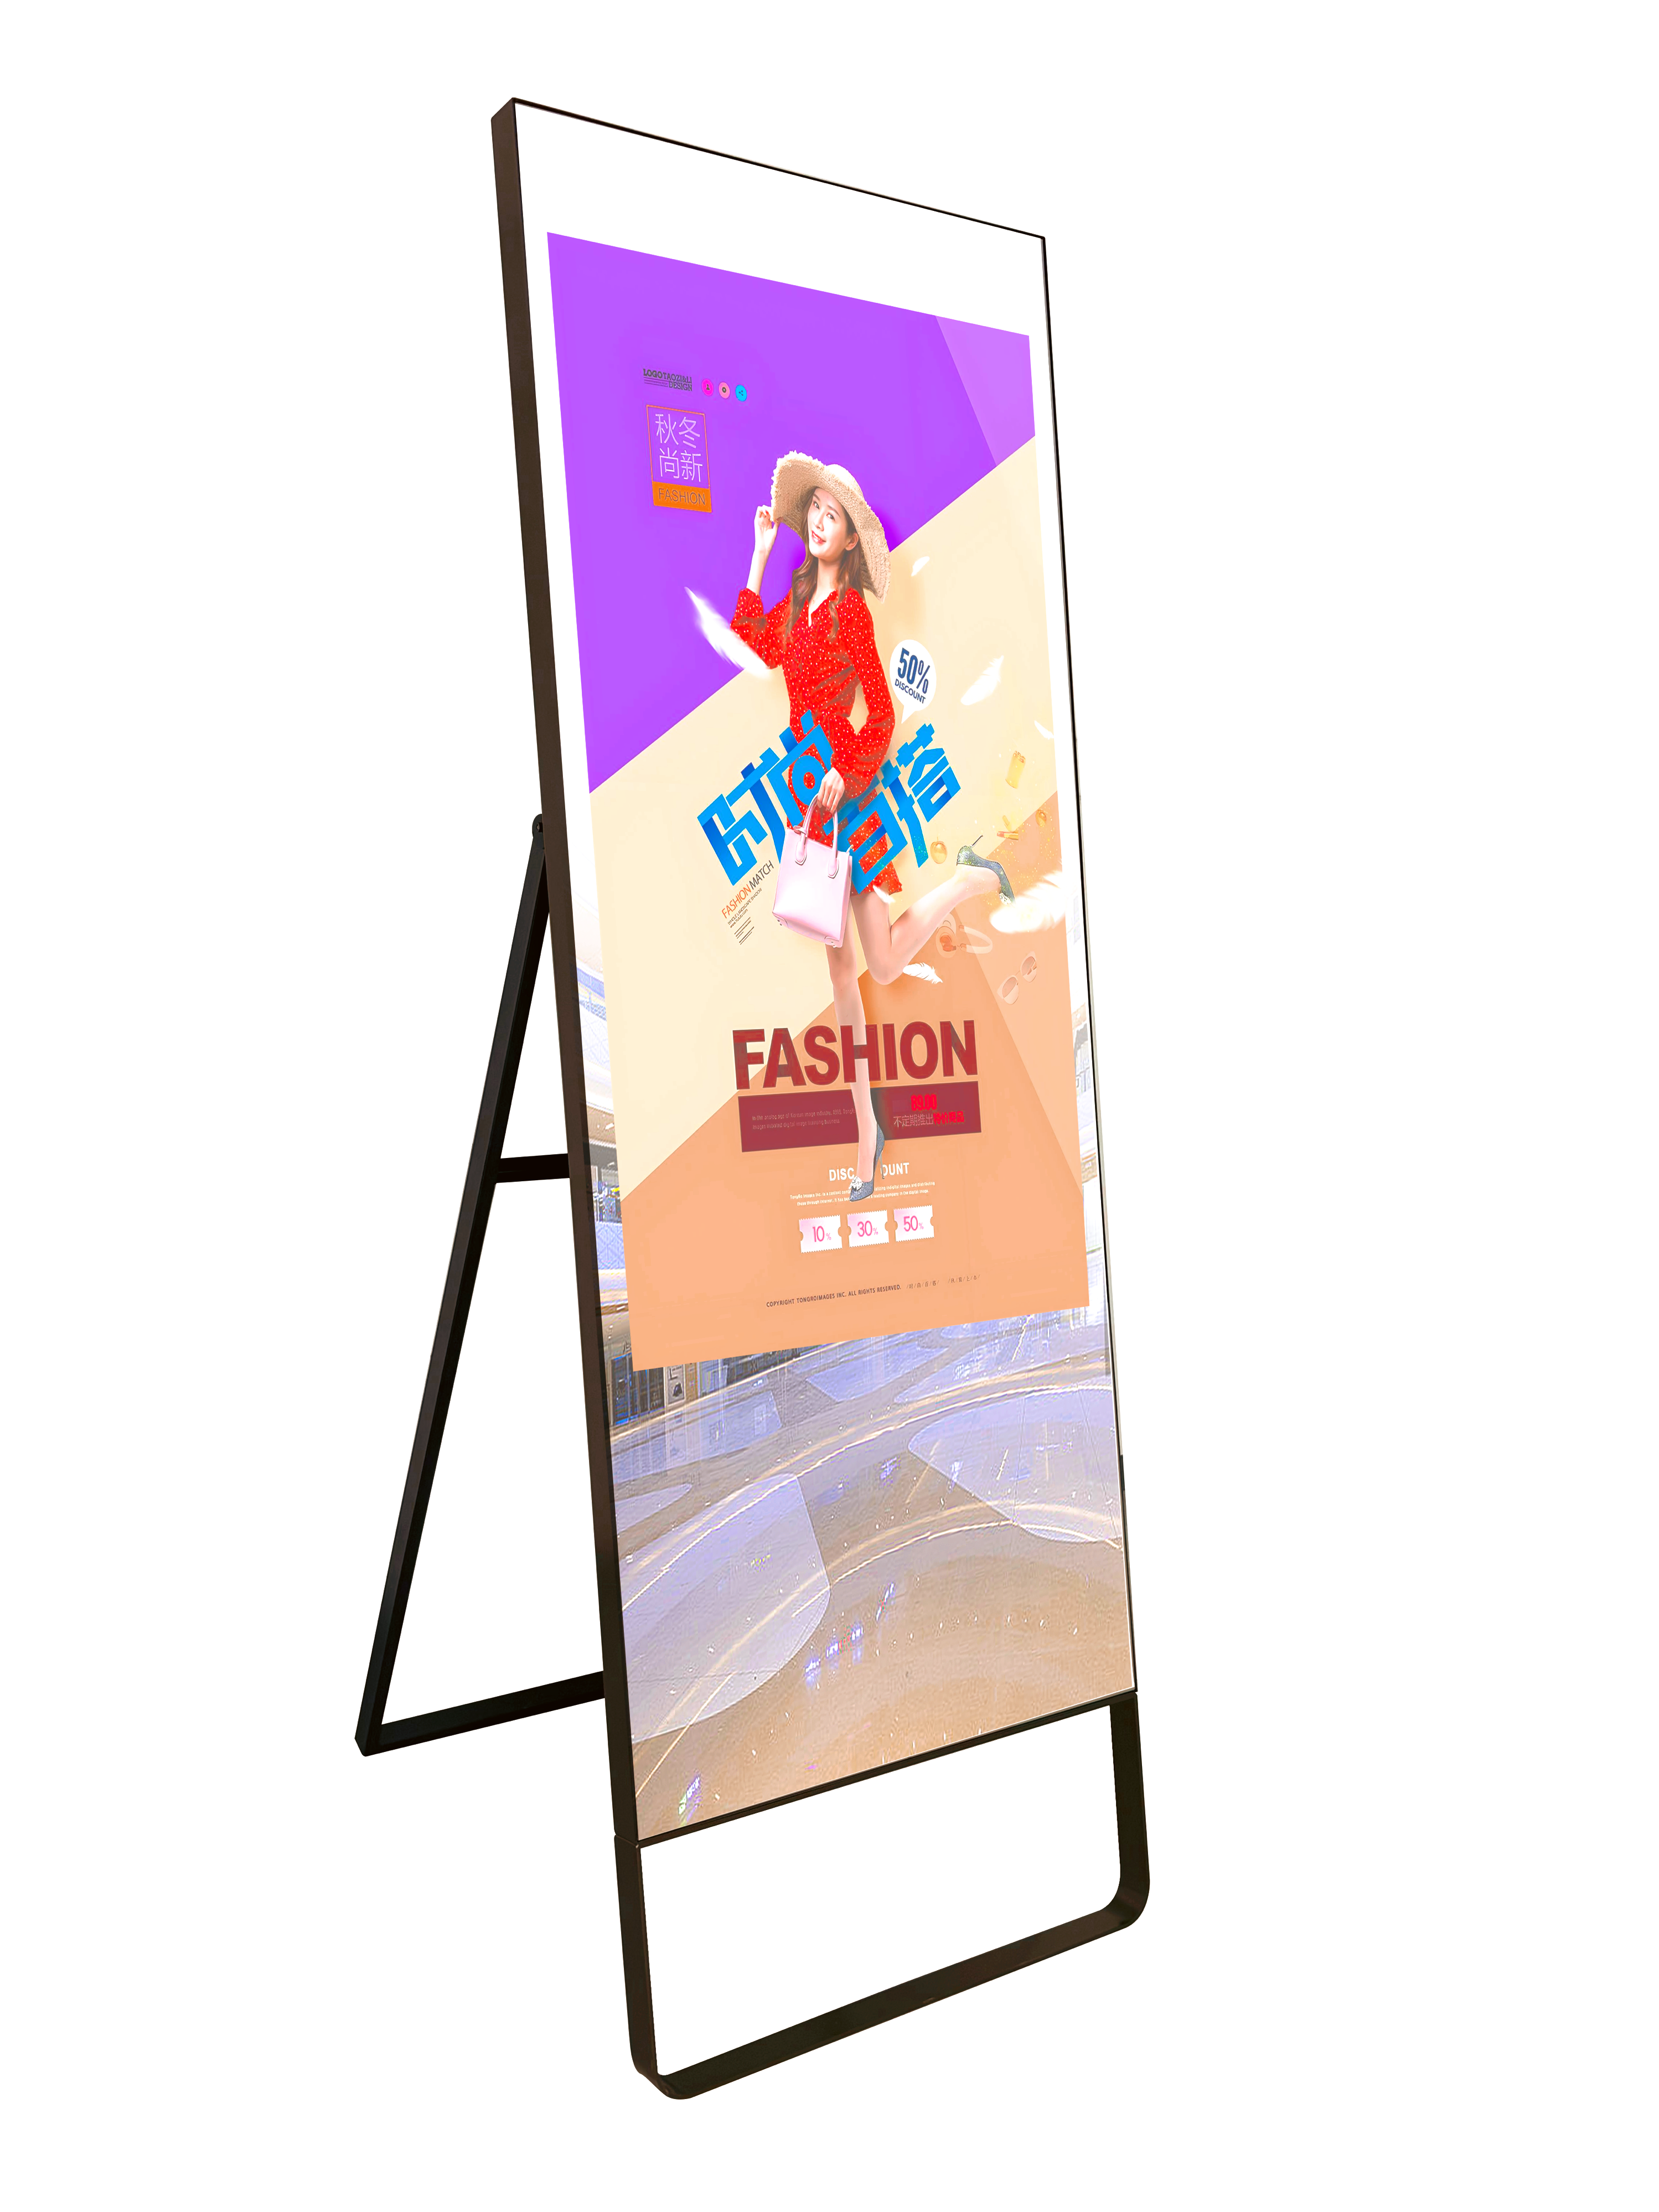
2. Non-Touch Mirror Display Signage
Materials Needed
Component | Purpose |
|---|---|
LCD panel | Display content |
Two-way mirror film or semi-reflective glass | Creates mirror effect |
Shadowbox or enclosure | Houses components |
Backlight/LCD driver board | Powers the display |
Content player (e.g., Raspberry Pi, Android box, PC) | Runs signage content |
Step-by-Step Assembly Process
Step 1: Prepare the Display
Select an LCD panel appropriate for your signage size requirements. Remove any existing bezels if necessary.
Step 2: Apply Two-Way Mirror Film
Following installation kit instructions, carefully spray, cut, and adhere the two-way mirror film to the inside surface of your glass or acrylic sheet. The film creates the semi-reflective property that enables mirror functionality when the display is off.
Step 3: Assemble the Enclosure
Mount the LCD panel inside a shadowbox or custom enclosure. Position the LCD so it presses against the film-treated glass when closed. Use spacers (foam, wood, or styrofoam) to ensure the LCD makes full contact with the glass surface.
Step 4: Add Light Blocking
Cut opaque material (cardboard or black foam board) to cover the window area around where the LCD will display. Cut out the exact section where the LCD sits. This prevents stray light from leaking through and compromising the mirror effect.
Step 5: Connect Content Player
Connect your content player to the LCD driver board. For non-touch signage, a simple media player running looped video content or a digital signage CMS works well.
Step 6: Calibrate Brightness
Mirror displays require higher brightness than standard LCDs because light must pass through the reflective layer. Adjust backlight settings for optimal visibility in your intended environment.
3. Touch Mirror Display Signage
Adding touch functionality requires integrating a touch sensor between the mirror glass and the LCD panel. The most effective technology for mirror applications is Projected Capacitive Touch (PCT or PCAP) .
Why Capacitive Touch for Mirror Displays?
Capacitive touch works through thick glass overlays (3mm or more) without requiring a bezel structure. The sensors can be embedded behind the mirrored glass while maintaining both reflective and transparent properties. The copper capacitor matrix is nearly invisible (10µm diameter) and doesn't impact light transmission.
Additional Materials for Touch Version
Component | Notes |
|---|---|
Projected Capacitive (PCAP) touch sensor | Placed behind mirror glass |
Touch controller board | Processes touch input |
USB connection or serial interface | Connects to content player |
Touch Assembly Process
Step 1: Layer Stack (from front to back)
text
Mirror Glass (front surface)
PCAP Touch Sensor (behind glass)
Two-Way Mirror Film (or integrated reflective layer)
LCD Panel (back)Step 2: Integrate the Touch Sensor
Position the PCAP touch sensor behind the mirrored glass. The sensor will operate through the glass overlay without requiring holes or bezels. The assembly can be completely sealed, making it suitable for environments where mirrors may get wet (splashes or condensation).
Step 3: Connect Touch Controller
Connect the touch sensor to a controller board, then interface with your content player via USB or serial connection.
Step 4: Software Setup
Configure your operating system to recognize touch input. For Raspberry Pi or similar platforms, install touch drivers and calibrate the sensor. For commercial signage players, ensure touch compatibility.
Step 5: Content Design
Design touch-friendly interfaces with buttons large enough for finger interaction (minimum 44x44 pixels). Consider that users will be interacting while viewing themselves in the mirror.
Alternative: Resistive Touch
Resistive touch is a lower-cost alternative that works with gloves and styluses, making it suitable for industrial or outdoor applications. However, it offers lower clarity due to additional layers and does not support multi-touch gestures.
4. Touch vs. Non-Touch Comparison
Feature | Non-Touch Mirror Signage | Touch Mirror Signage |
|---|---|---|
Interaction | Passive viewing only | Direct finger/stylus operation |
Technology | LCD + semi-reflective layer | LCD + touch sensor + mirror layer |
Display clarity | Higher light transmittance | Slightly reduced due to touch layer |
Durability | More tightly packaged, resistant to physical damage | Requires careful cleaning, no hard objects |
Cost | Lower | Higher ($$ to $$ range) |
Best for | Advertising, ambient displays, storefronts | Retail, beauty try-on, interactive kiosks |
Maintenance | Simple screen wiping | Regular calibration, gentle cleaning, avoid electromagnetic interference |
5. Advanced Features to Consider
Smart Mirror Capabilities
Add internet connectivity to display real-time information: weather, news, calendar events, or health metrics while maintaining the mirror appearance.
Gesture Recognition
For environments where touch might be undesirable (e.g., hygiene concerns), gesture sensors like the APDS-9960 can detect hand waves to change display content without physical contact.
AR Integration
Augmented reality mirrors overlay digital elements (clothing, accessories, makeup) onto the user's reflection using cameras and AR software. This requires advanced hardware and software integration but creates immersive try-before-you-buy experiences.
6. Practical Tips
Lighting Considerations
Mirror displays perform best in controlled lighting environments. Excessive ambient light can wash out display content, while insufficient light affects mirror utility.
Brightness Requirements
Select LCD panels with high brightness (minimum 500 nits, preferably 1000+ nits for bright environments) to overcome light loss through the reflective layer.
Sealing for Wet Environments
For bathroom or pool area installations, ensure the assembly is completely sealed to withstand moisture and condensation.
Content Management
Use cloud-based CMS platforms to update content remotely in real-time. This allows scheduling promotions based on time of day or special events.
7. Recommended Suppliers & Support
For professional-grade components and custom manufacturing support:
Shenzhen TOPADKIOSK Display - Specializes in LCD digital signage, QLED/OLED/LED displays, and transparent displays
Website: www.topadkiosk.com
WhatsApp: +86 138 25769658
Email: henry@topadkiosk.com, topadkiosk@gmail.com
They can provide customized solutions including touch integration, size customization, and complete assembly for both touch and non-touch mirror signage applications.
how to set up multi screen by display processor
已阅读 10 个网页
How to Set Up Multi-Screen with a Display Processor
A display processor (also known as a video wall controller or multi-screen拼接处理器) is a dedicated hardware device that takes one or more video sources and distributes them across multiple screens. This is the professional solution for digital signage, video walls, and commercial installations where you need advanced control over content layout.
Here's your complete guide to setting up multi-screen displays using a display processor.
Overview: What a Display Processor Does
Unlike simply connecting multiple monitors to a PC, a display processor gives you:
Single input to multiple outputs - One video source spread across many screens
Custom layouts - Picture-in-picture, side-by-side, or custom window arrangements
Edge blending - Seamless transitions between adjacent screens
Independent scaling - Different resolutions per output
Signal conversion - Mix input and output types (HDMI, DP, DVI, VGA)
Hardware Connection Steps
Step 1: Prepare Your Equipment
Before starting, gather these items :
Display processor (main unit)
Source devices (PC, media player, camera, etc.)
Displays (LCD, LED, or projection screens)
Appropriate cables (HDMI, DVI, DisplayPort, VGA as needed)
Step 2: Connect Source Devices
Connect your video sources to the input ports on the display processor. Most processors have multiple input types:
HDMI 2.0/2.1 (up to 4K@60Hz)
DisplayPort 1.4
DVI-D
VGA (legacy sources)
Pro tip: Label each source cable so you know which input corresponds to which device.
Step 3: Connect the Displays
Connect each display to the output ports on the display processor :
Maintain order - Connect output port 1 to the leftmost/topmost display
Follow the sequence - Output 2 to the next display, and so on
Use quality cables - Poor cables cause signal degradation and sync issues
Check connections - Ensure all cables are firmly seated
Step 4: Power On in Correct Order
Proper power-on sequence prevents detection issues :
Power on the display processor first
Power on all connected displays
Power on source devices last
Check each screen - Verify each display shows a signal (even if just a test pattern or black screen).
Software Configuration Steps
Step 5: Access the Processor's Settings Interface
Display processors offer one or more control methods :
On-screen display (OSD) - Using front-panel buttons or included remote
Web interface - Connect via Ethernet and access through a browser
PC software - Vendor-specific control application
RS-232 serial - For integration with control systems
Step 6: Select Input Source
In the settings menu, select which input source you want to display . For single-source setups, this is straightforward. For multiple sources, you'll assign different inputs to different output zones.
Step 7: Set Output Resolution and Aspect Ratio
Configure each output port to match its connected display :
Resolution - Match the native resolution of each display (e.g., 1920×1080 for Full HD screens)
Refresh rate - Typically 60Hz for most commercial displays
Aspect ratio - Set to match the physical screen (16:9, 16:10, 4:3)
Important: If screens have different resolutions, the processor will scale content independently per output.
Step 8: Configure Screen Layout
This is where the processor's power becomes apparent. You have several layout options :
Layout Type | Description | Best For |
|---|---|---|
Single画面 | One input fills all screens as a single canvas | Video walls, immersive displays |
Multi-picture | Multiple sources displayed simultaneously | Control rooms, monitoring stations |
Picture-in-Picture | Main source with smaller inset window | Retail, presentations |
Custom zones | Programmable window positions and sizes | Digital signage, creative installations |
To configure a video wall (single画面 across multiple screens) :
Select the "Video Wall" or "拼接" mode
Set the total number of rows and columns (e.g., 2×2 for four screens)
The processor automatically assigns bezel compensation
Adjust overlapping if using projection blending
To set custom multi-source layouts:
Choose "Multi-View" or "PBP (Picture-by-Picture)" mode
Select which input goes to each window
Drag windows to desired positions
Resize each window as needed
Step 9: Adjust Signal Parameters
Fine-tune the video signal for optimal display :
Brightness and contrast - Match across all screens
Color temperature - Ensure consistency between different display brands
Scaling - Choose between fill, fit, or stretch modes
Aspect ratio override - Force specific aspect ratios for legacy content
Step 10: Save Configuration
Always save your settings :
Navigate to the "Save" or "Preset" menu
Save to a preset slot (usually 8-16 available)
Name the preset for easy recall (e.g., "2x2 Video Wall - HDMI1")
Enable "Load on Boot" if you want this layout to start automatically
Alternative: Daisy-Chaining (Processor-Lite)
If you don't need a full display processor, daisy-chaining is a simpler alternative for basic multi-screen setups .
Requirements for Daisy-Chaining:
GPU or source device supporting DisplayPort 1.2 MST (Multi-Stream Transport)
Monitors with both DP In and DP Out ports
DisplayPort cables (not HDMI)
Daisy-Chain Steps :
Connect source to first monitor - DisplayPort cable from PC to Monitor 1's DP In
Connect first to second monitor - DP cable from Monitor 1's DP Out to Monitor 2's DP In
Continue the chain - Monitor 2 to Monitor 3, etc.
Configure in OS - Windows will detect all chained monitors as separate displays
Daisy-chain limits :
Maximum 3-4 monitors depending on resolution
Higher resolutions reduce maximum chain length
Bandwidth shared across all monitors
System-Level Configuration (Post-Processor)
Once your display processor is configured, set up your operating system for optimal multi-screen use.
Windows Setup
Quick setup using Win+P:
Press
Win + Pto open projection menuSelect Extend for independent desktop across all screens
Select Duplicate for identical content on all screens
Select Second screen only to use only external displays
Advanced arrangement:
Right-click desktop → Display Settings
Click "Identify" to see which rectangle corresponds to each physical screen
Drag rectangles to match physical monitor positions
Click a rectangle → "Make this my main display" to set primary
Adjust scaling per display if resolutions differ
macOS Setup
System Settings → Displays → Arrangement
Drag display icons to match physical layout
Drag the white menu bar to set the primary display
Linux (Weston/Wayland) Setup
For embedded Linux systems (common in digital signage), multi-display requires Weston configuration :
ini
# /etc/xdg/weston/weston.ini
[core]
shell=kiosk-shell.so
[output]
name=HDMI-A-1
mode=on
[output]
name=LVDS-1
mode=currentFor assigning specific applications to specific screens :
ini
[output]
name=HDMI-A-1
app-ids=Qt5_CinematicExperience
mode=1920x1080
[output]
name=HDMI-A-2
app-ids=smarthome
mode=1920x1080Display Modes Explained
Extend Mode
Each display shows different content. The desktop spans across all screens. Best for multitasking, design work, and applications where each screen serves a different purpose .
Duplicate/Clone Mode
All displays show identical content. Best for presentations, training rooms, and situations where multiple audiences need to see the same thing .
Picture-by-Picture (PBP)
The display processor shows multiple sources simultaneously on a single screen or across the wall. Each source occupies a distinct zone .
Troubleshooting Common Issues
No Signal on Some Displays
Check in this order:
Verify cable connections are secure
Confirm the output port is enabled in processor settings
Test the display with a known-good source
Try a different cable (cables fail more often than ports)
Resolution Mismatch
Symptoms: Image stretched, cropped, or black bars appear.
Solutions:
Set output resolution to match display's native resolution
Disable overscan in display settings
Update graphics drivers
Use EDID emulation if available on your processor
Screen Flickering or Artifacts
Possible causes:
Poor quality or excessively long cables
Bandwidth exceeded (too many high-resolution outputs)
Interference from nearby power cables
Solutions:
Use certified high-speed cables
Reduce resolution or refresh rate on affected outputs
Separate video cables from power cables
Displays Not Detected by OS
Windows:
cmd
pnputil /scan-devicesCheck BIOS settings:
Enable Multi-Monitor support
Set Primary Display to Auto or PEG
Enable Above 4G Decoding for multiple high-resolution outputs
Professional Tips for Digital Signage
Bezel Compensation
When creating video walls, account for the physical bezels between displays. Most display processors have bezel compensation settings that "hide" the gaps by shifting the image.
EDID Management
Professional processors can emulate EDID information, tricking sources into outputting the optimal resolution even if connected displays vary.
Redundancy
For critical installations, consider processors with redundant power supplies and dual network interfaces for failover.
Remote Management
Many display processors support:
SNMP monitoring
Schedule-based input switching
Email alerts for signal loss
Web-based control from anywhere
Quick Reference: Connection Types
Connection | Max Resolution | Daisy-Chain Support | Best For |
|---|---|---|---|
DisplayPort 1.4 | 8K@60Hz | Yes (MST) | Professional multi-screen |
HDMI 2.1 | 8K@60Hz | No | Consumer displays, short runs |
Thunderbolt 3/4 | 8K@60Hz | Yes | Mac setups, high-bandwidth |
USB-C (DP Alt) | 4K@60Hz | Limited | Laptops, portable setups |
DVI-D | 1920×1200@60Hz | No | Legacy equipment |
Need Professional Components?
For commercial display processors, video wall controllers, and custom signage solutions:
Shenzhen TOPADKIOSK Display
Specializes in LCD digital signage and display solutions
Website: www.topadkiosk.com
WhatsApp: +86 138 25769658
Email: henry@topadkiosk.com / topadkiosk@gmail.com
They can provide customized display processors, video wall controllers, and complete multi-screen signage systems tailored to your specific requirements.
See Also
Enhance Your Project With These OLED Display Tips
DIY Electronics: A Beginner's Guide to Transparent OLEDs
Leading Brands and Manufacturers of LCD Display Screens