A Complete Guide to Electric Bike LCD Display Manuals
Shenzhen TopAdkiosk Display Technology Co., Ltd.
Add.: 2F, Bldg 10, Changfeng Industrial Park, Dongkeng, Fenghuang, Guangming, Shenzhen, China 518132
Mobile/WHATSAPP: 86-138 25769658
Email: marketing@topadkiosk.com topadkiosk@gmail.com
Skype: pghenry1
Wechat: adkioskhenry
English Web.: http://www.topadkiosk.com/
https://www.topkioskdisplay.com/
When you ride your electric bike, the right electric bike lcd display manual helps keep you safe. It also helps your bike work better. There are many kinds of displays. Some are simple LED indicators. Others are advanced color LCD screens. You need the correct ebike lcd display manual for your bike model. Each display has different features. The user manual shows you how to set up your display. It helps you adjust settings and fix problems. The manual gives you steps to follow. If you are new or have experience, the ebike lcd display manual helps you feel sure. It helps you get the best from your electric bike.
Visibility | Data Depth | Durability | Price Range | |
|---|---|---|---|---|
Standard LCD | Good (High Contrast) | Full (Speed, Odo, Trip) | High | $30 – $60 |
Color LCD Display | Excellent (Vibrant) | Advanced (Wattage, Temp) | Medium | $70 – $130 |
LED Control Pad | Poor (Simple Lights) | Basic (Assist Level) | Very High | $15 – $30 |
Key Takeaways
Reading your electric bike LCD display manual makes riding better. It helps you learn about features and settings for more control.
There are different types of displays with special features. Pick one that matches how you ride and what you need, like how easy it is to see and how much data you want.
Changing settings on your LCD display can make riding safer. You can set things like brightness and pedal assist levels to fit your ride.
Taking care of your LCD display helps it last longer. Clean the screen and check the wires so you do not have problems when you ride.
Always look at your user manual if something goes wrong. It gives answers for common problems and helps keep your bike working well.
What an Electric Bike LCD Display Manual Covers
Main Sections in the Manual
When you open your user manual, you find clear sections that guide you step by step. Each user manual starts with a table of contents. This helps you find what you need fast. You see a section about the lcd display. It explains the screen layout and what each symbol means. The user manual also shows you how to turn your electric bike on and off. You learn how to use the buttons and change settings.
Most user manuals include:
A quick start guide for your electric bike
Diagrams of the lcd display and control buttons
Instructions for setting pedal assist levels
Steps for checking battery status and speed
Troubleshooting tips for common problems
Safety warnings and maintenance advice
You can use the user manual to adjust the lcd display for your needs. Some manuals have a section for advanced settings. These let you change things like backlight brightness or speed limits. You also find tips for keeping your electric bike in good shape.
Why Reading the Manual Matters
Reading your user manual gives you more control over your electric bike. You learn how to use the lcd display to check speed, battery power, and pedal assist. This helps you avoid running out of power or riding too fast. You can make smart choices while riding.
Tip: The user manual teaches you how to adjust settings without taking your hands off the handlebars. This keeps you safer on the road.
The user manual also explains features like backlit screens. These help you see the lcd display in low light. You ride with more confidence, even at night. When you follow the user manual, you protect your electric bike and make it last longer. You also keep yourself safe by understanding every feature.
Understanding Your Ebike LCD Display
What Is an Ebike LCD Display
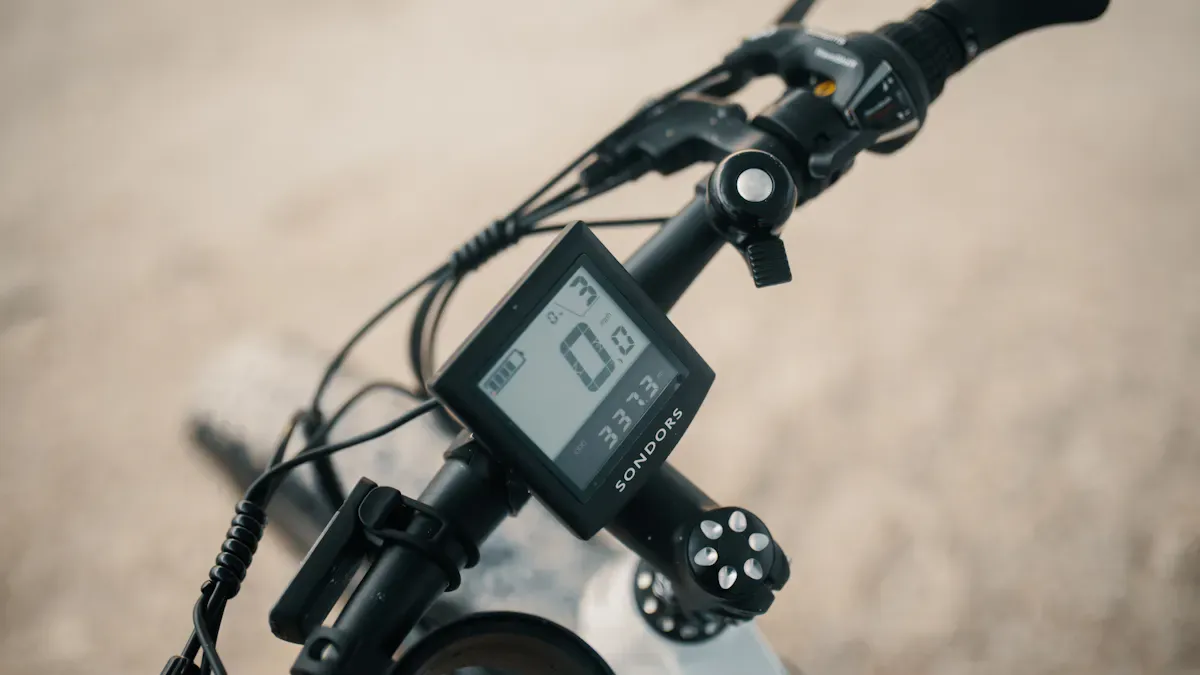
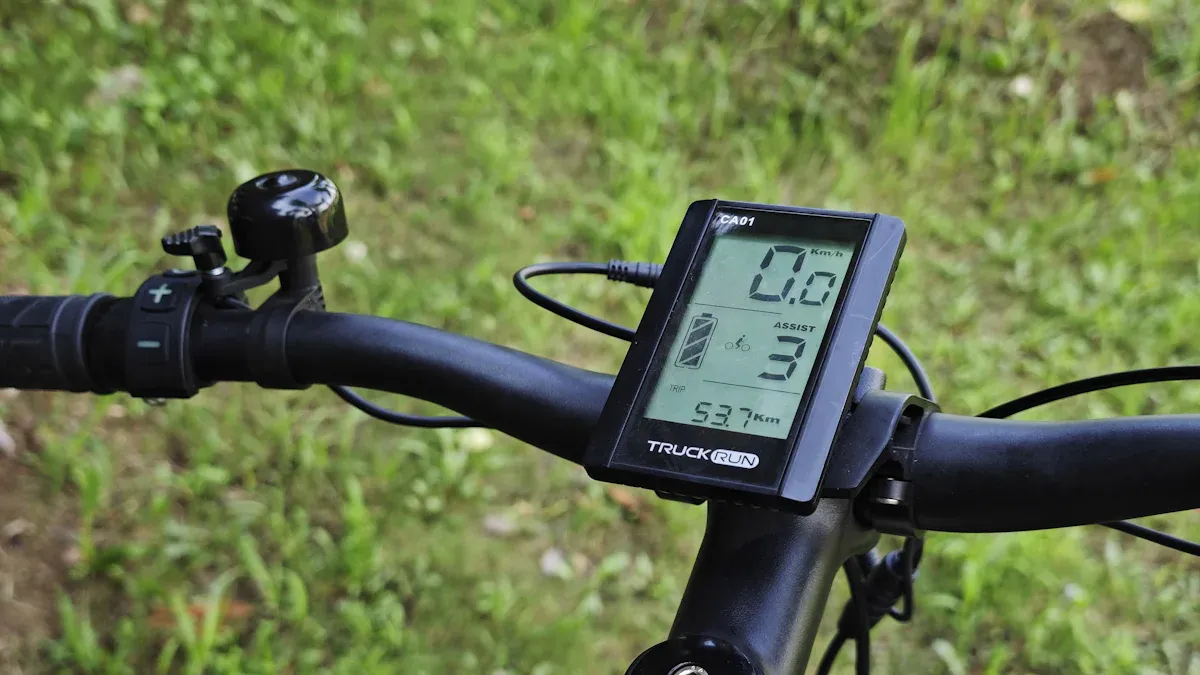
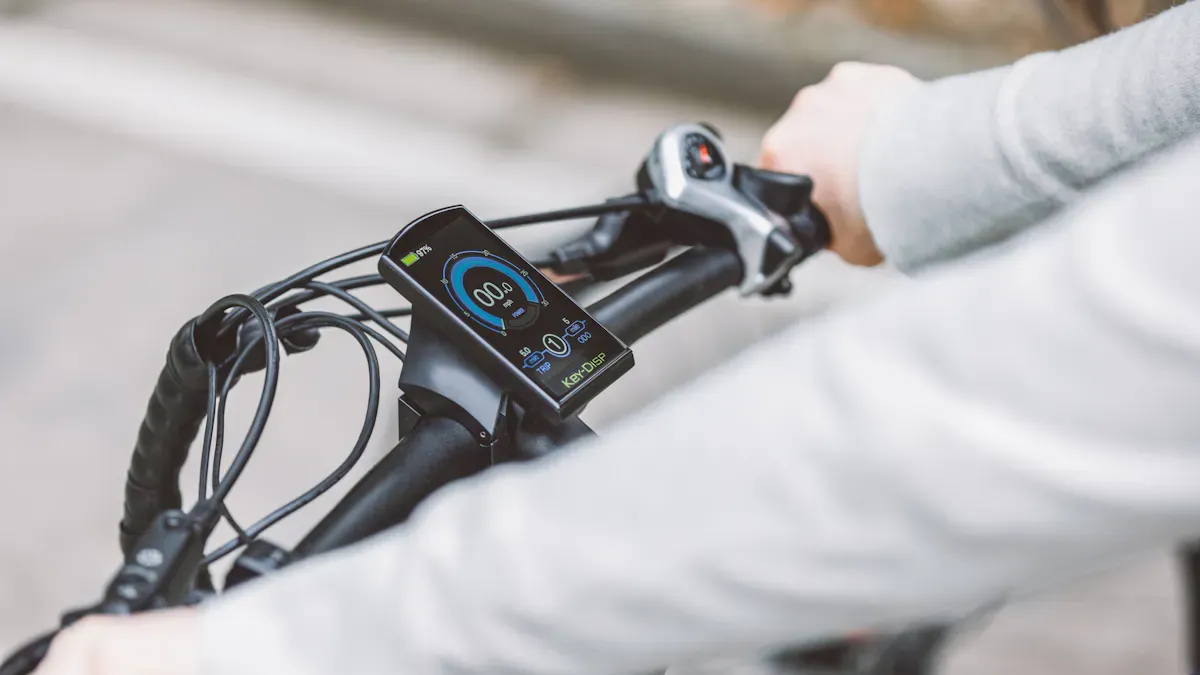
You use an ebike lcd display every time you ride your electric bike. This small lcd screen sits on your handlebars. It works like a dashboard for your bike. The ebike lcd display shows you important details about your ride. You can see your speed, battery level, and pedal assist mode. The lcd screen helps you control your bike and make smart choices while riding.
Manufacturers design the ebike lcd display to keep you safe and comfortable. The lcd screen gives you clear, bright numbers and symbols. You can read the lcd screen in sunlight or at night. Some lcd screens even let you adjust the backlight for better visibility. The ebike lcd display often includes buttons so you can change settings without stopping your bike. You can turn on your lights, check your trip distance, or switch pedal assist levels with a simple press.
Tip: Think of your ebike lcd display as your bike’s control center. It helps you track your ride and manage your settings with ease.
Key Information Displayed
The ebike lcd display gives you all the data you need for a safe and fun ride. The lcd screen shows several key pieces of information:
Current speed: See how fast you ride at any moment.
Battery level: Check how much power you have left on your bike.
Distance traveled: Track your trip distance and total distance.
Pedal assist mode: Know which level of help you get from your motor.
Trip time: See how long you have been riding.
Odometer: Find out the total miles your bike has traveled.
Wattage: Some lcd screens show how much power your motor uses.
Lights control: Turn your bike lights on or off right from the lcd screen.
USB charging: Charge your phone or device using the lcd screen’s USB port.
Date, time, and temperature: Stay updated with extra details on advanced lcd screens.
The lcd screen on your ebike lcd display makes it easy to see all this information at a glance. You do not need to stop your bike or guess about your battery. The lcd screen keeps you informed and in control. You can adjust your pedal assist, check your speed, and plan your ride better. The ebike lcd display improves your riding experience by making every detail clear and easy to read.
Note: A bright, backlit lcd screen helps you see your ebike lcd display in any weather or lighting. This feature keeps you safe and confident on every ride.
LCD Display Features and Types
Common Display Types
You see many types of electric bike display when you look at different bikes. Each type gives you a unique way to check your ride. The table below shows the most popular types and their main features:
Type of Display | Features |
|---|---|
Minimalist LED Indicators | Simple light bars show battery level and assist mode only. |
Standard LCD Screens | Black and white screens display speed, battery, assist level, trip, and odometer. |
Advanced Color Displays | Large color screens show rich data, GPS maps, and Bluetooth app support. |
Smartphone-Based Systems | Your phone becomes the display with navigation, music, and fitness tracking. |
You use the ebike lcd display to check your speed, battery, and trip distance. Some electric bike display models use only lights. Others give you a full screen with numbers and symbols. Advanced color displays can show maps and connect to your phone. Smartphone-based systems turn your device into a smart electric bike lcd display. You can pick the type that fits your riding style.
Essential Features for Riders
When you choose an electric bike display, you want features that make your ride safe and easy. The ebike lcd display should show you the battery level and current speed. You need to see your trip distance and the unit of distance, like miles or kilometers. A good lcd display for electric bike use lets you charge your phone with a USB port. Sunlight readability helps you see the screen on bright days. High image quality and anti-glare properties keep the display clear.
You want the ebike lcd display to work in hot and cold weather. Low power use means your electric bike battery lasts longer. The display should be easy to use, even when you ride fast. Many electric bike display models show voltage grades and pas grades. You can check your speedometer and odometer at a glance. Some displays let you set the wheel size for better accuracy. You may also adjust background luminance for night rides. The right lcd ebike display helps you control your bike and enjoy every trip.
Tip: Always check if your ebike lcd display matches your bike’s wheel size and voltage grades for the best results.
How to Set LCD Display Parameters
Setting up your ebike lcd display helps you get the most from your electric bike. You can change many settings to match your riding style and needs. Each display and controller may have different steps, so always check your manual before you start.
Accessing the Settings Menu
You need to enter the settings menu to adjust your ebike lcd display. Most electric bike displays use button combinations to open this menu. The table below shows how to access the settings menu on some popular models:
Model | |
|---|---|
SW900/S830 | Press and hold the Up and Down arrows for 4-5 seconds. |
LCD-S866/M5 | Press the up and down arrow buttons together for 5 seconds. |
Bafang | Press and hold the '+' and '-' buttons at the same time. |
KT Display | Use specific button combinations (check your manual or forums). |
You may need to turn on your electric bike first. For the SW900 display, press and hold the M button for 4-5 seconds to power on. Then, press and hold the Up and Down arrows to enter the settings panel. The kt display often uses unique combinations, so look for instructions in your manual or online forums.
Tip: If you cannot enter the menu, check if your controller is compatible with your ebike lcd display. Some displays only work with certain controllers.
Adjusting Common Parameters
Once you open the settings menu, you can set lcd display parameters that control how your electric bike works. The table below lists common parameters you can adjust:
Parameter | Description |
|---|---|
P01 | Background luminance (1 is darkest, 3 is brightest) |
P02 | Unit of distance (0 is KM, 1 is MILE) |
P03 | Voltage grades (24V, 36V, 48V, 52V) |
P04 | Sleep time (0 means never go off, 1-60 min for sleep time) |
P05 | PAS grades (0 has 3 grades, 1 has 5 grades) |
P06 | Wheel size (in inches, precision 0.1) |
P07 | Speed measuring magnet (range 1-100) |
To adjust these settings, use the arrow buttons to move through the menu. Press the M or power button to select a parameter. Change the value with the Up or Down arrows. Save your changes by pressing and holding the M button or waiting for the menu to exit.
Different displays and controllers may use different names or codes for these settings. The kt display lets you adjust many of these parameters. You can set the voltage to match your electric bike battery. You can also set the wheel size for accurate speed readings. The SW900 display has similar options but may use different button steps.
Note: Always match the voltage and wheel size to your electric bike. Wrong settings can cause speed errors or battery problems.
Personalizing Your Display
You can personalize your ebike lcd display to make your ride safer and more comfortable. The table below shows some settings you can change:
Setting | Description |
|---|---|
P01 | Background Luminance: Controls screen brightness (1 to 3) |
P02 | Distance Units: Switch between kilometers (0) and miles (1) |
P03 | Voltage Settings: Set for 24V, 36V, 48V, or 52V systems |
P04 | Sleep Timer: Set sleep time from 0 (never) to 60 minutes |
P05 | PAS Assist Levels: Adjust for different electric assist modes |
You can adjust the brightness for better visibility during the day. You can switch between miles and kilometers, depending on your preference. You can set the sleep timer to save battery when you stop riding. The kt display also lets you set the number of pedal assist levels for more control.
Personalizing your ebike lcd display can improve your riding experience. For example, setting the correct wheel size gives you accurate speed readings. Adjusting the speed limit helps you stay safe. Customizing power assist levels lets you match the bike to your skill level.
Tip: Customizing your display helps you ride smarter and safer. You see the data you need and control your electric bike with confidence.
The kt display offers many options for riders who want more control. You can set a password for extra security. You can also use the night driving function to turn on the backlight and headlight. Always check if your controller supports these features.
When you set lcd display parameters, you make your electric bike fit your needs. You get better performance, more safety, and a more enjoyable ride.
Troubleshooting Your LCD Display
If your ebike lcd display stops working, you might feel upset. You want to ride again soon. The user manual helps you fix problems quickly. This part shows common issues and how to solve them.
Display Not Working
When your ebike lcd display does not turn on, check simple things first. Most problems are easy to fix. Here are the main causes:
Cause | Description |
|---|---|
Damaged Wiring Harness | Loose wires or broken cables can stop power or data from reaching the display. |
Blown Fuse or Burnt Component | A blown fuse stops power from getting to the display, so it will not work. |
Controller Malfunction | If the controller breaks, the display may not turn on or may show mistakes. |
Faulty Buttons or Switches | Broken or stuck buttons can make the display not work right. |
Water and Moisture Damage | Water can cause short circuits or strange numbers on the display. |
Software or Firmware Glitches | Software problems can freeze the screen or show wrong numbers. You may need to update or reset it. |
Always check your battery first. Make sure it is charged and connected. If the display stays off, look for loose wires or damage. The user manual gives steps to check each part.
Resetting and Error Codes
Sometimes, your display shows error codes or freezes up. Try these steps to fix it:
Check the battery and power. Make sure the battery is strong enough.
Look at the display unit for damage or loose parts.
Check cables and connectors for rust or broken pieces.
Find error codes on the screen. The user manual tells what each code means.
Test each part one at a time. If you have another display, swap it to see if the problem moves.
Many displays let you reset by holding certain buttons. The user manual shows how to reset your display. If you see error codes, write them down. Use the manual to find out what caused the problem and how to fix it.
Waterproofing and Durability
Waterproofing keeps your ebike lcd display safe in rain or wet weather. Good waterproofing stops water from making the screen foggy or buttons stick. This helps your display last longer and keeps you safe. Always check if your display has a waterproof rating in the user manual.
Compatibility Issues
Some displays do not work with every controller. You may have problems if your display and controller do not match. Here are common compatibility issues:
Compatibility Issue | Description |
|---|---|
Display is Completely Dead | This happens from wrong voltage, bad wiring, or protocol problems. |
Powers On, Then Cuts Off | This comes from firmware that does not match. |
Screen is On but Blank or Frozen | Protocol or firmware mismatch causes this. |
Displays Error Codes | Communication errors or hidden faults can cause error codes. |
Incorrect or Erratic Readings | Firmware mismatch makes the display show wrong numbers. |
Unresponsive Buttons | Protocol conflict stops the buttons from working. |
If you see these problems, check your user manual for the right controller and display match. Always set the correct voltage and wheel size. Wrong settings can change battery capacity, speed, and sleep time. The manual gives you the best steps to fix your bike.
Tip: Keep your user manual close. It helps you fix problems fast and keeps your electric bike working well.
Choosing or Replacing an LCD Display
Factors to Consider
When you choose a new LCD display for your bike, you need to think about several important things. Picking the right display helps your bike work well and keeps you safe on every ride.
Make sure the display matches your bike’s motor system.
Check the communication protocol. Some displays use UART, while others use CAN Bus.
Look at the voltage. The display must fit your bike’s battery voltage.
Match the connectors. The pins and plugs must fit exactly.
Think about the features you want. Some displays show speed, battery, and trip distance. Others have extra features for night riding or bad weather.
Set a budget. Displays come in many price ranges.
Check how easy it is to install and set up the display.
Ask for help from a professional if you feel unsure.
Tip: Always read your bike’s manual before buying a new display. This helps you avoid mistakes and saves time.
Installation Tips
You need to follow the right steps when you install a new LCD display on your bike. Each model has its own rules. The table below shows what you should check before you start:
Installation Requirement | Description |
|---|---|
Compatibility | Displays must match the bike's motor and controller. Mixing brands usually does not work. |
Communication Protocols | Budget bikes often use UART. Premium models may use CAN Bus. |
Connectors and Wiring | Brands use different connectors. Pin setups must match exactly. |
Voltage Compatibility | Displays work with certain voltage ranges. Wrong voltage can break the display. |
Firmware and Software | Firmware must match. If the data format is different, the display may not work. |
You should always turn off your bike before you start. Connect the wires carefully. Double-check each connection. If you see any errors, check the manual or ask for help. A good installation keeps your bike safe and makes your rides smooth.
Note: If you feel unsure, ask a bike shop for help. This can prevent damage and save you money.
Best Practices and Resources for LCD Displays
Maintenance Tips
You want your electric bike LCD display to last a long time. Good care helps you avoid problems and keeps your rides smooth. Follow these steps to keep your display in top shape:
Clean the screen with a soft, lint-free cloth. Use water or a mild soap. Do not use harsh chemicals.
Store your bike in a cool, shaded place. Extreme heat or cold can damage the display.
Check all cables and connectors often. Make sure they are tight and not worn out.
Update your display’s software when the manufacturer releases new versions. Updates can fix bugs and add features.
Keep your bike’s battery healthy. Charge it as the manual says. A strong battery helps the display work well.
Handle your bike with care. Do not drop or hit the display.
Use a cover for the display if you leave your bike outside. This protects it from dust, rain, and sunlight.
Check for firmware updates regularly. These can improve how your display works.
Tip: Regular care keeps your display bright and easy to read. It also helps your bike stay safe and reliable.
Where to Find Manuals and Support
You may need help with your bike’s LCD display. Many resources can guide you if you have questions or problems.
Visit the manufacturer’s website. Most brands post user manuals and update guides online.
Join online forums like ElectricBikeReview or Endless Sphere. Riders share tips and answer questions about display issues.
Watch video tutorials on YouTube. Many bike owners post step-by-step guides for fixing displays.
Ask your local bike shop for help. Experts can check your display and suggest solutions.
Always turn off your bike and remove the battery before you inspect the display. This keeps you safe.
Read your user manual for model-specific advice. Manuals explain error codes and troubleshooting steps.
Note: You can solve many display problems by reading the manual and asking other bike riders for advice.
When you use the electric bike LCD display manual, you set up your bike the right way. This helps you ride safer. You can change wheel size, speed limits, and sensor sensitivity for a better ride. Try every feature in your manual to get more from your bike. For help, look at these resources:
Complete Repair Guide for Mihogo
Manufacturer websites and user forums
Troubleshooting Steps | Description |
|---|---|
Check all connections | Make sure your bike’s display and controller connect well. |
Test battery and power supply | Confirm your bike’s battery works as it should. |
You can keep your bike working well and enjoy every ride.
Guide to Electric Bike LCD Display
The LCD display on an electric bike is the core interface between you and the e‑drive system. Understanding it helps you better set up and maintain your bike, and makes every ride more intuitive.
🚴♂️ Types of E‑Bike LCD Displays
The type of display determines how much information you get and how easily you can control it. The main categories are:
Basic LCD (Monochrome) – The most common type, usually with a single‑colour backlight. Clearly shows core riding data: speed, battery level, assist level, distance. Excellent value for commuting and leisure riding.
Advanced LCD / TFT Colour Display – Richer colours, higher resolution, better sunlight readability. In addition to basic data, may show power output, cadence, heart rate (with sensors) and even navigation. Often supports smartphone connectivity.
Minimalist LED Indicator – A row of lights that uses colour and number of LEDs to show battery level and assist level only. Very durable and energy‑efficient – perfect for riders who want absolute simplicity.
Smartphone as Display – Uses a handlebar‑mounted remote and a phone app to turn your smartphone into the display. Pros: rich information, powerful navigation. Cons: limited by phone battery life and waterproofing.
🧐 How to Choose and Interpret Display Parameters
When selecting and reading a display, keep these key points in mind:
Compatibility is the first rule – The display must match your bike’s motor, controller, and communication protocol. Components from different brands (e.g., Bosch, Yamaha, Bafang) are generally not interchangeable. Always confirm compatibility with your dealer or seller.
Read the basic data – Typical icons include: real‑time speed, battery level (bars and percentage), current assist level, total odometer, trip distance. Some displays also show real‑time power or riding time when idle.
Look for extra metrics – More advanced displays provide power output (watts), cadence (RPM), and estimated remaining range – helping you plan your trip and manage effort.
Consider practical performance – Choose a display with at least IP65 waterproof rating for reliable operation in rain or wet conditions. High brightness and anti‑glare design ensure readability in direct sunlight.
🛠️ Common Parameters and System Settings
By correctly adjusting the hidden parameter menu, you can make your bike behave exactly the way you like.
Entering the parameter menu – Usually, with the display turned on, press and hold the “+” and “–” buttons together for a few seconds. The exact method may vary by brand and model.
Quick reference table of key parameters – The table below covers most basic adjustments. For advanced functions, refer to your specific user manual.
Parameter Code | Function | Typical Setting / Notes |
|---|---|---|
P01 / P2 | Speed limit | Sets the maximum speed at which the motor provides assistance. Must comply with local regulations – do not set it unrealistically high. |
P02 | Unit selection | Switch between “km” (kilometres) and “mi” (miles). |
P03 | Battery voltage | Must match your battery’s nominal voltage (e.g., 36V / 48V / 52V). |
P06 | Wheel circumference | Enter the actual rolling circumference (mm) of your tyre – critical for accurate speed and distance. |
P07 | Speed magnet parameter | Sets the number of pulses per motor revolution. Must match your motor specifications – otherwise speed will be very inaccurate. |
P08 / P09 | Backlight brightness / Sleep timer | Adjust screen brightness or set the system auto‑sleep time. |
P10 | Start mode | “0” = zero start (throttle only); “1” = non‑zero start (motor engages only after pedalling begins). |
🚦 Error Code Identification and Troubleshooting
When an error code appears on the display, it points you toward the problem. Below are common error codes with possible causes and suggested fixes. For the most accurate information, always refer to your user manual.
Error Code | Likely Cause | Suggested Action |
|---|---|---|
E004 / Error 4 (SW900) | Throttle or brake sensor fault | Check cable connections. Restart the system. |
E006 / Error 6 | Battery undervoltage | Charge the battery immediately. Check voltage setting (P03). |
E007 / Error 7 | Motor Hall sensor fault | If restarting does not help, contact a professional bike shop. |
E008 / Error 8 | Communication failure between controller and display | Check all cables and connectors from display to controller. |
E010 / Error 10 | Communication failure between controller and motor | Most often a loose connector or poor contact – resecure all cables. |
E011 / Error 11 | Motor overheating | Turn off power and let the motor cool down. Avoid long, steep climbs. |
💡 Troubleshooting flow: When you see an error code, follow this sequence:
Restart system → Check / resecure all cables → Fully charge battery → Contact your bike shop
💡 Common Non‑Error Problems
Sometimes the display works but shows incorrect or strange behaviour. Here are a few common issues and solutions.
Symptom | Possible Cause & Solution |
|---|---|
Screen does not light up | Battery dead or poor connection; loose cable; blown internal fuse. |
Speed / distance is wrong | Incorrect wheel circumference (P06) or speed magnet parameter (P07). |
Bike does not assist | Faulty motor‑controller connection, brake cutoff switch, or sensor. |
Cannot connect to smartphone app | Bluetooth not paired; outdated app or display firmware; missing phone permissions. |
🔧 Daily Maintenance Tips
Good daily care keeps your display working longer.
Keep it clean – Wipe the display housing regularly with a soft, damp cloth (mild detergent is OK). Avoid alcohol or harsh solvents.
Protect from moisture – Even if the display is water‑resistant, avoid prolonged heavy rain. Do not use a pressure washer directly on the display area.
Periodic inspection – Check cables and connectors from time to time for looseness, wear, or corrosion.
💎 Summary
The e‑bike LCD display is your essential window into your bike’s operation and status. In daily use, pay attention to what it shows. When you encounter a problem, follow the “Restart → Check cables → Consult manual → Contact support” sequence, and most issues can be resolved. Take care of your display, and it will be a reliable companion on every ride.
Let me know if you would like a printable PDF version or more detailed information on a specific display model!
FAQ
What should you do if your LCD display will not turn on?
First, check your battery connection. Make sure all wires are tight. Try charging the battery. If the display stays off, look for loose cables or a blown fuse.
How can you reset your electric bike LCD display?
You can usually reset the display by holding the power and mode buttons together for a few seconds. Check your manual for the exact steps. Each model may use a different button combination.
Why does your display show the wrong speed or distance?
You may have set the wrong wheel size.
The speed sensor might be dirty or misaligned.
Check your settings menu and adjust the wheel size for accuracy.
Can you use any LCD display with your electric bike?
No, you cannot. Your display must match your bike’s controller and voltage. Always check compatibility in your manual before buying a new display.
Where can you find a replacement manual for your LCD display?
Visit the manufacturer’s website. You can also search online forums or ask your local bike shop. Many brands post free PDF manuals for download.
See Also
A Newbie's Guide to Transparent OLED Displays for DIY Projects
Leading LCD Display Manufacturers for Your Upcoming Project
Guide to Installing and Configuring Digital Signage Displays
Comprehensive Instructions for Setting Up a Touch Screen Kiosk
Selecting the Ideal LCD Kiosk Installation Service in Your Area