Easy ways to implement conference room digital signage at work
Shenzhen TopAdkiosk Display Technology Co., Ltd.
Add.: 2F, Bldg 10, Changfeng Industrial Park, Dongkeng, Fenghuang, Guangming, Shenzhen, China 518132
Mobile/WHATSAPP: 86-138 25769658
Email: marketing@topadkiosk.com topadkiosk@gmail.com
Skype: pghenry1
Wechat: adkioskhenry
English Web.: https://www.topkioskdisplay.com/
http://www.ad-kiosk.com/
https://www.toplcddisplay.com/
http://www.multitouchdigitalsignage.com/
https://www.youtube.com/channel/UCYVYNJHxLVEcQD8fuUxXNTA/videos?view_as=subscriber
https://www.facebook.com/TOPADKIOSKSHENZHEN/?ref=bookmarks
You can set up conference room digital signage at work with easy tools and fast steps. Many office managers and IT workers pick a DIY method because it saves money and time. You can use your TV screens to show interactive content.
Updating digital signage takes only a few minutes. Printed materials can take days to update. Staff do not waste time on simple tasks. They can spend more time on important projects.
Benefit | How It Helps Your Office |
|---|---|
Cost Reduction | No need to pay for printing or paper |
Time Efficiency | Content updates are quick |
Increased Productivity | Staff work on tasks that matter |
Look at https://www.topkioskdisplay.com/ to start using conference room digital signage.
Key Takeaways
Use the TVs you already have in your office for digital signage. This helps you save money and resources.
Change the content fast so your team stays informed and interested.
Connect digital signage with your office calendar. This helps stop booking conflicts.
Pick software that is easy to use. This makes it simple to manage displays and content.
Try the system in one room first. Test it before you use it in more rooms.
Conference Room Digital Signage Benefits

Scheduling & Collaboration
Conference room digital signage makes scheduling simple. When you walk into a meeting room, you see signs that show if the room is open or busy. This helps you not book the same room as someone else. The system connects to your office calendar. You always see the newest schedule. You do not have to stop meetings to check if a room is free.
Here are some ways digital signage helps with scheduling and teamwork:
You see signs with colors that show if a room is open or not.
You can book a room from the screen or your phone.
The display changes right away, so everyone knows the schedule.
The system removes bookings for meetings that do not happen.
You can check the display to see how many people fit in the room and what tools are there.
Feature | How It Helps You |
|---|---|
Clear status indicators | Save time and stop interruptions |
Interactive booking | Book rooms fast |
Central calendar integration | No more double bookings |
Conference room digital signage works with Zoom Rooms, Microsoft Teams Rooms, and Cisco Webex. These tools help your team start meetings on time. They also help you share information fast.
Workplace Communication
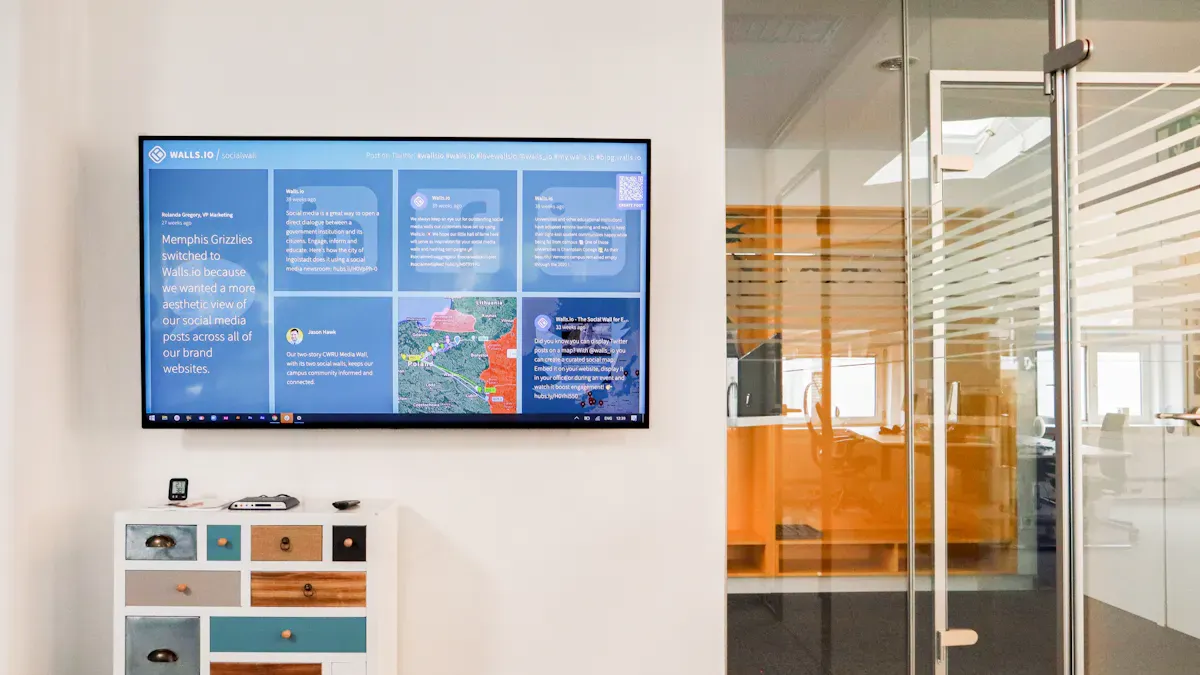
You can use conference room digital signage to share news and updates. The screens show messages, meeting progress, and welcome notes for guests. This helps everyone know what is going on and makes your office feel friendly.
Some benefits are:
Screens show company news and reminders that change
Updates show right away, so people do not get confused
Visitors see messages just for them
Your logo and mission statement show up the same way every time
You can also show live numbers, social media posts, or meeting countdowns. Good pictures and clear words help your team pay attention. By using screens you already have, you get more out of your equipment and help your office use more technology.
Equipment & Software
Using Existing TVs
You can use your office TVs for digital signage. Most offices have TVs with HDMI ports and Wi-Fi. If your TV is a smart TV, you do not need to buy more media players. This saves money and makes things faster. You only need three things to begin:
Software to control what shows on the screens
Your office TVs
A player for each TV (smart TVs have this built in)
Many smart TVs let you add apps or use a web browser. You can show meeting times, news, or welcome notes from your dashboard. This way, you spend less and use what you already have.
Tip: Check that your TV can go online and use simple apps or browsers.
DIY Setup Options
You can set up digital signage with easy tools. Here is a table with some common DIY choices:
Component | Description | Cost Range |
|---|---|---|
Small Tablet | At least 8" with a web browser and internet connection. | Varies (approx. $100) |
Mounting Hardware | Options from adhesive strips to designer mounts. | $3 - $100 |
Extra-long Power Cord & Adapter | Necessary for reliable power supply. | Varies |
Office 365 Tenant Credentials | Required for setup. | N/A |
Free Meeting Room 365 Account | Allows unlimited customizable displays; free for 30 days. | N/A |
If you do not have a smart TV, you can use a small tablet as a screen. Mounting hardware lets you put screens where people can see them. Always make sure your devices have power and internet.
Digital Signage Software
You need software to run your conference room digital signage. Some popular choices are:
Yodeck
Appspace
Yodeck and Appspace help you pick what shows on each screen. You can change content from one place. Appspace is known for being great at workplace experience. These tools are simple to use and work for any office size.
If you use Microsoft Teams Rooms, follow these steps to set up digital signage:
Set permissions for digital signage.
Turn on digital signage for your group.
Add sources for signage, including other apps if needed.
Choose which rooms get which sources and settings.
With the right software and setup, you can keep your conference rooms neat and your team up to date.
Setup Guide
Room Preparation
Get your conference room ready before you put up screens. Look at the room and pick the best spot for the display. Put screens at eye level so people can read them. Place the display near the door or in the middle of the room. This way, people see the room status when they walk by.
Think about these things when you set up the room:
Make sure your display works with your hardware and calendar.
Choose a system that can grow with your company.
Check prices to find what fits your budget.
Plan to keep everything working with regular checks.
Teach your team how to use the new system.
Keep the room safe and neat. Use strong brackets and cases to protect your screens. Add locks if you need more security.
Here is a table to help you plan your setup:
Feature | Benefit |
|---|---|
Real-Time Room Availability | Shows live updates so you do not waste time looking for open rooms. |
Integration with Calendars | Syncs with your schedule to stop double bookings. |
Wayfinding and Interactive Maps | Helps people find rooms quickly, even in large offices. |
Hardware Installation
Now you can put in your conference room digital signage hardware. Pick a screen size that fits your space. Put the display at eye level so it is easy to see. If you want to move screens, use ones that are easy to move. Place screens near doors or busy spots so everyone can see them.
Follow these steps for a safe setup:
Step | Recommendation |
|---|---|
1 | Place signage at eye level for better visibility. |
2 | Install movable screens for flexible presentations. |
3 | Put displays near central areas for easy access to information. |
You can use all-in-one panels, regular screens with HDMI players, or Android tablets with signage apps. Use strong brackets to hold your devices. Add cases and locks to stop theft or damage. You can also use cameras for extra safety.
Tip: Always check power and internet before you finish setting up.
Here are some safety tips to remember:
Safety Measure | Description |
|---|---|
Protects hardware from theft or damage. | |
Secure mounting brackets | Keeps devices firmly attached to walls or stands. |
Physical locks | Stops people from removing or changing equipment. |
Regular maintenance | Finds problems early and keeps everything running smoothly. |
Software Configuration
After you set up the hardware, get your digital signage software ready. Pick software that works with your screens and booking system. Connect the display to your calendar for live updates. Use templates to make all screens look the same.
Follow these tips for software setup:
Connect with your room booking and calendar tools.
Set up layouts, logos, and schedules for a pro look.
Teach your staff how to use the system.
Set content to update by itself to save time.
Use good pictures and clear words to help people pay attention.
Update the system often to keep it safe.
Keep your system safe with strong passwords and updates. Turn on firewalls and let only some people change the content. Back up your data so you do not lose anything important.
Testing & Troubleshooting
Test everything before you start using your conference room digital signage. Check that the display turns on and connects to the internet. Make sure the calendar works and shows the right info. Try booking a room and see if the display changes right away.
Some problems you might see are:
Devices not working together
Sound or picture issues
Software bugs
Booking mix-ups
Staff not knowing how to use the system
If you find a problem, do these things:
Make sure all power cords are plugged in.
Test the internet connection.
Look for damage to the hardware.
Update the software to the newest version.
Note: Teach your team to tell you about problems early. This helps you fix things before meetings get messed up.
When you follow these steps, you get a conference room digital signage system that works well and is easy to use. Your team can work better and your office will run smoothly.
Managing & Scaling Signage
Content Updates
You need to keep your digital signage new so people pay attention. Change what is on your screens two or three times each day. Switch messages in the morning, afternoon, and evening. This helps your team stay interested and see new things. Think about who will see the screens and what you want to say. Use these tools to make updates simple:
Joan works with Microsoft Office 365, Google Workspace, and other calendars for fast updates.
Look Digital Signage shows live schedules and changes them when you update your calendar.
Zapier links Look DS to Google Calendar so everything updates by itself.
Smart scheduling connects your signage to your calendar, so meeting changes show up right away.
Tip: Let updates happen automatically to save time and stop mistakes.
Multiple Room Management
It can be hard to manage many conference rooms, but the right tools make it easy. Use one main dashboard to control all your screens from one spot. You can check if devices work, change how screens look, and see meeting info right away. Here is a table with ways to help you:
Strategy | Description |
|---|---|
Scalability for Multi-location Offices | Start with a few rooms and add more as you need. The software works for one room or many. |
Integrating With Room Booking Systems | Connect your CMS to your calendar for correct room info and privacy. |
Customizing Templates and Layouts | Make displays that match your brand and show schedules clearly. |
Training Employees and Monitoring Usage | Give guides to staff and use reports to see how well the system works. |
Centralized Management and Monitoring | Control and update screens from far away without going to each room. |
Multi-zone Displays | Use screen space for news or notes when rooms are empty. |
Regular Maintenance and Updates | Check your system often to keep it working well. |
Enhancements & Upgrades
You can make your conference room digital signage better with new features. Start by asking your team what they want. Connect your signage to your calendar to stop double bookings. Pick the right mounts for your screens. Show clear and easy-to-read messages. Try your system in one room before using it everywhere.
Listen to what employees say to make the system better.
Make sure your signage connects to your calendar.
Choose mounts that fit your walls or glass.
Use simple layouts for important messages.
Test the system in one room before adding more.
You can also add digital whiteboards, meeting room displays, voice controls, or AI cameras. Interactive screens let people report problems right away.
"Giving clear, interactive, and easy tools for space management shows employees that their time matters and their space is made for them.
You can set up conference room digital signage with easy steps. First, put displays where people can see them. Next, teach your team using simple instructions. Always keep your system updated and check it often.
A fast DIY setup gives you great results.
Benefit | Description |
|---|---|
Everyone sees the correct schedule. | |
Faster meetings | Teams find open rooms quickly. |
Better guest experience | Visitors get clear directions and welcome notes. |
Stronger communication | Staff see important updates right away. |
Begin with one room. You will notice better teamwork and less confusion. Your brand will look stronger. Add more rooms when you feel ready.
Step‑by‑Step Guide to Installing Conference Room Digital Signage
Conference room digital signage is one of the highest‑impact communication tools you can deploy in an office—and in 2026, it’s easier and cheaper than ever. You no longer need expensive AV consultants or dedicated media players for every screen. A working system can be live in an afternoon using TVs you already own, a $50 streaming stick, and cloud‑based software that costs less than a coffee per screen per month.
This guide walks you through the entire process: planning, hardware selection, physical installation, software configuration, content creation, testing, and ongoing maintenance.
📋 Phase 1: Planning & Site Survey
Before buying any equipment, assess each conference room where you plan to install signage.
What to Check During a Site Survey
Checkpoint | What to Look For |
|---|---|
Mounting surface | Wall material (drywall, concrete, glass). Will anchors hold the display weight? |
Power outlets | Within 6 ft of intended mount location preferred. Consider adding new outlets if not—cheaper to install before drywall is finished than after |
Network access | WiFi coverage strength, or existing Ethernet drops near the door |
Viewing angles | Screen should be readable from at least 10 ft away, no glare from overhead lights or windows at different times of day |
Room occupancy data | How many meeting rooms? How often are they used? Which rooms suffer from "ghost meetings" (booked but empty)? |
Pro tip: Walk every location at different times of day. Glare that’s invisible at 10 am can render a screen unreadable at 2 pm.
Define Your Use Cases
Conference room signage typically serves four overlapping functions. Choose the ones that match your problems:
Use Case | Description | Impact |
|---|---|---|
Room status & schedules | Small screen outside each door showing “Available / Booked” with current and upcoming meetings | Eliminates the 5–10 min walk‑and‑check that kills productivity in growing offices |
Company announcements & dashboards | Larger screen in break room or hallway cycling OKR progress, new hire welcomes, customer wins | Reaches people who skip all‑hands and ignore Slack |
Live KPIs | Real‑time sales pipeline (Salesforce, HubSpot), support ticket queue (Zendesk), engineering metrics (DataDog, Grafana) | Keeps dashboards “honest”—stale data gets ignored |
Reception & visitor screens | Greets visitors by name, shows meeting host info, WiFi password, product videos | Professional first impression |
🛠️ Phase 2: Hardware Selection (2026 Options)
Your hardware setup has three core components: a display, a media player, and networking.
2.1 Choose Your Display
Display Type | Pros | Cons | Best For |
|---|---|---|---|
Existing consumer TV | $0 upfront cost. Works fine for 8‑10 hours/day | Not rated for 24/7 operation; may overheat or fail faster if run continuously | Low‑budget startups, offices where screens are off after hours |
Commercial display | Rated for 16–24 hours daily. Better warranty, LAN control, higher brightness (300–700 nits indoor, 1,000+ nits window‑facing) | $400–800+ | Meeting rooms where signage runs all day, every day |
Integrated smart display | Built‑in media player; single device | Vendor lock‑in | Large‑scale deployments with central management |
2026 options to watch: The Philips Signage 2000 Series (43″ to 65″ 4K, 400 nits, runs Android 14 natively) eliminates the need for an external player. It features FailOver technology that automatically plays backup content if the player fails. For small meeting room doors, the VITEC X‑View (11.6″ or 21.5″) runs on PoE (Power‑over‑Ethernet), integrates with Microsoft Office 365 for real‑time availability, and requires only one cable.
2.2 Choose Your Media Player
The media player is the “brain” that runs your signage software. In 2026, you have several good options:
Player | Approx. Cost | Ease of Use | Best For |
|---|---|---|---|
Amazon Fire TV Stick 4K | $50 | ★★★★★ (plug & play) | Small businesses, single screens, minimum technical effort |
Android TV box | 40–40–80 | ★★★★☆ | Flexible setups, multiple apps |
Raspberry Pi 4 | 50–50–75 | ★★★☆☆ (technical) | Custom DIY deployments |
Smart TV (built‑in) | $0 extra | ★★★★☆ | Simple setups; check if your CMS has a native app |
PoE integrated screen | $300+ | ★★★★★ | Cleanest install; one cable for power, network, and data |
2026 trend: Many platforms now turn idle Microsoft Teams Rooms and Zoom Rooms displays into managed signage endpoints with no additional hardware—just a cloud‑native app deployed remotely in minutes.
2.3 Calculate Power & Circuit Requirements
Before installing, confirm your electrical setup can handle the load:
Screen Size | Typical Power Draw |
|---|---|
Small (under 32″) | 50–100W |
Medium (32–55″) | 100–200W |
Large (55–85″) | 150–400W |
Video wall (per sq meter) | 300–800W+ |
A standard 15A circuit can handle about 1,800W total; a 20A circuit about 2,400W. Plan accordingly if multiple displays share the same circuit. Always use surge protectors—they’re cheap insurance.
🔨 Phase 3: Physical Installation
Step 1: Mount the Display
For a wall‑mounted sign outside a meeting room, use a fixed or tilting wall mount:
Mount type: Fixed mounts look cleanest (flush against wall). Tilting mounts (15–15–40) let you angle the screen downward—useful if the TV is mounted above eye level.
Mount height: For hallway or lobby signage, center the screen at eye level (about 4–5 ft from the floor). Above a meeting room door, mount it higher (6–7 ft) with a slight downward tilt.
VESA pattern: Match the mount to your display’s VESA pattern (e.g., 200×200, 400×400).
Safety check: Always mount into studs or use heavy‑duty anchors rated for the display’s weight. A falling screen is a serious hazard.
Step 2: Route Power and Network Cables
Clean cable management separates a professional installation from a messy one.
Power: Plug the display into a nearby outlet. If an outlet isn’t within 6 ft, use a cable management channel (10–10–15) to hide the cord. Running a new outlet costs 150–150–300 with an electrician.
Network: For wired connections, run Cat6 cable to the media player. For WiFi, verify signal strength at the mount location before finalizing.
Media player mounting: Hide the player behind the TV using VESA brackets or adhesive mounts. Crucial: Plug the player into continuous power—don’t use the TV’s USB port unless you’re certain it stays powered when the TV is off.
Step 3: Connect Everything
Plug the media player into the TV’s HDMI port.
Connect the player to power.
Connect the player to your network (WiFi or Ethernet).
Power on the TV and verify the player boots.
💻 Phase 4: Software & Calendar Integration
4.1 Choose Your Digital Signage CMS
Your Content Management System (CMS) is where you create, schedule, and publish content. For conference rooms, the most important feature is calendar integration with your existing scheduling system.
Software | Starting Price (per screen/month) | Key Feature | Calendar Support |
|---|---|---|---|
Yodeck | 8–8–10 (free for 1 screen) | Free single‑screen tier, intuitive drag‑and‑drop | Outlook, Google, Teams, Power BI |
OptiSigns | ~$10 | 40+ integrations, wide hardware support | Outlook, Google Calendar |
ScreenCloud | ~$20 | 90+ app integrations, strong corporate focus | Google Calendar, Teams, Zoom Rooms |
EasySignage | ~$10 | Very easy setup, Fire TV native app | Microsoft 365 calendar |
RoomStream (Embed Signage) | Custom | Turns idle Teams/Zoom Rooms into signage with no extra hardware | Microsoft Teams Rooms, Zoom Rooms |
For calendar‑only room signs: Solutions like YAROOMS + Dahua DeepHub integrate real‑time booking data with room panels, automatically releasing unused spaces when no one checks in.
4.2 Install the CMS on Your Media Player
For Fire TV Stick (most common approach):
Open the Amazon App Store on the Fire Stick.
Search for your signage app (e.g., “SignPresenter”, “Yodeck”, or “OptiSigns”).
Install the app and open it.
The app will display a pairing code.
On a computer, log into your CMS account, add a new screen, and enter the code.
The screen is now linked.
For PoE integrated displays (e.g., VITEC X‑View):
Connect the display to your network via Ethernet. Power is delivered over the same cable. The display appears in your central management dashboard automatically.
4.3 Connect Your Calendar (The Critical Step)
The key to eliminating “ghost meetings” is syncing each room’s signage with its calendar resource.
For Microsoft 365 / Outlook / Teams:
In your CMS dashboard, add a “Room Calendar” widget or app.
Authenticate using Microsoft Graph API (most platforms handle this without coding).
Select the specific room mailbox or resource calendar you want to display.
Configure display settings:
Room name
Current meeting title and end time
Next 1–2 upcoming meetings
Color‑coded status (green = available, red = occupied, yellow = starting soon)
Optional: “Book this room” or “Release the room” button (touchscreen only)
Set the refresh interval (typically 1–5 minutes).
For Google Workspace:
Same process—most CMS platforms natively support Google Calendar integration. Each room is treated as a “resource” in Google Calendar, which the signage software pulls via API.
4.4 Create Content Beyond Room Schedules
Once your room status screen is working, add secondary content playlists:
Announcements: Use your CMS’s template library to create slides for company news, policy updates, new hire introductions.
KPI dashboards: Embed live Power BI, Tableau, or Looker dashboards. Most signage tools refresh embedded dashboards on a schedule (every minute to every hour).
Social proof / culture content: Rotate customer testimonials, team photos, birthday announcements.
Design tip: Keep slides short—each slide should communicate one idea in 3–5 seconds of viewing. Use sans‑serif fonts, high contrast (minimum 4.5:1), and test your designs on the actual screen from the typical viewing distance.
4.5 Schedule Playlists
Set up your schedule in the CMS:
Always‑on layer: Room status calendar is the default view.
Secondary layer: Rotate announcements between meetings, or display them after hours.
Event‑based: Push urgent alerts or emergency notifications that override all other content.
✅ Phase 5: Testing & Quality Assurance
Before declaring the installation complete:
Test | What to Verify |
|---|---|
Power cycle | Unplug the display and media player for 30 seconds, then plug back in. Does everything auto‑restart correctly? |
Network failure | Disconnect WiFi/Ethernet for 2 minutes, then reconnect. Does the software recover and re‑sync calendar data? |
Calendar sync | Book a test meeting in Outlook/Google Calendar for the next 15 minutes. Does the door screen update within 1–2 minutes? |
Screen readability | Stand 10–15 ft away. Can you read room status and meeting titles without squinting? Check for glare at different times of day. |
Glance test from hallway | Walk from 30 ft away. Can you see the color‑coded status (green/red) clearly before you reach the door? |
🔧 Phase 6: Maintenance & Best Practices
Daily / Weekly Maintenance
Task | Frequency | How |
|---|---|---|
Wipe screen | Daily | Use a microfiber cloth—never spray liquid directly on the screen. |
Check all screens are online | Weekly | Log into CMS dashboard; verify heartbeat status for each screen. |
Verify calendar sync | Weekly | Spot‑check 1–2 rooms. Does the schedule match actual meetings? |
Monthly Maintenance
Task | How |
|---|---|
Update firmware | Check for media player OS updates and install during off‑hours. |
Review usage analytics | Most CMS platforms report screen uptime, playlist performance, and room utilization. Use this to optimize. |
Clean media player vents | Dust kills electronics. Use compressed air to clear vents. |
Long‑Term (Quarterly)
Refresh content: If content hasn’t changed in 90 days, employees stop noticing it.
Audit room utilization: Use calendar data to identify under‑used rooms. Consider consolidating or repurposing space.
Common Mistakes to Avoid
Mistake | Why It Hurts | Fix |
|---|---|---|
Plugging media player into TV’s USB port | TV turns off → player loses power → screen goes black. Player may not auto‑restart correctly. | Plug player into wall outlet. |
Using consumer TV for 24/7 operation | Consumer TVs aren’t rated for continuous use; overheat, backlight fails prematurely. | Buy commercial‑grade or limit runtime. |
Mounting too high | Text becomes unreadable; neck strain if users interact (touchscreen). | Mount at eye level (4–5 ft) for door signs, slightly higher for hallway viewing. |
Ignoring glare | Screen becomes unreadable for hours each day. | Test at different times before final mounting. Add anti‑glare film if needed. |
Stale content | Employees stop looking at screens because information is outdated. | Set calendar reminders to review content every 30 days. |
🧭 Phase 7: Scaling to Multiple Rooms
Once your first room is working, scaling to 10, 20, or 50 rooms is straightforward.
Step‑by‑Scale Workflow
Use screen groups / tags in your CMS. Create a tag like “Floor 2 Conference Rooms” and assign each new screen to that group.
Clone room‑specific playlists. Most CMS platforms let you duplicate a configured room calendar widget and change just the room resource name.
Bulk deploy media players. For Fire TV sticks, order them pre‑registered to your Amazon account or use a deployment service.
Leverage PoE for new rooms. For new construction or renovations, specify PoE‑powered displays (like VITEC X‑View) to eliminate separate power cabling—cleaner installation and lower labor costs.
When to Hire a Professional Integrator
If your deployment involves:
More than 20 screens across multiple floors or buildings
Video walls or custom structural mounting
Running new electrical circuits
Integration with building access or occupancy sensors
…consider hiring an AV integrator. They handle site surveys, permits, structured cabling, and commissioning. But for a typical small‑to‑medium office with 5–15 meeting rooms, the DIY approach works beautifully.
💰 Realistic Budget Estimate (2026)
Item | Low‑End (using existing TV) | Mid‑Range (new commercial display) |
|---|---|---|
Display (55″) | 0(existing)or0(existing)or300–$400 (consumer 4K TV) | 500–500–800 (commercial‑grade) |
Media player | $50 (Fire TV Stick 4K) | $50 (built‑into smart display) |
Wall mount | 15–15–40 | 15–15–40 |
Cables / surge protector | $20 | $20 |
CMS software (per screen/month) | 8–8–10 | 8–8–10 |
Electrical (if needed) | 150–150–300 per new outlet (one‑time) | 150–150–300 per new outlet (one‑time) |
Per‑room total (one‑time) | 85–85–110 (TV owned) / 385–385–440 (new consumer TV) | 685–685–1,160 (commercial display) |
Monthly per room (software) | 8–8–10 | 8–8–10 |
Total investment for 5 rooms: Under 2,500forhardware(usingconsumerTVs)plus 2,500forhardware(usingconsumerTVs)plus 50/month in software fees.
✅ Quick Start Checklist
Use this checklist to track your progress:
Phase | Task | Done |
|---|---|---|
Planning | Complete site survey for each room | ☐ |
Define use cases (status screens, announcements, KPIs, visitor) | ☐ | |
Confirm power outlet proximity within 6 ft | ☐ | |
Confirm WiFi or Ethernet at mount location | ☐ | |
Hardware | Purchase displays + mounts + media players | ☐ |
Purchase surge protectors and cable management | ☐ | |
Installation | Mount displays at correct height (eye level or above door) | ☐ |
Connect media players to HDMI and continuous power | ☐ | |
Route and hide cables | ☐ | |
Software | Sign up for CMS (free trial recommended first) | ☐ |
Install CMS app on each media player | ☐ | |
Pair each screen to your CMS account | ☐ | |
Connect calendar integration (Microsoft 365 or Google) | ☐ | |
Content | Configure room status widget for each meeting room | ☐ |
Add secondary announcements / KPI playlists | ☐ | |
Set content schedules (always‑on room status + rotating messages) | ☐ | |
Testing | Power cycle each screen → verify auto‑recovery | ☐ |
Book test meeting → verify calendar sync within 2 minutes | ☐ | |
Check visibility from 10–15 ft → adjust font sizes if needed | ☐ | |
Test at different times of day → check for glare | ☐ | |
Launch | Announce new system to employees (email + Slack) | ☐ |
Train front desk staff on basic troubleshooting (power cycle, check connections) | ☐ | |
Set calendar reminder to review content every 30 days | ☐ |
🎯 Final Advice
Conference room digital signage in 2026 is no longer a multi‑thousand‑dollar project requiring specialists. You can start with one screen outside your most‑booked meeting room, prove the value in a week, then scale to your entire floor. The elimination of “ghost meetings” (booked but unused rooms) alone often pays for the entire system within months.
If this is your first deployment, start small: one Fire TV stick, one existing TV, and a free trial from Yodeck or OptiSigns. Get the room status screen working. Then layer in announcements, then KPIs. Within an afternoon, you’ll have a live system that your team will wonder how they ever lived without.
If you share how many rooms you need to cover and which calendar system you use (Microsoft 365, Google Workspace, or something else), I can help narrow down the software recommendation even further.
FAQ
How do I update content on conference room digital signage?
You can change what shows on the screens using your software dashboard. Pick the message you want, then press a button to put it on the screen. Most systems let you plan updates or change messages from your computer.
Can I use my existing TV for digital signage?
Yes, you can use your office TV if it has an HDMI port or is a smart TV. Put signage software on the TV or connect a media player. This helps you save money and use what you already own.
What happens if the internet goes down?
If the internet stops working, your screen might show old messages or nothing at all. Some systems keep the last update saved. You should check your internet often. Use offline mode if your software lets you.
Is digital signage safe for my office?
Digital signage is safe if you use strong passwords and keep your software updated. Lock the screens and use safe mounts. Teach your team to tell you about problems. Check your system often to keep it working well.
See Also
Understanding The Basics Of Digital Signage Solutions
A Simple Guide To Setting Up Digital Signage Software
Step-By-Step Instructions For Digital Display Signage Setup
Seven Effective Strategies For Engaging Customers Using Digital Signage