Beginner’s Tutorial for Transparent OLED Displays in DIY Electronics
You can make your DIY electronics project exciting with a transparent oled display. This tutorial shows you how to use a transparent screen. You do not need special skills. Picture your oled transparent display showing images in the air. You can try fun ideas and see what happens quickly. If you have trouble, do not worry. This guide explains common problems and helps you use your transparent display easily.
Are you curious? You will soon learn a new way to use transparent tech!
Key Takeaways
Collect important parts like a small transparent OLED and a microcontroller to begin your project. - Use the Qwiic cable system for simple and tidy connections, so you do not need to solder wires. - Add the correct software libraries in the Arduino IDE to control your transparent OLED display well. - Try your display in different lights to make sure you can see it clearly and the colors look right. - Join online groups for help and new ideas as you learn about transparent OLED technology.
What You Need for a Transparent OLED Display Project
So, you want to start your own oled transparent display project? This guide will help you gather everything you need. Let’s break it down step by step.
Essential Components and Microcontrollers
You need a few main parts to get started with your transparent oled display. Here are some popular options:
Small transparent oleds (about 1-2 inches) work great for DIY.
The Transparent OLED Development Kit comes ready to use. You just plug it in with USB power.
Some large transparent oleds exist, but they cost a lot and are mostly for big signs.
When you pick a microcontroller, make sure it works with your display. Here’s a quick look at some good choices:
Microcontroller Name | Product Link |
|---|---|
SparkFun RedBoard Plus (ATmega328P) | |
SparkFun Thing Plus - Artemis | |
SparkFun Thing Plus - SAMD51 |
You can use these boards for most examples in this tutorial.
Cables, Tools, and Accessories
You will need a few extra things to put your oled transparent display together:
Qwiic cable for easy connections
Power supply (USB works for most kits)
Female header pins
Soldering iron (for some setups)
3D printed parts or custom PCBs (optional for mounting)
Screws and bolts (like M2 or M3)
XIAO M0 DEV Board (if you want to try something different)
Tip: The Qwiic system makes wiring simple. You just snap the cable in place—no messy soldering!
Software and Libraries
To control your transparent oled, you need the right software. The Arduino IDE is a good place to start. You should install these libraries:
Library Name | Description | Link |
|---|---|---|
Lets you control the Transparent Graphical OLED with HyperDisplay graphics. | ||
SparkFun WiseChip HUD | Controls the Transparent OLED Heads-Up Display from WiseChip. |
You can find these in the Arduino Library Manager. This guide will show you how to use them in your project.
Note: The price of large oled panels has dropped a lot in recent years. Smaller parts for DIY are getting cheaper, so now is a great time to try a transparent oled display!
How an OLED Transparent Display Works
Technology Basics
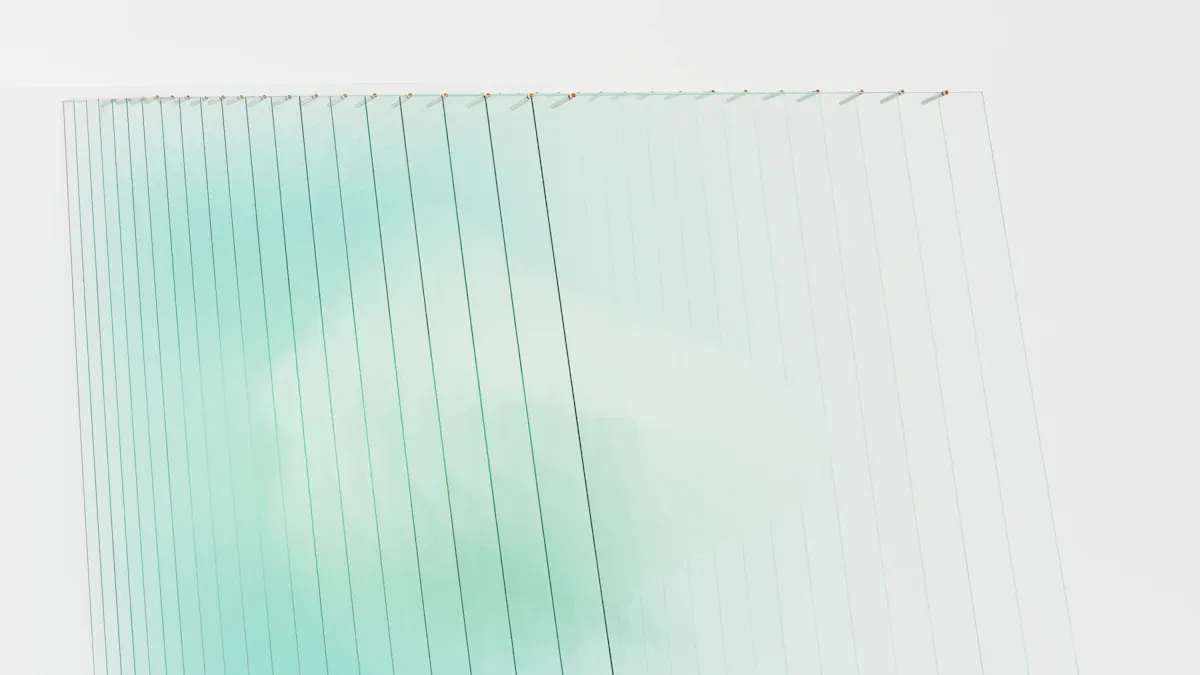
You may wonder how an oled transparent display works. The secret is in its design. Transparent oleds use a clear base. This lets light go through parts that are not lit up. You can see things behind the screen while it shows pictures or text. Each pixel shines by itself, so you do not need a dark background. This makes the screen look like it floats in the air. You get cool visuals that mix digital images with real life.
Here are some important specs for a typical transparent oled used in DIY:
Specification | Details |
|---|---|
Display Type | 1.51-inch transparent OLED (Blue) |
Resolution | 128 × 64 pixels (128 × 56 pixels transparent) |
Display Area | 35.05 × 15.32 mm (1.40 × 0.60 in) |
Screen Size | 42 × 27 mm (1.65 × 1.07 in) |
Pixel Pitch | 0.274 × 0.274 mm |
Working Voltage | 3.3V |
View Angle | Full (wide viewing angles) |
Display Color | Blue |
Driver Chip | SSD1309 |
Interfaces | SPI and GDI |
Adapter Size | 18 × 28 mm (0.71 × 1.10 in) |
Operating Temperature | -40°C to 70°C |
Unique Features for DIY Projects
You can use a transparent oled to make cool effects in your project. The clear screen lets you mix digital graphics with real objects. This works well for heads-up displays, smart mirrors, or clocks that look futuristic. You can use your electronics in new ways. The oled transparent display shows bright colors and sharp contrast. You can see both the screen and what is behind it.
Tip: For the best results, pay attention to how you place the screen. Try putting it in front of something dark to make colors pop. You can also use a polarizer film to cut down glare and reflections.
The transparency level is important. More transparency can make colors and brightness weaker. This makes it harder to see clear images, especially in bright rooms. You should test your screen in different lighting to find what works best.
Creative Use Cases
You can see transparent oled displays in smart homes and wearable gadgets. These screens make your home look modern and fun. You can use them for smart mirrors, control panels, or window displays. In AR and VR devices, transparent oleds help create cool experiences. Cars use them for dashboards and heads-up displays.
Here are some places you can use a transparent oled:
Smart homes: Panels and mirrors you can touch
AR/VR devices: Cool visuals that feel real
Automotive: Dashboards and heads-up displays
Home automation: Works with AI and IoT
Household surfaces: Looks nice and works well
You can try these ideas in your own project. This guide will help you start using your oled transparent display.
Setting Up Your Transparent Graphical OLED
Ready to bring your transparent graphical oled to life? This part of the tutorial walks you through connecting your display, uploading example code, and checking if everything works. You’ll see how easy it is to get your transparent oled display running. Let’s jump right in!
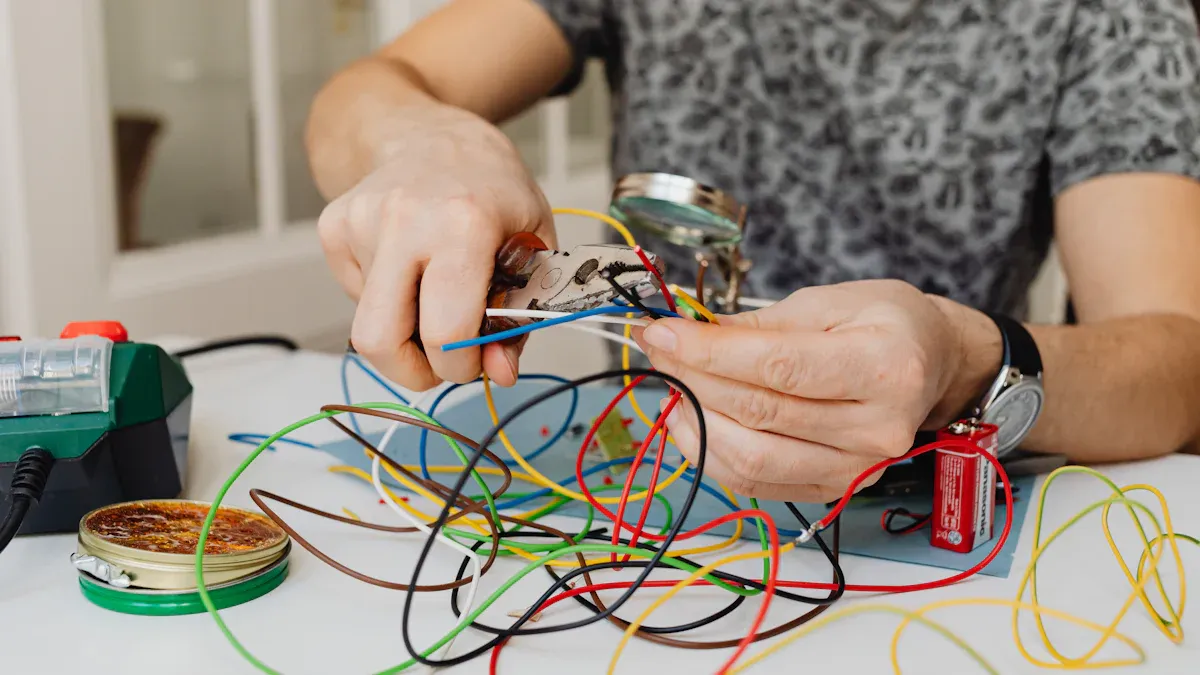
Connecting the Display
You can connect your transparent graphical oled to an Arduino or ESP32 board using a Qwiic cable. The Qwiic system makes wiring simple and neat. Follow these steps to set up your transparent oled display:
Grab your Qwiic jumper adapter cable. You’ll see four colored wires: yellow, blue, red, and black.
Connect the yellow wire to the SCL pin on your board.
Attach the blue wire to the SDA pin.
Plug the red wire into the 3.3V pin for power.
Connect the black wire to the ground pin.
If you don’t use a Qwiic shield, make sure you connect directly to the I2C pins on your Arduino or ESP32.
Double-check all connections. The transparent graphical oled needs a secure setup to work well.
Tip: If you use a breakout board, make sure the shiny pins face up. This helps your transparent graphical oled sit properly and avoids connection issues.
Here’s a quick table to help you match the wires:
Wire Color | Function | Board Pin |
|---|---|---|
Yellow | SCL | SCL |
Blue | SDA | SDA |
Red | Power | 3.3V |
Black | Ground | GND |
You’re almost ready to see your transparent graphical oled light up!
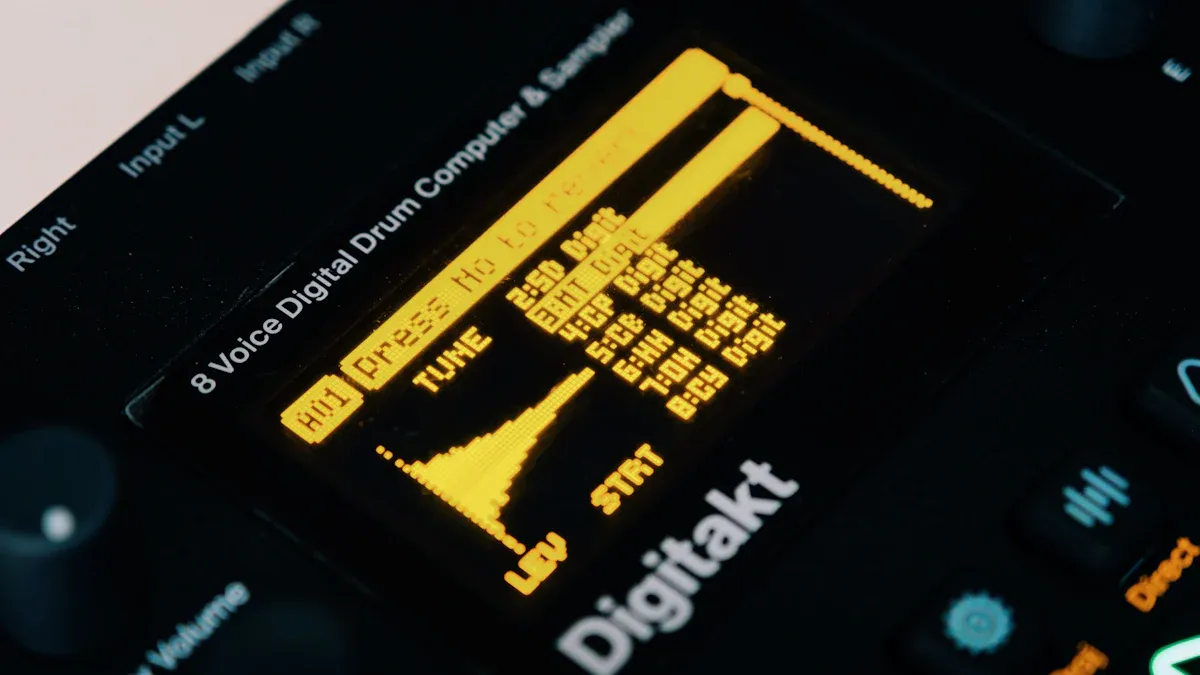
Uploading Code and Testing
Now you can upload example code to your board and test your transparent graphical oled. The guide makes this step easy. You’ll use the Arduino IDE for this part.
Open Arduino IDE on your computer.
Go to Sketch > Include Library > Manage Libraries.
In the Library Manager, type ‘SSD1306’ in the search box. Install the SSD1306 library from Adafruit.
Next, type ‘GFX’ in the search box. Install the Adafruit GFX library.
Restart your Arduino IDE after installing both libraries.
Select your board (like Arduino/Genuino Mega 2560 or ESP32) and choose the correct COM port.
Copy and paste the example code below into your IDE:
#include <SPI.h>
#include <Wire.h>
#include <Adafruit_GFX.h>
#include <Adafruit_SSD1306.h>

#define SCREEN_WIDTH 128 // OLED display width, in pixels
#define SCREEN_HEIGHT 64 // OLED display height, in pixels

Adafruit_SSD1306 display(SCREEN_WIDTH, SCREEN_HEIGHT, &Wire, OLED_RESET);

void setup() {
  Serial.begin(115200);
  if(!display.begin(SSD1306_SWITCHCAPVCC, 0x3C)) {
    Serial.println(F("SSD1306 allocation failed"));
    for(;;);
  }
  display.display();
  delay(2000);
  display.clearDisplay();
  display.drawPixel(10, 10, WHITE);
  display.display();
  delay(2000);
}

void loop() {
}
Click the upload button in Arduino IDE. Wait for the code to finish uploading.
Watch your transparent graphical oled. You should see a pixel light up on the screen.
Note: If your transparent graphical oled does not light up, check your connections and make sure you selected the right board and COM port.
Verifying Operation
You want your transparent graphical oled to look clear and bright. Here’s how you can check if your display works and adjust for the best transparency:
Check color accuracy. Use software tools and update calibration algorithms to keep colors sharp.
Try transparency optimization. Calibrate your transparent graphical oled with optical tools to make sure you see through the screen easily.
Watch the environment. Keep the temperature and humidity steady. This protects the oled and keeps your transparent graphical oled working well.
Use advanced monitoring. Sensors can track performance and alert you if something changes.
If your transparent graphical oled does not light up after uploading code, try these steps:
Make sure you set the correct interface in your code. Most transparent graphical oled displays use SPI.
Check all wires. Loose connections can stop your transparent graphical oled from working.
Look at the breakout board. The display should sit flat, with shiny pins facing up.
Tip: Place your transparent graphical oled in front of a dark background. This makes colors pop and helps you see the display better.
You can now enjoy your transparent oled display. Try different examples and see what your transparent graphical oled can do. This guide helps you get started and gives you confidence to explore more.
Troubleshooting and Tips
Common Issues with Transparent OLEDs
You might run into a few problems when you set up your transparent oled display. Don’t worry—these issues are common, and you can fix them with a little patience. Here are some things you might notice:
The display does not light up at all.
You see library errors in the Arduino IDE.
Images look blurry or hard to focus on, especially up close.
The screen flickers or shows strange lines.
You have trouble seeing clear images without distortion.
The display needs a special setup to project images the right way.
If your display will not start, try these steps:
Look at your code. Make sure you use the right display address and size.
Test your oled on another board if you have one.
Use an I2C scanner to find the display’s address.
Add a short delay in your code to stop flickering.
Clear the screen before you draw new images.
Make sure your power supply is steady.
Tip: Most problems have simple fixes. Take your time and check each step.
Best Practices for Beginners
You want your transparent oled project to last and look great. Here are some best practices you can follow:
Pick displays with IP ratings like IP65 or IP67. These keep out dust and water.
Use a conformal coating or a protective film to block humidity.
Seal joints well to stop condensation.
Keep your oled away from high humidity for long periods.
Watch the temperature. Try to keep it between 0°C and 40°C. Good airflow helps too.
Clean your display with a lint-free microfiber cloth. Stay away from alcohol-based cleaners.
Update your software often. Use efficient code to keep your display running smoothly.
You can find more tips in this tutorial and other guides. Try different examples to see what works best for you.
Where to Find Help
If you get stuck, you can find help online. Many communities and resources are ready to answer your questions. Here are some places you can check out:
Resource Type | Link |
|---|---|
Community Forum | |
Video Tutorial | |
Troubleshooting FAQ |
You can also join forums like BrickStuff Forum or the DIY section on Crystalfontz. These places have lots of people who share their projects and answer questions. If you need more help, just ask in the community. Someone will have a solution!
You finished this tutorial and now know how to set up a transparent OLED display for your DIY project. Look at the table below to see the main features you learned about:
Technology/Feature | Benefit |
|---|---|
Automatic Light Sensing | Changes brightness as light changes |
Multi-layer OLED Architecture | Makes the screen brighter and saves power |
Micro Lens Arrays | Makes pictures look clearer |
You can use transparent OLED displays for fun projects like AR, VR, or even a 3D printed mask with moving eyes. Try using your display with touch sensors or make an interactive store window. If you want more ideas, check out articles and stories about transparent OLED technology.
FAQ
How do you power a transparent OLED display?
You can use a USB power supply or connect the display to a 3.3V pin on your microcontroller. Make sure your board supports the voltage needed for your display.
Can you use a tiny transparent oled screen for wearable projects?
Yes, you can! The tiny transparent oled screen fits well in wearable devices. You get clear visuals without blocking your view. Try it for smart glasses or badges.
What should you do if the display shows nothing?
Check your wiring first. Make sure each wire connects to the right pin. Restart your board. If you still see nothing, upload the code again and check the display address.
Is it possible to draw custom graphics on the screen?
You can draw custom graphics using the Arduino IDE and the right libraries. Try shapes, text, or even simple animations. Experiment with different code examples to see what works.
Where can you find more project ideas?
You can visit maker forums or watch video tutorials. Many people share their transparent OLED projects online. Look for inspiration and ask questions if you need help.
See Also
Enhance Your Project With These OLED Display Tips
Exploring The World Of Transparent OLED Technology
Evaluating Top Transparent OLED Displays Set For 2025